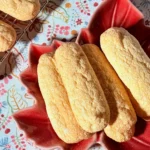
Homemade Ladyfingers (Savoiardi) for Tiramisu
Ladyfingers made with just eggs, sugar and flour. All the air comes from whipping the whites and yolks separately, with no baking powder. Dried in the oven, they come out crisp and ready for tiramisu.
20 ladyfingers
Equipment
- Large stainless steel or glass bowl 2 to 3 liters (2 to 3 quarts), for the whites. Never plastic
- Small bowl For the yolks
- Electric mixer Balloon whisk beaters work best
- Wide silicone spatula For folding
- Fine-mesh sieve For the flour and the powdered sugar
- Piping bag with a plain round tip 1.2 to 1.5 cm (½ in). Or a zip-top bag
- Baking sheet
- Parchment paper or a silicone baking mat Not greased
- Wire rack For cooling
Ingredients
- 3 eggs US large or EU medium; 150-160 g without shells, at room temperature
- 60 g granulated sugar ¼ cup + 1 tbsp; for the egg whites
- 30 g granulated sugar 2½ tbsp; for the yolks
- 90 g cake flour ¾ cup; or all-purpose (plain) flour, weighing is best
- 0.5 g fine salt a pinch; optional
- 3 g vanilla extract ½ tsp; optional
- 5 g powdered sugar 2 tsp; optional, one light layer on top
Instructions
Before you start
- Preheat the oven. To 150 °C (300 °F), conventional setting with top and bottom heat, fan off. That way it has time to settle while you make the batter.
- Prepare the tray and the piping bag. Line the baking sheet with parchment paper or a silicone baking mat, without greasing it. Fit the tip into the bag and stand it in a tall glass with the top folded down over the rim.
- Clean the bowl for the whites. The bowl and the beaters must be perfectly clean and dry. If in doubt, wipe them with a paper towel and a few drops of lemon juice or vinegar, then dry them.
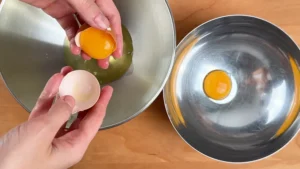
- Separate the eggs. The whites (about 95 g) into the large bowl and the yolks (55-60 g) into the small one. Separate each egg over a small bowl first: a single drop of yolk is enough to stop the whites from whipping properly.
- Weigh the flour. The 90 g, in a bowl, with the fine sieve next to it: you’ll sift it straight over the batter when it’s time to add it.
The meringue
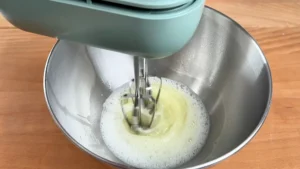
- Beat the whites. With the pinch of salt, if using, on medium speed, for 1 or 2 minutes, until they're white and foamy, like soap suds.
- Add the sugar in batches. The 60 g, in 4 or 5 additions, without stopping the mixer.
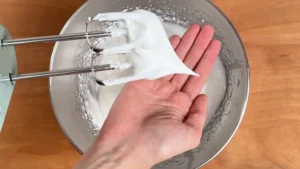
- Beat to stiff peaks. On medium-high, for 3 to 5 minutes, until the meringue is smooth and glossy and doesn't move when you tilt the bowl. Optional: beat the last 30 seconds on medium-low to make the bubbles finer.
The yolks
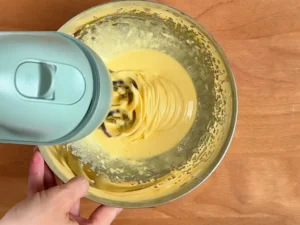
- Beat the yolks with the sugar. With the same beaters, unwashed, add the 30 g of sugar and the vanilla, if using, and start beating right away. For 3 to 4 minutes, until they're pale, have doubled in volume and fall in a ribbon that sits on the surface.
The batter
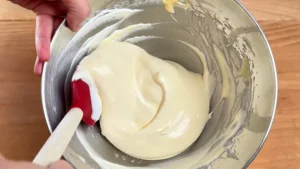
- Combine the yolks and the meringue. Pour half the yolks over the meringue and fold with the spatula, from the bottom up. When it's almost blended, add the other half. A few streaks are better than overmixing.
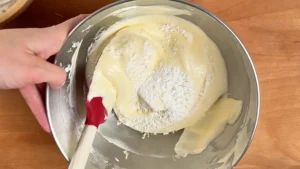
- Fold in the flour in batches. Sift a little over the top, cover it with 1 or 2 folding strokes and repeat until it's all in. Don't mix more than you need to: stop as soon as you can't see dry flour, checking the bottom of the bowl. The batter should be thick and fall from the spatula in clumps.
Pipe and bake
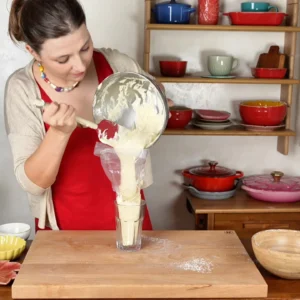
- Fill the piping bag. Gently, without pressing the batter. If you're using a zip-top bag, cut about 2 cm (¾ in) off one corner now.
- Pipe the strips. With the bag at 45° and 1 cm (⅜ in) above the paper, strips 2 x 10 cm (¾ x 4 in), 2 to 3 cm (1 in) apart. Don't linger: the batter is losing air.
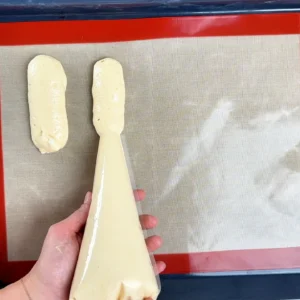
- Dust with powdered sugar. Optional. A single light layer, sifted from 20 to 30 cm (8 to 12 in) high, and straight into the oven: with no baking powder, the only air is in the egg whites, and it escapes while the batter sits.
- Bake for 15 minutes. Tray on the middle rack or one lower, and don't open the oven for the first 10 minutes. They're done when they're pale golden and the surface is dry and firm.
- Dry them for 15 more minutes. At the same temperature, with a sheet of aluminum foil on the top rack or with bottom heat only, so they don't brown too much.
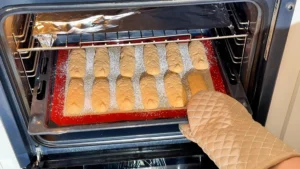
- Peel them off. With a silicone mat: slide it off the hot tray onto the counter and leave it for 5 minutes. Then lift one end of the mat and slowly bend it downward: the ladyfingers release on their own. With parchment paper: let them cool on the tray for 15 to 20 minutes. Then bring the paper to the edge of the table and, instead of lifting the ladyfingers, pull the paper downward so it's the paper that comes away from them.
- Move them to a wire rack. Leave them until they're completely cool. Air circulates underneath, so the steam they still release doesn't soften the bottoms.
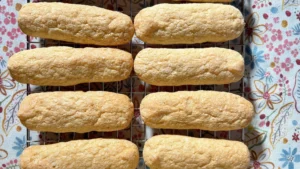
- Store them airtight. In an airtight container or a zip-top bag, at room temperature.
Video
Notes
- Our recipe uses 3 ingredients. For a texture closer to store-bought ladyfingers, swap 15 g of the flour for 15 g of cornstarch: 75 g of flour and 15 g of cornstarch, mixed together before sifting.
- Are your eggs bigger? Adjust the flour and sugar with the egg size table.
- Use a stainless steel or glass bowl for the whites. Plastic holds on to fat and the whites won't whip as well.
- If your home is humid, drying them in the oven is a must. Left out in the air, they soften instead of drying.
- With 10 cm (4 in) strips you get about 20. If you make them bigger, you get fewer: we made 12.
- They keep for a couple of weeks in an airtight container and can be frozen for up to 3 months.
- No vanilla extract? Here's our homemade vanilla extract with 2 ingredients.