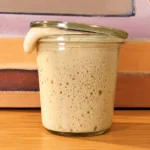
Sourdough Starter Recipe From Scratch
A homemade sourdough starter with just wheat flour and water, in one minute a day. With the daily routine, the signs that tell you it's ready and how long it takes depending on your kitchen's temperature: usually 7 to 14 days.
1 jar (about 200 g / 7 oz)
Ingredients
Day 1
- 50 g wheat flour (⅓ cup + 1 tbsp), all-purpose or bread flour, unbleached if possible
- 50 g water (3 tbsp + 1 tsp), at room temperature
Every day, from day 2
- 50 g wheat flour ⅓ cup + 1 tbsp
- 50 g water 3 tbsp + 1 tsp, at room temperature
Instructions
Day 1: the first mix
- Choose your jar. A wide-mouth glass jar of about 500 ml is ideal, but any glass jar or drinking glass you have at home will do.
- Mix the flour and water. 50 g of each, with the water at room temperature. It doesn't have to be exact: 5 g more or less makes no difference. Stir until there's no dry flour left.
- Mark the level. With a rubber band or a sticker around the jar, right at the level of the mixture. It lets you see at a glance how much it rises.
- Cover it loosely. The starter releases gas, and the gas needs a way out: a lid resting on top, a cloth with a rubber band, or a mason jar with the lid screwed on loosely. Never airtight.
- Leave it on the counter until tomorrow. In the warmest corner of the kitchen. We keep ours next to the fridge, which gives off a little heat from the motor.
From day 2 on: the daily feeding
- Stir what's in the jar. If you see a little liquid on top, you can pour some off or stir it in: both work.
- Remove about half. With a spoon, by eye: while you're creating it, you don't need to be precise. In these first days, what you remove goes in the trash.
- Add 50 g of flour and 50 g of water. With the jar on the scale and the scale zeroed. Stir until there are no dry lumps.
- Clean the sides and move the rubber band. Scrape down the bits stuck to the glass with the spoon and set the band at the new level.
- Cover it and leave it on the counter until tomorrow. Repeat every day. If you forget a day or two, it's fine: just pick up the next day as usual.
When it's ready
- Pay attention to the smell. For the first few days it will smell really bad, and that's normal. When it smells more pleasant, like apples, yogurt or something fermented, you're on the right track.
- Watch how long it takes to double. When it doubles in about the same time after feeding (for example, about 4 hours) at least 3 days in a row, it's ready to bake with.
- If you're not baking yet, into the fridge. It no longer needs daily feeding: once a week is enough. Below, we explain how to store it and how to get it ready for baking.
Video
Notes
- While you're creating it, removing about half by eye works perfectly. The grams matter when you feed it to bake.
- Between day 3 and day 6, it's normal for nothing to seem to happen. It isn't dead: keep up the routine.
- It takes about 7 days in a warm summer kitchen, and two weeks or more in winter. The table of times by temperature is below.
- Any wheat flour works, all-purpose or bread flour. Whole wheat or whole rye start faster but are less predictable: if you start with them, switch to white flour after 3 or 4 days.
- Tap water is fine if it doesn't smell of chlorine. If it does, or your starter is sluggish, use filtered or bottled water. Always at room temperature.
- In total you'll use about 350 g (2¾ cups) of flour if it takes one week, and about 700 g (5½ cups) if it takes two. A 5 lb bag is more than enough.
- If you see pink, orange or green spots, or fuzz, it's mold: throw it all out and start again.