Sourdough Starter for Beginners: Day by Day Until Your First Loaf
Want to learn how to make sourdough starter at home? It seems intimidating until you’ve done it once. Then you realize it’s one of the simplest things in the kitchen: flour, water and one minute a day.
A sourdough starter is fermented flour and water. The wild yeasts and bacteria that live naturally in flour wake up, feed on its sugars and grow into a living culture that can raise bread without commercial yeast. It takes one to two weeks to be ready, depending on how warm your kitchen is. And once you have it, it lasts as long as you keep feeding it.
Here’s how we make ours from scratch: what to do on day one and the days after, what you’ll see in the jar (including the days when it looks dead, which it isn’t), how to tell when it’s ready and how to keep it going so you can bake with it.
How We Make It at Home, Step by Step
Sourdough Starter Recipe From Scratch
Ingredients
Day 1
- 50 g wheat flour (⅓ cup + 1 tbsp), all-purpose or bread flour, unbleached if possible
- 50 g water (3 tbsp + 1 tsp), at room temperature
Every day, from day 2
- 50 g wheat flour ⅓ cup + 1 tbsp
- 50 g water 3 tbsp + 1 tsp, at room temperature
Instructions
Day 1: the first mix
- Choose your jar. A wide-mouth glass jar of about 500 ml is ideal, but any glass jar or drinking glass you have at home will do.
- Mix the flour and water. 50 g of each, with the water at room temperature. It doesn't have to be exact: 5 g more or less makes no difference. Stir until there's no dry flour left.
- Mark the level. With a rubber band or a sticker around the jar, right at the level of the mixture. It lets you see at a glance how much it rises.
- Cover it loosely. The starter releases gas, and the gas needs a way out: a lid resting on top, a cloth with a rubber band, or a mason jar with the lid screwed on loosely. Never airtight.
- Leave it on the counter until tomorrow. In the warmest corner of the kitchen. We keep ours next to the fridge, which gives off a little heat from the motor.
From day 2 on: the daily feeding
- Stir what's in the jar. If you see a little liquid on top, you can pour some off or stir it in: both work.
- Remove about half. With a spoon, by eye: while you're creating it, you don't need to be precise. In these first days, what you remove goes in the trash.
- Add 50 g of flour and 50 g of water. With the jar on the scale and the scale zeroed. Stir until there are no dry lumps.
- Clean the sides and move the rubber band. Scrape down the bits stuck to the glass with the spoon and set the band at the new level.
- Cover it and leave it on the counter until tomorrow. Repeat every day. If you forget a day or two, it's fine: just pick up the next day as usual.
When it's ready
- Pay attention to the smell. For the first few days it will smell really bad, and that's normal. When it smells more pleasant, like apples, yogurt or something fermented, you're on the right track.
- Watch how long it takes to double. When it doubles in about the same time after feeding (for example, about 4 hours) at least 3 days in a row, it's ready to bake with.
- If you're not baking yet, into the fridge. It no longer needs daily feeding: once a week is enough. Below, we explain how to store it and how to get it ready for baking.
Notes
- While you’re creating it, removing about half by eye works perfectly. The grams matter when you feed it to bake.
- Between day 3 and day 6, it’s normal for nothing to seem to happen. It isn’t dead: keep up the routine.
- It takes about 7 days in a warm summer kitchen, and two weeks or more in winter. The table of times by temperature is below.
- Any wheat flour works, all-purpose or bread flour. Whole wheat or whole rye start faster but are less predictable: if you start with them, switch to white flour after 3 or 4 days.
- Tap water is fine if it doesn’t smell of chlorine. If it does, or your starter is sluggish, use filtered or bottled water. Always at room temperature.
- In total you’ll use about 350 g (2¾ cups) of flour if it takes one week, and about 700 g (5½ cups) if it takes two. A 5 lb bag is more than enough.
- If you see pink, orange or green spots, or fuzz, it’s mold: throw it all out and start again.
Any questions about the recipe? Ask us in the comments and we’ll get back to you. And if you make it, tell us how it turned out, we love hearing from you! 🤗
What You’ll See in the Jar, Day by Day
Timing changes a lot with temperature, so take the days as a guide. What doesn’t change is the order in which things happen.
| When | What you’ll see | What you do |
|---|---|---|
| Day 1 | A thick paste, no bubbles | Cover loosely and wait until tomorrow |
| Days 2 and 3 | Some bubbles, a small rise and a strong smell | The daily feeding |
| From day 3 or 4 | Nothing seems to happen: no bubbles, no rise, and it smells bad | The same as always. This is exactly when most people throw it out, and you shouldn’t |
| The following days | Activity comes back and the smell turns more pleasant | Start watching how long it takes to double |
| Between day 7 and 14 | It doubles in about the same time, at least 3 days in a row | It’s ready |
Why It Rises at First, Then Stops
That first burst of activity isn’t your starter yet. At the beginning there’s a bit of everything in the jar, and the first to multiply are microbes we don’t want: they cause those first bubbles and that strong smell. As the mixture becomes more acidic, they stop thriving and die off, while the yeasts and lactic acid bacteria we do want are still settling in. That’s why there are a few days when the jar seems asleep.
It’s fine whether there’s activity or not. Keep up the routine every day, and in one or two weeks you’ll have it.
How to Know Your Sourdough Starter Is Ready
This is the part that raises the most questions, so let’s take it slowly. There are two signs, and you need both.
It doubles in the same amount of time, at least 3 days in a row. This is the most reliable sign. One good rise isn’t enough: it has to rise consistently. For example, you feed it and 4 hours later it has doubled. The next day you feed it and it doubles again in about the same time. And on the third day, the same. Then it’s ready. The rubber band you put on the jar on day one makes this easy, because you can see at a glance whether it has reached double.
The smell has changed. For the first few days it will smell really bad. It isn’t spoiled, dead or rotten: the good bacteria simply haven’t won the battle yet. The day you open it and it smells more pleasant, a little like apples, yogurt or something fermented you could imagine eating, you’re on the right track. From then on, start checking whether it doubles in the same time.
Once it passes the test, it’s ready for your first loaf: start with our easy sourdough bread, or go for something softer with our sourdough milk bread 🍞
Mature vs. Active: Ready for Good, or at Its Peak Today
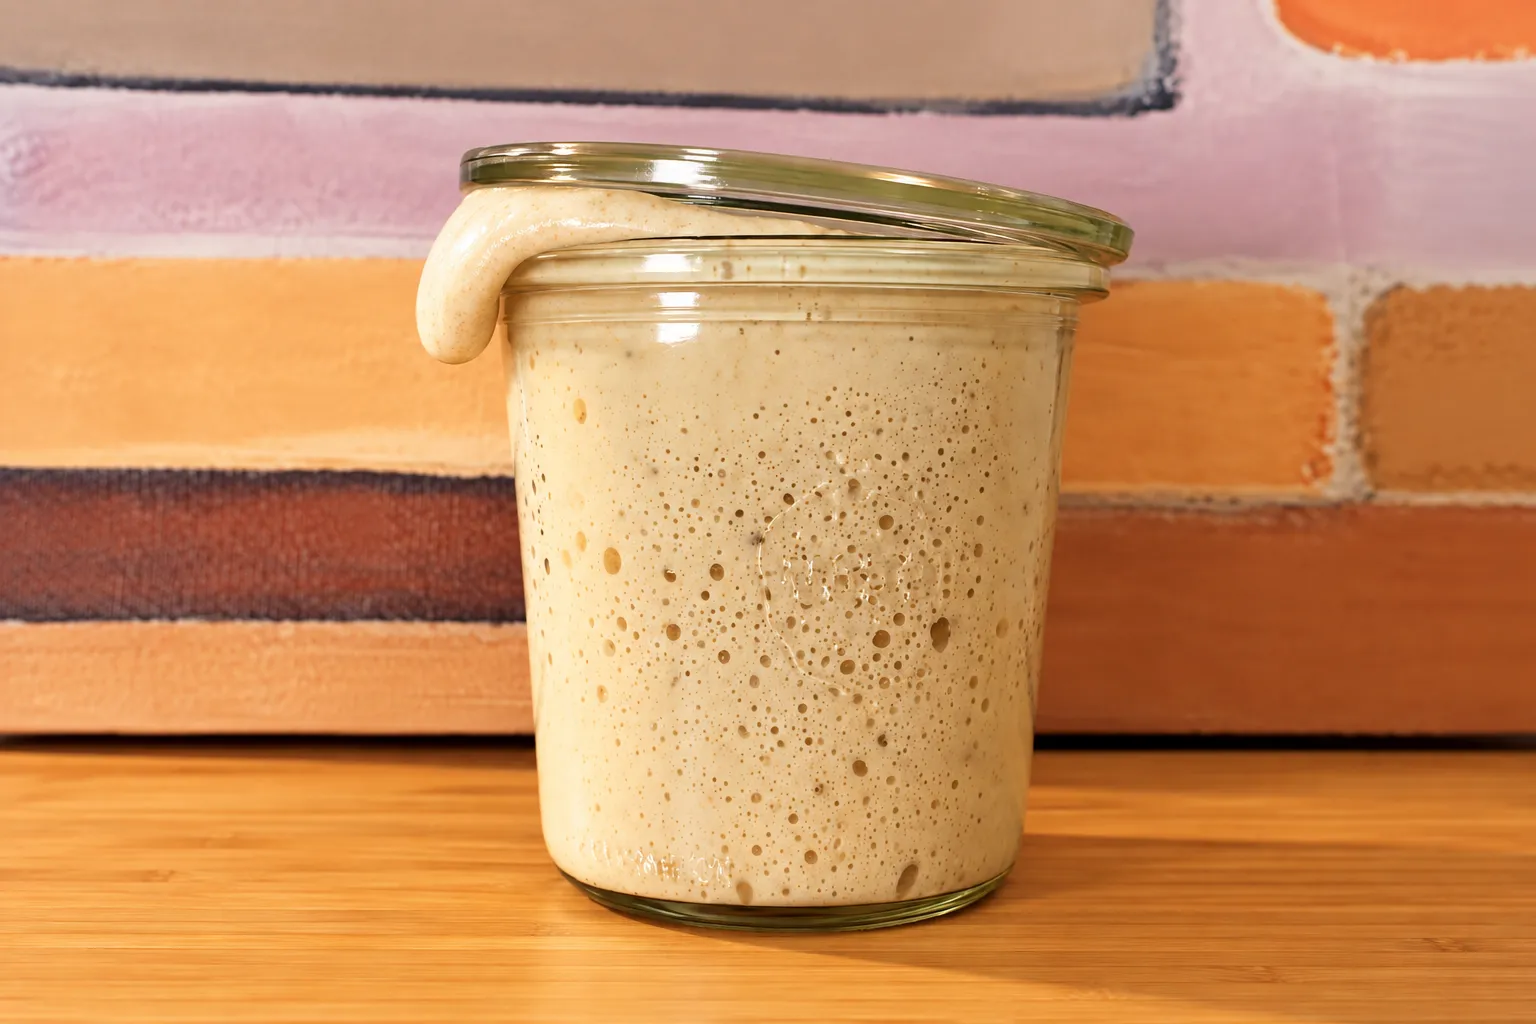
Once your starter shows both signs, it’s mature, and it will stay that way as long as you feed it. But that doesn’t mean you can bake with it at any moment. Every time you use it, it has to be active: fed a few hours earlier, with a domed top, bubbles on the surface and along the sides of the jar, and a mild, yogurt-like tang.
After its peak, a starter slowly sinks. If the center has dipped slightly, it’s past its highest point but still has strength. If it has collapsed completely and smells very sour, it has gone too far and needs another feeding before you use it.
How Long It Takes, Depending on Temperature
It’s a rough guide, because every kitchen is different, but it tells you what to expect:
| Your kitchen’s temperature | Approximate time |
|---|---|
| Cool, in winter: 17 to 19 °C (63 to 66 °F) | 14 to 21 days, and longer below 17 °C (63 °F) |
| Mild: 20 to 23 °C (68 to 73 °F) | 10 to 14 days |
| Warm, in summer: 24 to 27 °C (75 to 81 °F) | 7 to 10 days |
As a quick rule: at about 20 °C (68 °F) it can take you two weeks, and at about 26 °C (79 °F), one. Seven days is the optimistic end, typical in a warm summer kitchen. If it’s winter and it takes you two weeks, that’s completely normal.
If your home is cool, find the warmest spot. We keep ours on the counter next to the fridge: the motor gives off a little heat, and that corner is always slightly warmer than the rest of the kitchen.
Whether it takes longer or shorter, if you keep up the routine every day, you’ll get there.
What Sourdough Discard Is, and Why You Remove Half
If you only added flour and water without removing anything, the starter would keep growing, and each feeding would give it less and less food compared with everything already in the jar. Removing about half keeps it a manageable size and makes each feeding actually feed it.
You don’t need to weigh it. While you’re creating your starter, a spoon and a rough guess work perfectly.
What you remove is called sourdough discard. During the first days, while the starter isn’t ready yet, you simply throw it away. Once it’s mature, you don’t have to waste it: discard is great in pancakes, crackers and other recipes where baking powder or yeast does the lifting.
Which Flour and Water to Use
Almost any flour works. The one thing to check is that the ingredient list says wheat flour. If it’s enriched or has malted barley flour added, as most US flours do, that’s fine.
- All-purpose or bread flour: both work very well, and they’re the simplest choice.
- Whole wheat or whole rye flour: they give it an early boost, and activity starts sooner.
- Spelt: it’s also a wheat, so it works the same way.
In the US, pick unbleached flour if you can. It’s the standard advice for starters, and it’s what we use at home in Spain, where flour isn’t bleached.
The downside of whole grain flour is that it’s less predictable: the starter behaves differently from day to day, which can throw off the “doubles in the same time” rule that works so well with white flour. If you’re impatient, use whole wheat for the first 3 or 4 days and then switch to white.
To feed it once it’s mature, all-purpose and bread flour are equally good: it needs food, not gluten strength. Use the same one every time, so it behaves the same way.
About the water: tap water is fine if it doesn’t smell or taste of chlorine. If it does, use filtered or bottled water. Keep in mind that many US cities treat their water with chloramine, which, unlike chlorine, doesn’t go away if you leave the water out overnight, so if your starter is sluggish, filtered water is the easiest fix. Always use it at room temperature, never cold.
Which Jar to Use and Where to Keep It
Almost any glass container you already have will do: a jar, a pitcher or even a drinking glass, with something to cover it.
Never airtight. A starter releases gas as it ferments, and that gas needs a way out. A glass lid resting on top, a cloth held with a rubber band, or a mason jar with the lid screwed on loosely.
About the size: the ideal is a wide-mouth jar of about 500 ml (16 oz). The math is simple: with the routine of removing half and adding 50 g of flour and 50 g of water, after a few days the jar settles at about 200 g (7 oz) of starter, and when it doubles it fills about 400 ml. A 500 ml jar gives it room to rise without overflowing. If you only have one of about 300 ml (10 oz), that works too: use smaller amounts, always keeping the same weight of flour and water.
Keep it clean: when you stir it each day, scrape down the bits stuck to the sides with a spoon or a knife. It’s not essential, but dry flour builds up over the days and can harm your starter. Every so often, move it to a clean jar.
Where: on the counter, in the warmest corner of your kitchen.
How to Feed Your Sourdough Starter
While you’re creating it, and whenever it lives on the counter, you feed it once a day: remove about half, add equal weights of flour and water, stir and cover. Once it’s ready and you’re going to bake, eyeballing is over. Now the grams matter, because the ratio decides when it will peak.
Feeding Ratios, Explained
A feeding is written as three numbers: starter : flour : water. A 1:1:1 is equal parts of all three. A 1:5:5 is one part starter to five parts flour and five parts water.
The rule is simple: the more food you give it in proportion, the longer it takes to peak. The same yeasts and bacteria have more flour to get through, and that takes more hours. As a bonus, the flavor comes out milder and less sour.
So you can match the feeding to your schedule:
| Ratio | Example | When it suits you |
|---|---|---|
| 1:1:1 | 50 g + 50 g + 50 g (1.8 oz each) | To have it ready in a few hours |
| 1:2.5:2.5 | 40 g + 100 g + 100 g (1.4 + 3.5 + 3.5 oz) | To bake the same day |
| 1:5.5:5.5 | 20 g + 110 g + 110 g (0.7 + 3.9 + 3.9 oz) | To feed it at night and find it at its peak in the morning |
With the middle one, which is the one we use for our bread, these are the times:
- Warm kitchen, 24 to 26 °C (75 to 79 °F): 4 to 5 hours
- Mild kitchen, 20 to 22 °C (68 to 72 °F): 6 to 8 hours
- Cool kitchen, below 19 °C (66 °F): 10 to 12 hours
If you need more starter at once, scale up the flour and water while keeping the ratio that fits your schedule.
Example: Getting 180 g Ready for a Loaf
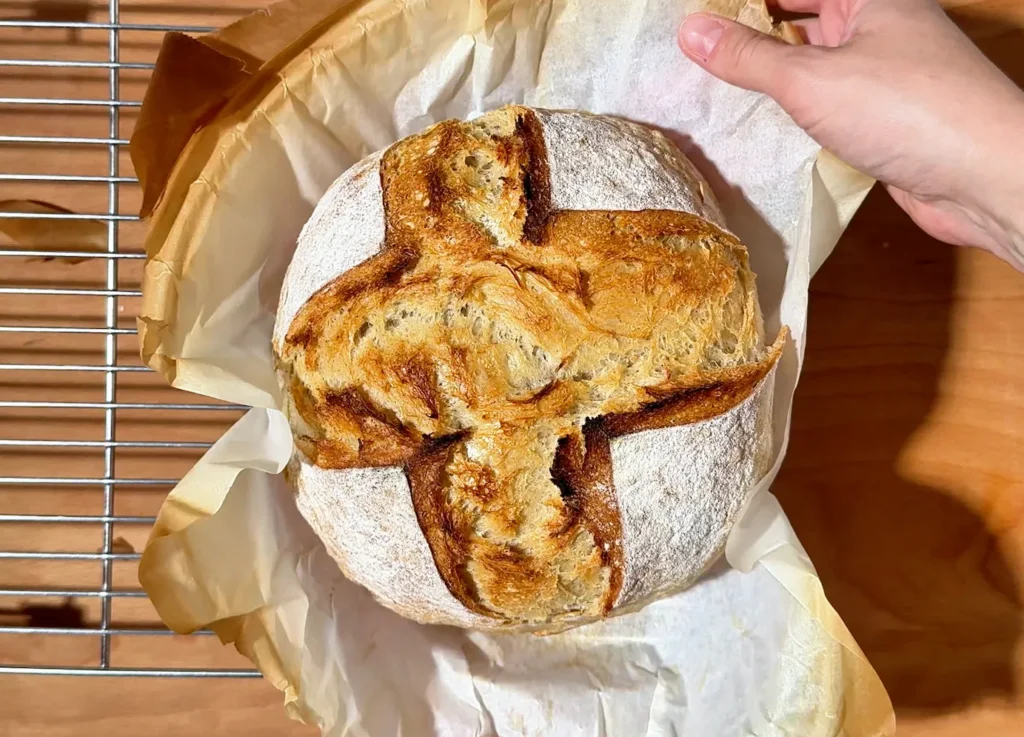
Our basic sourdough loaf uses 180 g of active starter. The night before, or the morning of the day you bake:
- Take your starter out of the fridge.
- In a clean jar, mix 40 g of starter, 100 g of flour and 100 g of room temperature water (1.4 + 3.5 + 3.5 oz).
- Leave it at room temperature until it peaks.
- You’ll have 240 g (8.5 oz): use 180 g (6.3 oz) for the bread and put the remaining 60 g (2.1 oz) back in the fridge. That’s your starter for next time.
This way you never use up all your starter at once: there’s always some left to keep going.
How to Store Sourdough Starter in the Fridge
Once it’s ready, there’s no need to keep feeding it every day unless you bake every day. Keep it in the fridge in a jar that’s covered but not airtight, and feed it once a week.
That way, if you bake once a week, say on the weekend, you only need to think about it that day. The rest of the week, it rests quietly in the fridge.
How to Feed Your Starter From the Fridge
Weekly maintenance: take it out, remove half and add equal weights of flour and water, with the water at room temperature, never cold. For example, if you have 100 g, remove 50 g and add 50 g of flour and 50 g of water. Then straight back into the fridge, without waiting for it to rise.
To bake: use the feeding from the section above, a few hours before you need it.
If it hasn’t been touched in weeks: one feeding isn’t enough. Give it two or three in a row, 12 to 24 hours apart, until it rises reliably again.
Troubleshooting Your Sourdough Starter
Almost everything that looks alarming in a starter can be fixed. There’s only one case where you need to throw it out, and it’s the last one on this list.
Is My Sourdough Starter Dead?
Almost certainly not. It’s the most common question, and it nearly always has one of three explanations:
- You’re between day 3 and day 6. It’s the stage when it seems asleep. That’s normal: keep up the routine.
- It’s cold. Below 20 °C (68 °F) everything slows down a lot, but nothing goes wrong. Move it to a warmer spot and give it time.
- It’s hungry. If you haven’t fed it for days, or it has been in the fridge for weeks, give it two or three feedings in a row.
If you forget to feed it for a day, or two, that’s fine too: you don’t have to throw it out. Just pick up the next day as usual.
A starter is only lost when it grows mold. That’s covered below.
It Smells Bad, or Like Acetone
It depends on when:
- In the first days it’s normal for it to smell really bad, and many people describe it as acetone or nail polish remover. It’s part of the process: the good bacteria haven’t taken over yet. Keep up the routine until the smell changes to apples or yogurt.
- Once it’s mature, an acetone smell means it’s hungry: it has eaten through its flour and gone well past its peak. Give it one or two feedings before you use it.
A mature starter smells tangy, like yogurt or something fermented.
There’s Liquid on Top (Hooch)
If you skip a feeding, you may find a layer of grayish or dark liquid on the surface. Bakers call it hooch: water plus the alcohol yeasts produce when they run out of food. It’s a sign of hunger, nothing more. You can do either of two things, and both work: pour some of the liquid off, or stir it all back in and do your usual feeding.
My Sourdough Starter Isn’t Rising, or Rises and Falls
- If it hasn’t risen at all after two weeks: check the temperature (the number one cause), the water (if it smells of chlorine, or your city uses chloramine, switch to filtered or bottled) and the flour (the ingredient list should say wheat flour).
- If it rises and then falls: that’s normal. After its peak, a starter slowly deflates. If you see it sunken with streaks on the sides of the jar above the current level, it has already risen and fallen: next time, check on it earlier.
- If it rises one day and not the next: it isn’t stable yet. Keep feeding it daily until it doubles in the same time at least 3 days in a row. If you’re using whole wheat, switch to white flour, which is much more predictable.
Colored Spots or Fuzz: This One Goes in the Trash
If you see pink, orange, green or black spots, or fuzz on the surface, it’s mold. There’s no fixing it: throw the whole thing out, without trying to save the bottom, wash the jar well with hot water and start again. It’s rare if you feed it daily and keep the sides clean, but it’s the only case where a starter has to go.
Sourdough Starter FAQ
Is a sourdough starter the same as levain or mother dough?
Yes, they’re different names for the same thing: a culture of flour and water, with wild yeasts and bacteria, that makes bread rise. You’ll also see it called wild yeast, mother dough or levain, the French name. What’s not the same is commercial yeast, fresh or dry: that’s a single selected yeast, with no bacteria.
Is sourdough starter alive?
Yes. It’s a living culture of wild yeasts and lactic acid bacteria that feed on the flour you give it. That’s why it needs regular feedings, why it slows down in the cold, and why it can recover after weeks of neglect.
How often should I feed my sourdough starter?
It depends on where you keep it. While you’re creating it, and whenever it lives on the counter, once a day. Once it’s ready and stored in the fridge, once a week is enough, plus a feeding a few hours before you bake. If you miss one, it’s fine: pick up again when you can.
How long does it take to make a sourdough starter?
Usually 7 to 14 days, depending on how warm your kitchen is. In a warm summer kitchen, about a week; at around 20 °C (68 °F), closer to two weeks, and longer in a cold winter. We have a table of times by temperature above.
Can I make a quick sourdough starter, or one with yeast?
A true sourdough starter can’t be made in a day or two: its yeasts and bacteria need one to two weeks to settle in. Quick starters made with commercial yeast are a different thing, a pre-ferment. It can add some flavor to a yeasted bread, but it doesn’t behave or taste like sourdough. If you’re in a hurry, you can speed yours up a little: whole wheat flour for the first days and the warmest spot in the house.
Do I need to add fruit, raisins, yogurt or juice?
No. You can make a starter with fruit, but it’s more complicated and not necessary. Flour and water is the easiest way, and it works: everything it needs is already in the flour.
Do you have to discard sourdough starter?
While you’re creating it, yes: removing about half each day keeps the jar a manageable size and makes each feeding actually feed it. In those first days, throw the discard away, because it isn’t a stable starter yet. Once it’s mature, use the discard in pancakes, crackers or other recipes where baking powder or yeast does the lifting. And if you don’t feel like using it one day, throwing it out is fine too.
Can I use all-purpose flour for my sourdough starter?
Yes. All-purpose and bread flour both work very well, and they’re the simplest choice. In the US, unbleached is the usual recommendation. See which flour and water to use for whole wheat, rye and spelt.
Can I use only whole wheat flour, without switching to white?
Yes, you can keep it on whole wheat the whole time. The downside is that whole wheat is less predictable: the starter can take different times to double, and it’s harder to tell when it’s ready. That’s why the easiest route is usually to start with whole wheat for a boost and switch to white afterwards.
Can I use tap water?
Yes, if it doesn’t smell or taste of chlorine, and there’s no need to boil it. If you can taste the chlorine, or your city uses chloramine, which doesn’t go away if the water sits out, use filtered or bottled water. Either way, at room temperature, never cold.
My house is below 20 °C (68 °F) in winter and I barely see any activity. Have I failed?
No. In winter a starter moves much more slowly, and below 20 °C (68 °F) it can need two weeks or more. Cold slows it down but doesn’t ruin it. Put it in the warmest spot in the house, for example next to the fridge or inside a cabinet, use lukewarm water for the feedings and give it time.
How long can it stay in the fridge without feeding? What if I go on vacation?
Ideally, feed it once a week, but it holds up much longer. If you come back from vacation and it hasn’t been touched in weeks, don’t throw it out: give it two or three feedings in a row, 12 to 24 hours apart, until it rises reliably again.
How much starter do I need to make bread?
It depends on the recipe. Our basic loaf uses 180 g of active starter for 500 g of flour. Less also works, but fermentation is slower. What matters most is that it’s at its peak when you use it.
Made This Recipe or Have a Question?
Any questions before you start? Ask us down below and we’ll get back to you. And if you’ve already made it, tell us how it turned out or leave us a rating: it really helps more people find the recipe 😊
Rate this recipe ⭐️