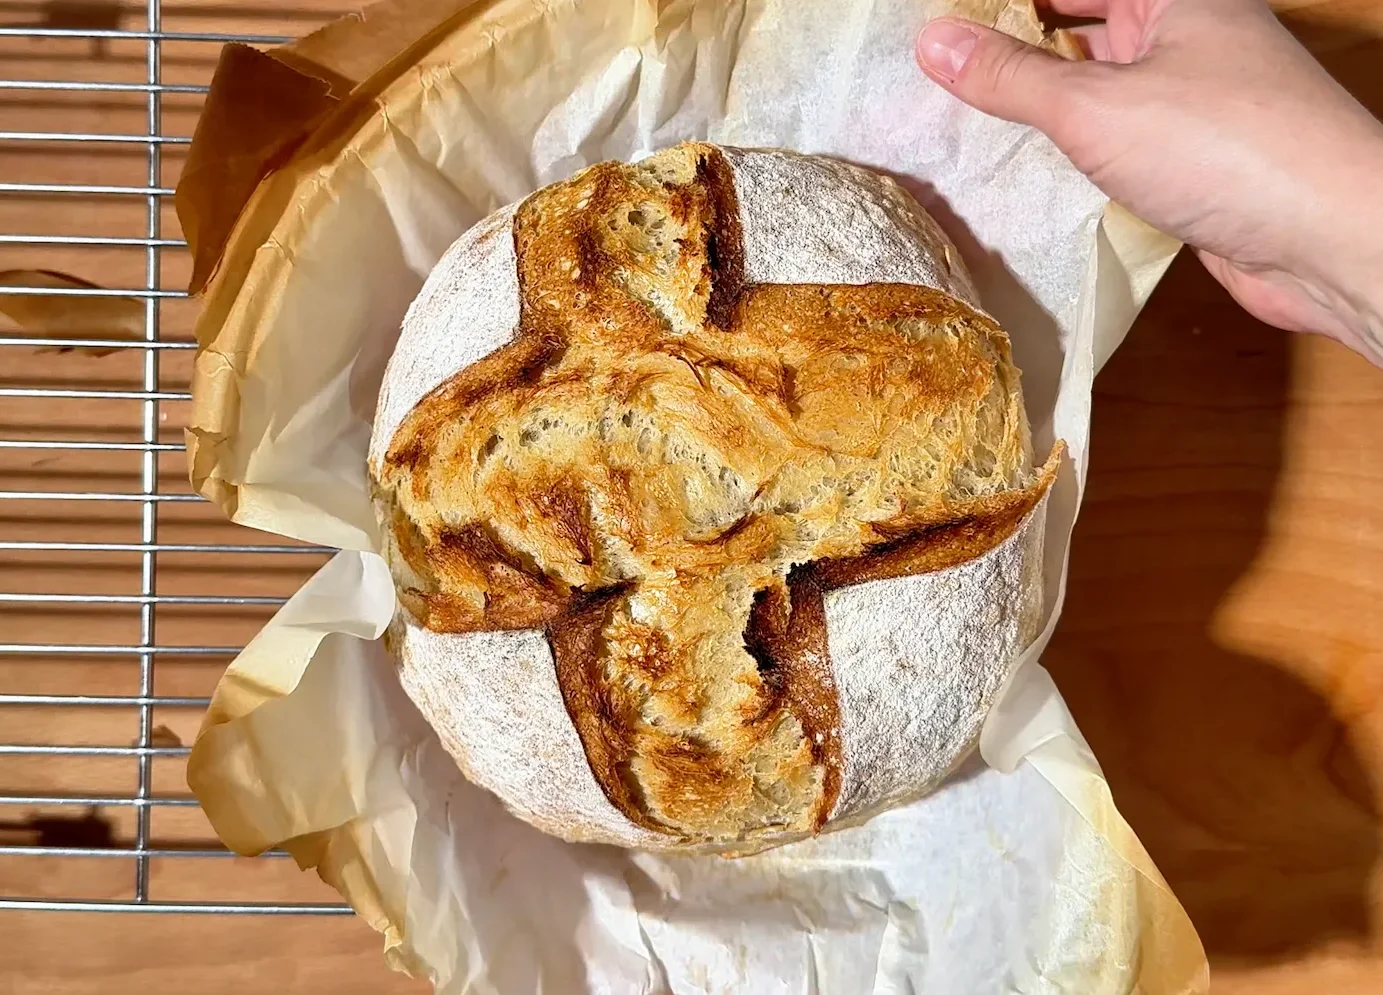
How to Bake Sourdough Bread: Your First Loaf, Done Right
This easy sourdough bread is the one we make at home when we want a proper loaf, crusty on the outside and soft inside, without spending the whole day watching the dough. Four ingredients, a few rounds of folds spread over an afternoon and a night in the fridge. The next day, into the oven.
It’s designed to be your first loaf. Instead of exact schedules, which depend a lot on how warm your kitchen is, we tell you what needs to happen at each stage and how to read the signs: when the dough is ready, when it’s underdone and when it has gone too far. It’s how we’d teach a friend how to bake sourdough bread for the first time. Once that’s clear, the rest falls into place.
And if you don’t have a Dutch oven, don’t worry. We’ve baked this bread without one too, and further down we show you how to do it with what you already have in your kitchen.
The only thing to plan ahead is 180 g (6.3 oz) of active sourdough starter. If you’re not sure how to get it ready, we explain it right below the recipe.
How We Make It at Home, Step by Step
Beginner Sourdough Loaf, Step by Step
Equipment
- Large bowl
- Kitchen scale
- Dutch oven Or the method without a Dutch oven we explain below
- Banneton Or a bowl lined with a well-floured kitchen towel
- Stand mixer or Danish dough whisk Or just your hands
- Bread lame Or a very sharp knife
- Wire rack For cooling
- Large wooden board or a roomy work surface
- Bench scraper
- Parchment paper Rated to 250 °C (480 °F), if you bake in a classic Dutch oven
- Oven thermometer Optional
Ingredients
- 500 g bread flour 17.6 oz
- 330 g water 11.6 oz; at 20-30 °C (68-86 °F)
- 180 g active sourdough starter 6.3 oz; at its peak or just past it
- 10 g fine salt 1¾ tsp; fine sea salt or table salt
- 30 g rice flour 1.1 oz; optional: for the counter, the banneton and dusting before scoring; regular flour works too
Instructions
The dough
- Autolyse: Mix the 500 g of flour with the 330 g of water until there's no dry flour left. With a stand mixer, 1 minute on low speed. By hand, about 5 minutes, with a Danish dough whisk or just your hands. No need to knead; the flour just needs to hydrate. Cover the bowl and let it rest for 30 minutes.
- Add the starter and salt: Add the 180 g of active starter and the 10 g of salt. With a stand mixer, about 5 minutes on low speed. By hand, about 10 minutes. It's ready when the dough is even and you can't feel any salt crystals between your fingers. Cover and let it rest for another 30 minutes.
- Stretch and folds: Do 3 or 4 rounds of folds, 30 minutes apart. Wet your hands a little, grab the dough from underneath, lift it without tearing it and fold it over itself. Turn the bowl 90 degrees and repeat until you've gone all the way around. With each round, the dough will feel smoother, more elastic and stronger.
- Bulk fermentation: From the last set of folds, let the dough ferment until it has grown by about 50%. About 2 hours at 26 °C (79 °F) and about 3 hours at 21 °C (70 °F), but the dough decides, not the clock. It's ready when it's bubbly, looks airy and jiggles slightly when you move the bowl.
Shaping and cold proof
- Preshape: Dust a large board or the counter with a little rice flour and turn the dough out gently, without tearing it. Rice flour works better than regular flour here because it has no gluten, so the dough sticks less. Stretch it gently into a rectangle, fold the sides into the middle and roll it up into a spiral. Leave it seam side down, cover it with an upturned bowl and let it rest for 15 minutes, so it relaxes and is easier to handle.
- Final shape: Shape it with a push and pull motion: push the ball away from you, then drag it back toward you so it grips the counter and the surface tightens. Turn the ball slightly and repeat several times. If it sticks, wet your hands or use a drop of neutral oil. It's ready when the surface is smooth and taut and the ball holds its shape. A bench scraper makes this much easier: it lets you lift the dough off the counter and drag it without touching it with your hands, which is when it sticks most.
- Overnight cold proof: Dust a banneton well with rice flour and place the dough in it smooth side down, because when you turn it out later that side will be on top. Dust a little more flour over it, lay a sheet of parchment paper on top and put the banneton inside a bag. The paper keeps moisture from the bag off the dough and stops it sticking to the plastic. Into the fridge for 10 to 14 hours. The cold ferments slowly, improves the flavor and makes the dough easier to score.
Baking
- Preheat: Preheat the oven to 250 °C (480 °F) with the Dutch oven inside, for 30 minutes.
- Turn out and dust: Take the dough out of the fridge and turn it out onto a sheet of parchment paper. Check that yours is rated to 250 °C (480 °F), because many are only rated to 220 °C (428 °F): the paper is what lets you lower the bread into the pot without burning yourself, and what helps you lift it out afterwards. If you have a bread-specific pot, with a shallow base and a dome lid, you don't need paper: turn the bread straight out onto the base. Dust the top with rice flour: that's what gives the scores that pretty white contrast once baked.
- Score: Make a decorative cut 1 to 2 mm (1/16 in) deep if you like, and above all one long cut along the side, about 1.5 cm (⅝ in) deep, at a slight angle rather than straight down. That's the bread's escape route: if you skip it, it will burst open wherever it wants.
- Bake: Lower the bread into the pot on its paper, cover and bake for 25 minutes at 250 °C (480 °F) on the lower-middle rack. Remove the lid, lower the oven to 210 °C (410 °F) and bake for 20 more minutes.
- Cool: Take the bread out of the pot and let it cool on a wire rack for at least 1 hour. It's hard to wait, but it's still finishing baking inside: if you cut it sooner, the crumb can turn out damp or gummy.
Notes
- Your starter needs to be active, fed a few hours before. We explain how to get it ready right below the recipe.
- Don’t have a sourdough starter yet? Here’s how to make one from scratch.
- The 30 minutes of preheating the Dutch oven aren’t included in the bake time.
- Check that your oven really reaches 250 °C (480 °F). Many home ovens fall short even when the dial says they’re there, and it’s one of the most common reasons a loaf rises less than expected. An oven thermometer settles it.
- The 2 to 3 hours of bulk fermentation are counted from the last set of folds and depend a lot on how warm your kitchen is. Trust the dough’s signs over the clock.
- If you use kosher salt, weigh it: a teaspoon of kosher salt weighs very different amounts depending on the brand.
- Once you get the hang of the recipe, try our house version: 400 g of bread flour, 50 g of whole wheat and 50 g of rye. We explain it below, in the variations.
- No Dutch oven? You can still make it, and below we show you how we do it with a tray of water.
Any questions about the recipe? Ask us in the comments and we’ll get back to you. And if you make it, tell us how it turned out, we love hearing from you! 🤗
Getting Your Sourdough Starter Active and Ready
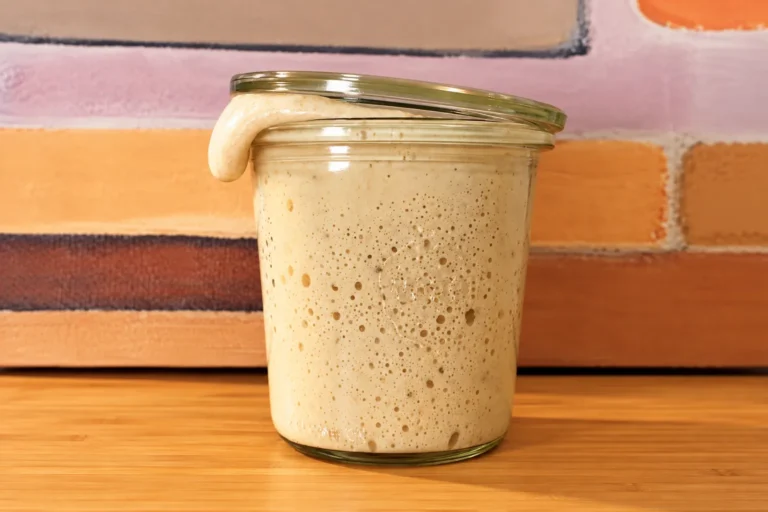
For this recipe you need an active sourdough starter: one that was fed a few hours earlier and is bubbly, with enough strength to raise the bread.
It can be at its peak or even a little past it, as long as it’s lively and smells good. What won’t work is a starter straight from the fridge that hasn’t been fed: it has no strength, and the bread won’t rise.
Don’t have a starter yet? Start with our guide to making sourdough starter from scratch: in one to two weeks you’ll have one ready.
How to Get Your 180 g of Starter Ready
If you keep your starter in the fridge, you need to feed it before you bake. Feeding means giving it flour and water so it wakes up and gets strong.
The night before, or the morning of the day you mix the dough, do this:
| Ingredient | Amount |
|---|---|
| Starter from the fridge | 40 g (1.4 oz) |
| Wheat flour | 100 g (3.5 oz) |
| Room temperature water | 100 g (3.5 oz) |
About the flour: all-purpose and bread flour both work. For a feeding, the starter doesn’t need gluten strength, just food, so use the one you always feed it with. If you add a spoonful of whole wheat or rye, it will get going sooner: they have more minerals and more activity.
About the water: not straight from the fridge. The starter is already cold, and cold water adds hours. In winter, lukewarm to the touch (not hot) gives it a boost.
Mix, cover loosely and leave it at room temperature.
How to Tell It’s Ready
Three signs, and you need all three:
- It has clearly risen. Roughly doubled since you fed it. If you use a straight-sided jar and mark the level with a rubber band, you’ll see it at a glance.
- It has bubbles, on the surface and along the sides of the jar.
- It smells good. Mildly tangy, like yogurt. If it smells like acetone or nail polish remover, it’s hungry: give it another feeding before you use it.
The ideal moment is when the top is domed, at its highest point. If the center has dipped slightly, it still works: it’s past its peak but still has strength. If it has collapsed completely, turned runny and smells very sour, it has gone too far: give it another feeding, or use it for pancakes.
Timing depends on how warm your kitchen is:
- Warm kitchen, 24 to 26 °C (75 to 79 °F), in summer: 4 to 5 hours
- Mild kitchen, 20 to 22 °C (68 to 72 °F): 6 to 8 hours
- Cool kitchen, below 19 °C (66 °F): 10 to 12 hours
You’ll have 240 g (8.5 oz). Use 180 g (6.3 oz) for the bread and you’ll have about 60 g (2.1 oz) left: that’s what goes back in the fridge for next time.
Want to feed it at night and find it ready when you wake up? Use 20 g of starter, 110 g of flour and 110 g of water (0.7 + 3.9 + 3.9 oz). It takes longer and gives you a wider window in the morning, with the same 240 g at the end. If you’re curious about why these ratios work, we explain it in depth in our sourdough starter guide.
If your starter hasn’t been touched in weeks, one feeding isn’t enough. Give it two or three in a row, 12 to 24 hours apart, until it rises reliably.
And if you have starter left over, or it has gone past its peak, don’t throw it out: sourdough discard makes really good pancakes.
How to Bake Sourdough Without a Dutch Oven
A Dutch oven helps a lot, but it isn’t essential. We’ve baked this bread without one several times and it turns out well. What the pot does is trap the steam the dough itself releases during the first minutes of baking, and you can get that in other ways with what you already have at home.
Our Method: A Hot Base and a Tray of Water
You need two things: a base that holds heat (a cast iron skillet, a heavy stainless steel tray or a pizza stone) and a metal tray for the water. No glass dishes: the thermal shock breaks them.
| Stage | What to do |
|---|---|
| Preheating | 250 °C (480 °F) for 30 minutes with the skillet inside, or 45 minutes if you’re using a pizza stone. The water tray goes in empty, on the lowest rack, from the start |
| Loading the bread | Place the loaf on the skillet or the stone, on the lower-middle rack. Pour 100 ml (3.4 fl oz) of boiling water into the tray below and close the door quickly |
| First 20 minutes | 250 °C (480 °F), top and bottom heat, fan off, without opening the door |
| At 20 minutes | Lower to 210 °C (410 °F). Look through the glass: with 100 ml, the water has usually evaporated by now and you won’t need to open the door. If some is left, open the door for a few seconds and take the tray out |
| Up to 45 minutes | 210 °C (410 °F) until the crust is deep golden |
Three Details That Make the Difference
Boiling water. If you pour it in cold, it lowers the oven temperature and takes a while to make steam, right when you need it most.
Fan off. Forced air disperses the steam and dries out the crust too early. Use top and bottom heat, with convection off.
Not a drop more than needed. 100 ml is plenty. If you use more, water can be left in the tray and the oven struggles to hold its temperature.
And be careful when you pour the water: the burst of steam burns. Wear an oven mitt, keep your face away and don’t splash the glass of the oven door.
What Changes in the Result
To be honest: without a pot, the bread rises a little less and the crust comes out less glossy, with fewer blisters. The tray of water partly replaces the effect of the pot, not completely.
That said, it makes a great loaf, with a good crust and a good crumb. If you’re just starting out, don’t buy anything yet. Bake a couple of loaves this way, and if sourdough becomes part of your life, then think about a Dutch oven.
Sourdough Bread Tools: What You Need and What Just Helps
You need fewer things for this bread than it seems. Here’s what we use, what can be swapped and what to swap it for.
The Only Things You Can’t Replace
A large bowl and a kitchen scale.
The scale is non-negotiable. The whole recipe is in grams because with bread, the difference between a loaf that works and one that doesn’t comes down to a few dozen grams of water. Measuring with cups doesn’t work here, which is why we give ounces alongside the grams, not cups. The scale is the cheapest thing on this list and the one that changes the result most.
And the oven, of course. But check that it really reaches 250 °C (480 °F). Many home ovens fall short even when the dial says they’re there, and it’s one of the most common reasons a loaf rises less than expected. An oven thermometer is inexpensive and settles it in one bake.
The Stand Mixer
We use a stand mixer for both mixing steps, and for us it’s the difference between 6 minutes of machine and 15 of arm work. In the first step, one minute and the flour is hydrated. In the second, five minutes and the dough is smooth, with the salt and the starter fully worked in.
It isn’t essential. This bread’s structure doesn’t come from kneading; it comes from the autolyse and the folds, and the folds are done by hand anyway. By hand it’s about 15 minutes, split between two moments, and the bread comes out just as good.
But if you bake often, it’s where you’ll notice it most.
A Dutch Oven for Sourdough Bread
After the scale, it’s what changes the result most. The pot concentrates the heat and traps the steam the dough releases during the first minutes of baking. That’s what makes the bread rise more and gives it a crackly, glossy crust instead of a dry, pale one.
There are two formats, and it’s worth knowing before you buy. The classic Dutch oven, deep with the lid on top, is the one almost everyone has at home, and with it you need parchment paper to lower the bread to the bottom without burning yourself. Bread-specific pots, sold as cast iron bread pans, bread cloches or combo cookers, work the other way around: the base is shallow, almost a tray, and what you lift off is the dome. With those, you turn the loaf out straight onto the base and lower the lid over it, with no paper and without reaching into anything hot. They cost a bit more, but if you bake often they’re much more comfortable and much safer.
Whichever you choose, the one non-negotiable is that it can take 250 °C (480 °F) with the lid on. Plastic or Bakelite knobs usually can’t handle that heat.
You don’t need one to start: above, we explain how to bake this bread without it. But if you bake every week, it’s the purchase you’ll appreciate most.
Nice to Have, Easy to Replace
Banneton. It helps the loaf hold its shape during the cold proof and, because it’s a breathable material, the surface dries slightly and the scores open better in the oven. A bowl lined with a well-floured kitchen towel replaces it, and works perfectly.
Danish dough whisk. It saves you getting messy in the first mix if you don’t have a stand mixer. Wet hands work just as well.
Bread lame. It cuts better than a knife because the blade is very thin and doesn’t drag the dough. A very sharp knife does the job, especially if you wet it before cutting.
Rice flour. For dusting the banneton and the top of the loaf before baking. It has no gluten, so it sticks less and stays whiter, and the scores look much more defined. Regular flour works too.
Wire rack. It matters more than it seems: if you leave the bread on a flat surface, the bottom stays damp and the lower crust softens.
Bench scraper. One of those things that seem unnecessary until you use one. It lifts the dough off the counter without tearing it, helps you drag it while shaping and divides it if you make two loaves. It’s inexpensive and changes the whole shaping experience.
Parchment paper rated to 250 °C (480 °F). If you bake in a classic Dutch oven, this one is essential, and not every paper will do: check the box, because many are only rated to 220 °C (428 °F). It’s what lets you lower the bread into a scorching pot without burning yourself, and lift it out afterwards without a fight.
What Flour to Use for Sourdough Bread
One of the questions we get most is what bread flour actually is and how to spot it at the store. Here it is.
What Bread Flour Is
Bread flour is simply flour with more protein. That protein is what forms gluten, and gluten gives the dough its structure: it lets it trap the gas from fermentation without collapsing. That’s why it works so well in long-fermented breads like this one.
Three ways to spot it:
The name on the bag. In the US and Canada it’s sold as “bread flour”; in the UK, as “strong white bread flour”. It’s the easiest check.
The protein. Bread flour has about 12 to 14 g of protein per 100 g. In the UK, Ireland, Australia and New Zealand, labels give it per 100 g, so you can read it directly. In the US and Canada, labels give it per serving: on a ¼ cup (30 g) serving, bread flour usually shows 4 g. Because US labels round to the nearest gram, some all-purpose flours show 4 g too, so there the words “bread flour” on the bag are the clearer sign.
The W value. In Europe you may see a W value, which measures flour strength: bread flour is usually W 260 to 320. Outside Europe it’s rarely printed, so go by the name and the protein.
What It’s Called Where You Live
| Country | What it’s called | Protein, approx. |
|---|---|---|
| United States | Bread flour | 12 to 14% |
| Canada | Bread flour | 12 to 14% |
| United Kingdom and Ireland | Strong white bread flour | 12 to 14 g per 100 g |
| Australia | Bread flour or baker’s flour | 12 to 13 g per 100 g |
| New Zealand | High grade flour | 12 to 13 g per 100 g |
| Spain | Harina de fuerza | 12 to 13 g per 100 g |
Canadian all-purpose flour tends to be stronger than the US one, so it’s worth checking its protein before you buy a separate bag.
Can You Use All-Purpose Flour?
You can, but it changes the result. All-purpose flour has less protein, so the dough holds up less well during the long fermentation and the bread comes out flatter, with a tighter crumb. It still tastes good, but you won’t get that volume.
If it’s all you have, two adjustments help: reduce the water to about 310 g (10.9 oz) instead of 330 g, and shorten the bulk fermentation a little, so the dough doesn’t reach the oven exhausted.
Adding Whole Wheat or Rye
A small percentage of whole wheat or rye flour adds a lot of flavor. We always do it, and we share our exact mix further down, in the variations.
But the more whole wheat or rye you add, the stickier the dough gets and the harder it is to shape. If it’s your first loaf, start with the 500 g of bread flour and save the blends for when shaping comes naturally.
The Flour We Buy
We buy organic bread flour from a flour mill, in 10 kg (22 lb) sacks. It’s cheaper per kilo, it’s freshly milled, and in general we prefer organic ingredients when we can.
That said, you don’t need organic flour to bake a good loaf. If 10 kg sacks aren’t your thing or there’s no mill nearby, supermarket flour works perfectly. Just two things:
Choose by protein, not by brand. Look for bread flour and, where the label gives it per 100 g, 12 to 14 g of protein. It works with any brand, store brands included.
Check the best-by date. Flour can sit on the shelf for months, and the fresher it is, the better it behaves. Between two identical bags, take the fresher one. It’s free and you’ll notice it.
And a word on sacks: if you bake often, they’re well worth it. But flour doesn’t keep forever, so store it somewhere cool and dry, in a closed container.
Tips for Getting It Right
Once you understand what happens at each stage, you stop needing exact schedules. These are the six things that really make the difference.
Why We Autolyse With Just Flour and Water
The autolyse is that first 30-minute rest where you mix only flour and water, with no starter and no salt. We do it that way on purpose.
During that time the flour fully hydrates and gluten starts forming on its own, without kneading. When you then add the starter and the salt, the dough is already smoother, more elastic and much easier to handle.
Can you mix everything from the start? Yes, no problem. With good kneading, the result is the same or nearly the same. But the autolyse saves you work, and that’s why we keep it.
How to Know When Bulk Fermentation Is Done
This is the step where most people go wrong, and it’s the one that has least to do with the clock. The 2 hours at 26 °C (79 °F) or 3 hours at 21 °C (70 °F) are a guide; the dough is what decides.
Look for four signs together:
- It has grown by about 50%. It doesn’t need to double.
- It has visible bubbles on the surface.
- It looks airier and puffier, not dense.
- When you move the bowl, it jiggles slightly, like Jell-O. That wobble is the most reliable sign of all: it means the gluten is taut and full of gas.
If you stop too early, the bread comes out dense, with a tight crumb, because the dough hasn’t produced enough gas.
If you go too far, the dough turns very sticky, loses strength, won’t hold a shape and the bread comes out flat and spread out. Going too far is worse than stopping short, so when in doubt, end the bulk sooner.
A trick so you’re not guessing: use a straight-sided container, or mark the level of the dough with a rubber band right after the last set of folds. That way you see the 50% at a glance instead of eyeballing it.
Stretch and Folds: Wet Hands, From Underneath
The folds replace long kneading. Instead of working the dough for ten minutes straight, you work it for a few seconds every half hour, and in between, the gluten relaxes and organizes itself.
Technique matters more than it seems. Wet your hands, grab the dough from underneath, lift it without tearing it and fold it over itself. Turn the bowl 90 degrees and repeat until you’ve gone all the way around.
Two typical mistakes: doing it with dry hands, which makes the dough stick and tear, and stretching it too far. If you feel the dough resisting, stop. It’s telling you it already has enough tension.
With each round you’ll feel the dough get smoother, more elastic and stronger. That progression is the sign that it’s going well.
Shaping: Roll First, Tension Second
Shaping happens in two stages, and each one does something different.
The preshape (stretching the dough into a rectangle, folding the sides to the middle and rolling it up into a spiral, like a cinnamon roll) organizes the dough and gives it a starting shape. Then it rests for 15 minutes, and that rest isn’t optional: the dough loses tension and becomes easier to handle. If you skip it, the final shape will fight you.
The final shape is where you create surface tension, with a push and pull motion: push the dough away from you and drag it back so it grips the counter and the skin tightens. That tight skin is what makes the bread rise up in the oven instead of spreading out.
You’ll know it’s ready when the surface is smooth and shiny and the ball holds its shape without slumping. If it sticks, wet your hands or use a drop of neutral oil, and use the bench scraper, not your fingers, to lift it off the counter.
The Overnight Cold Proof
After shaping, the dough goes into the fridge in the banneton for 10 to 14 hours. It isn’t just a way to split the work across two days: it’s one of the steps that does the most for the bread.
The cold slows fermentation right down, and that long, slow proof gives the bread a deeper flavor. It also firms up the dough, so it’s much easier to score. That’s why we score it straight out of the fridge.
The dough keeps rising in the fridge, slowly, and by morning it will have grown noticeably. That’s normal, and it’s one more reason the bulk fermentation stops at about 50% instead of letting the dough double.
The hours in the fridge also set the flavor: the longer it stays, the tangier the bread. If you like it mild, stay closer to 10 hours; if you like it more sour, go toward 14.
Cover it well, as we explain in the recipe: a sheet of parchment paper on top and the whole banneton inside a bag, so moisture from the bag doesn’t drip onto the dough and the dough doesn’t stick to the plastic.
If your dough hardly grew overnight, the cause is almost always earlier on: the bulk fermentation was too short or the starter wasn’t active enough. Next time, let the bulk go until the dough shows all four signs.
How to Score Sourdough, and Why the Cut Goes at an Angle
The long cut isn’t decoration: it’s the escape route. In the oven, the bread expands suddenly during the first few minutes, and that gas has to get out somewhere. If you don’t decide where, the bread will, and it will burst open along one side or at the base.
Three things make it work:
Depth. A cut about 1.5 cm (⅝ in) deep, made with confidence. Timid half-centimeter (¼ in) cuts close up and do nothing.
Angle. Hold the blade at an angle, not straight down. Cutting at an angle lifts a flap of dough that opens upward in the oven and forms that classic ridge bakers call the ear. With a straight-down cut the bread opens, but flat.
Cold dough. That’s why we score it straight out of the fridge. Cold dough is firm and the blade goes in cleanly; at room temperature it sticks and drags.
The decorative cuts, 1 to 2 mm (1/16 in) deep, are something else: they’re purely for looks and don’t replace the long cut.
How to Store and Freeze Sourdough Bread
Sourdough bread keeps much better than a yeasted loaf, thanks to the acidity from fermentation. But it needs storing in a very specific way, and most people do exactly the opposite.
The First Few Days, at Room Temperature
Let it cool completely before you store it: at least that hour on the rack. If you store it warm, the steam it’s still releasing gets trapped and the crust softens.
Once it’s cool, the best option is a cloth bread bag or a cotton kitchen towel, or a bread box. Cloth lets the bread breathe: the crust stays crisp and the crumb doesn’t dry out quickly. That way it keeps well for 3 or 4 days.
If you’d rather keep the crumb soft for longer and don’t mind losing some crust, a plastic bag or an airtight container will do that, but the crust will soften within a few hours.
And a simple trick: once you’ve cut into it, store it cut side down on the board. The crumb itself acts as a seal and the bread dries out much more slowly.
Not in the Fridge
It’s the most common mistake and the easiest to avoid. The fridge is the worst thing you can do to bread.
Between 0 and 7 °C (32 and 45 °F), starch recrystallizes much faster than at room temperature. That’s the process we call going stale, and in the fridge it speeds up. A loaf that’s still lovely on the counter on day three is dry in the fridge by day two.
If you won’t finish it in 3 or 4 days, the answer isn’t the fridge. It’s the freezer.
Freezing: The Best Option
Sourdough bread freezes very well and comes out almost like freshly baked. The key is to freeze it the same day, while it’s at its best, not once it’s three days old and starting to go stale.
Sliced is the most practical. Slice the whole loaf, separate the slices and freeze them in a bag. That way you take out only what you need. They toast straight from frozen, with no thawing, and come out perfect.
Half or whole, if you’d rather have it for a specific meal. Wrap it well, with no air. To bring it back, let it thaw at room temperature and give it 10 to 15 minutes in the oven at 180 °C (350 °F): the crust turns crisp again.
It keeps well frozen for up to 3 months.
If It’s Gone Hard
Don’t throw it out. Stale sourdough is the best raw material there is for good toast, croutons, breadcrumbs or pan con tomate, the Catalan toast rubbed with ripe tomato and finished with olive oil and salt. And if you dampen it lightly and put it in the oven at 180 °C (350 °F) for about 10 minutes, it comes back to life much more than you’d expect.
Sourdough Bread Variations
Once you’ve mastered this basic recipe, you can use it to make very different breads by changing the flour or adding flavor and color. The technique is always the same.
Our Everyday Loaf, With Whole Wheat and Rye
After many loaves, the mix we like best is 400 g of bread flour, 50 g of whole wheat and 50 g of rye (14.1 + 1.8 + 1.8 oz). The total is still 500 g, the water is still 330 g, and no time or step in the recipe changes. Only the flour does.
The flavor gains a lot. Rye brings a slightly tangy note and a deeper aroma, and whole wheat gives it that more rustic background. It’s the bread we make most often at home.
Now the honest part: the dough is stickier and harder to shape. Whole wheat and rye absorb water differently and the dough has less strength, so the push and pull will fight you a bit more and the ball won’t get as tight.
That’s why we recommend learning with 500 g of bread flour first. Make the basic recipe two or three times, until shaping comes without thinking, and then change the flours. If you start here and the bread comes out flat, you’ll think the problem is the recipe when it’s really the shaping.
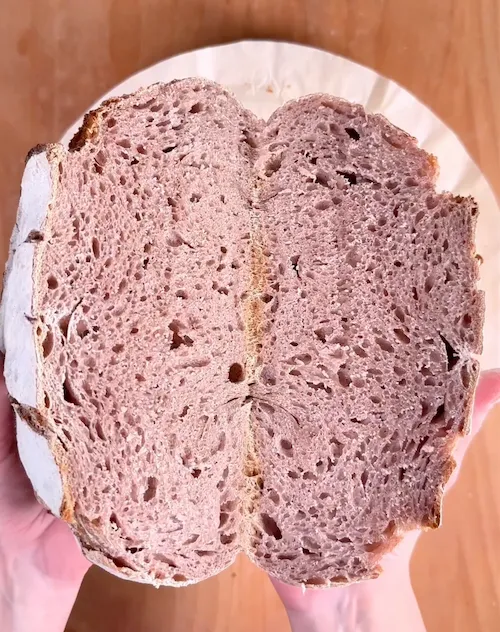
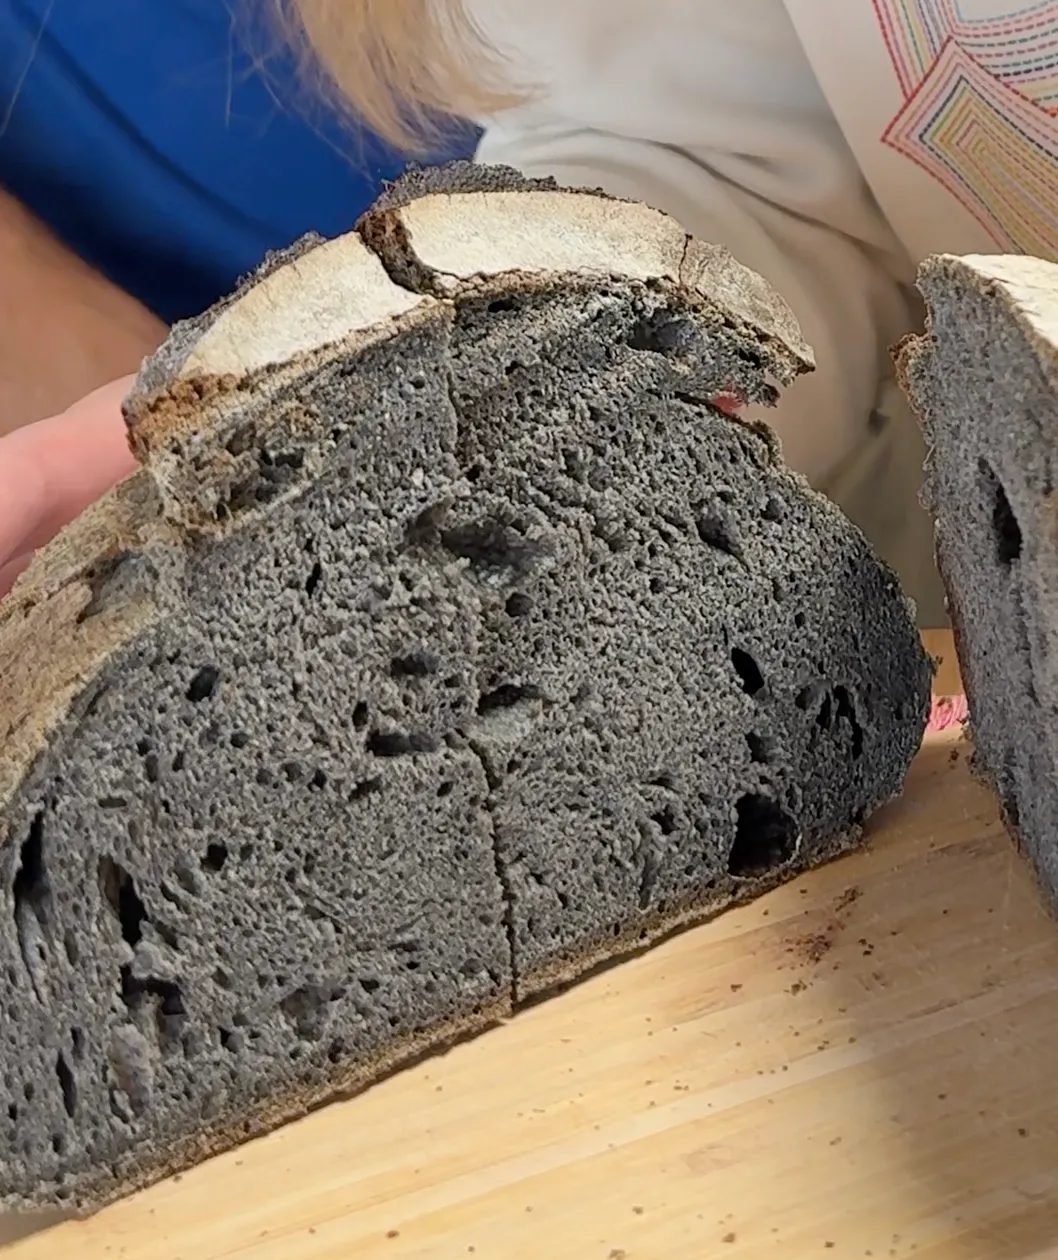
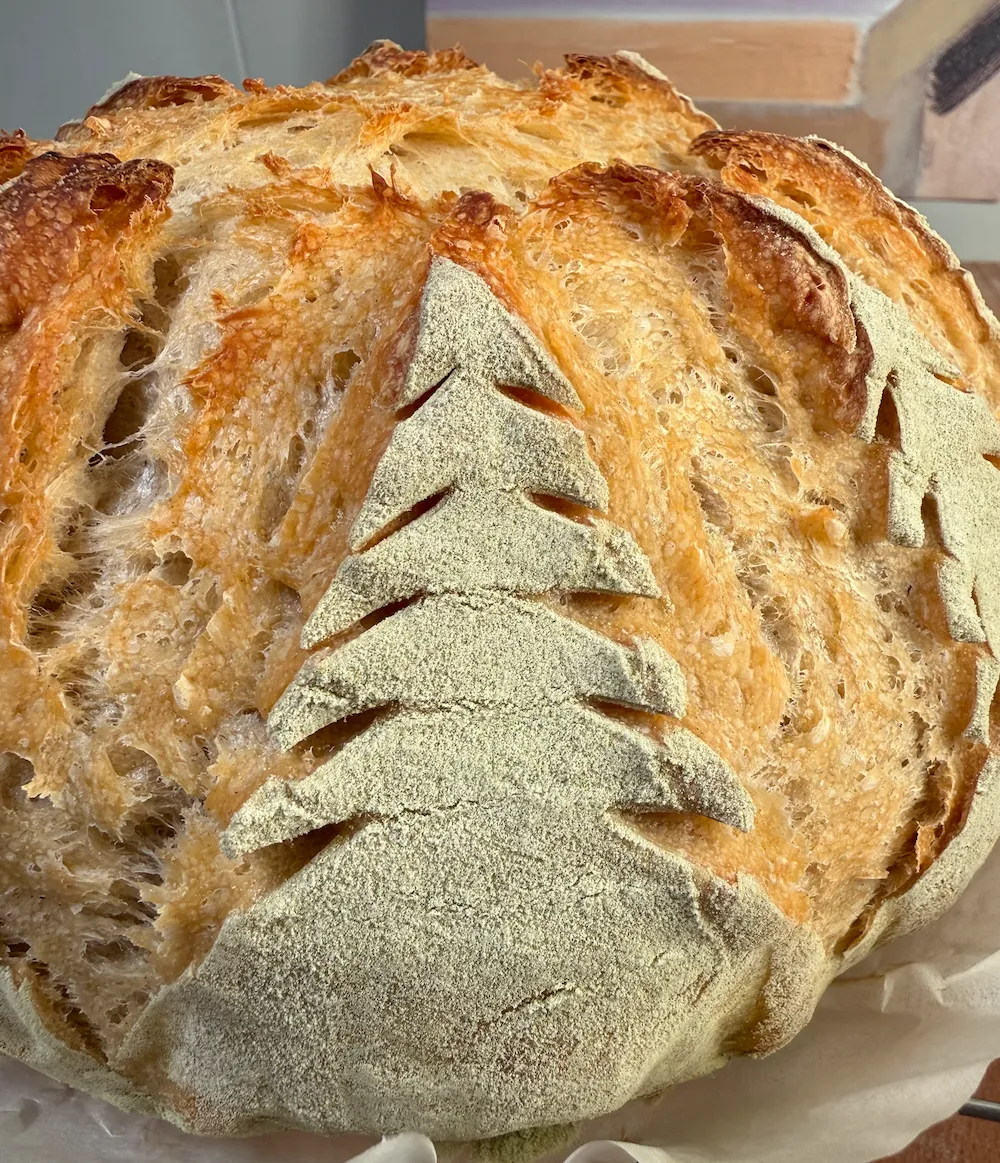
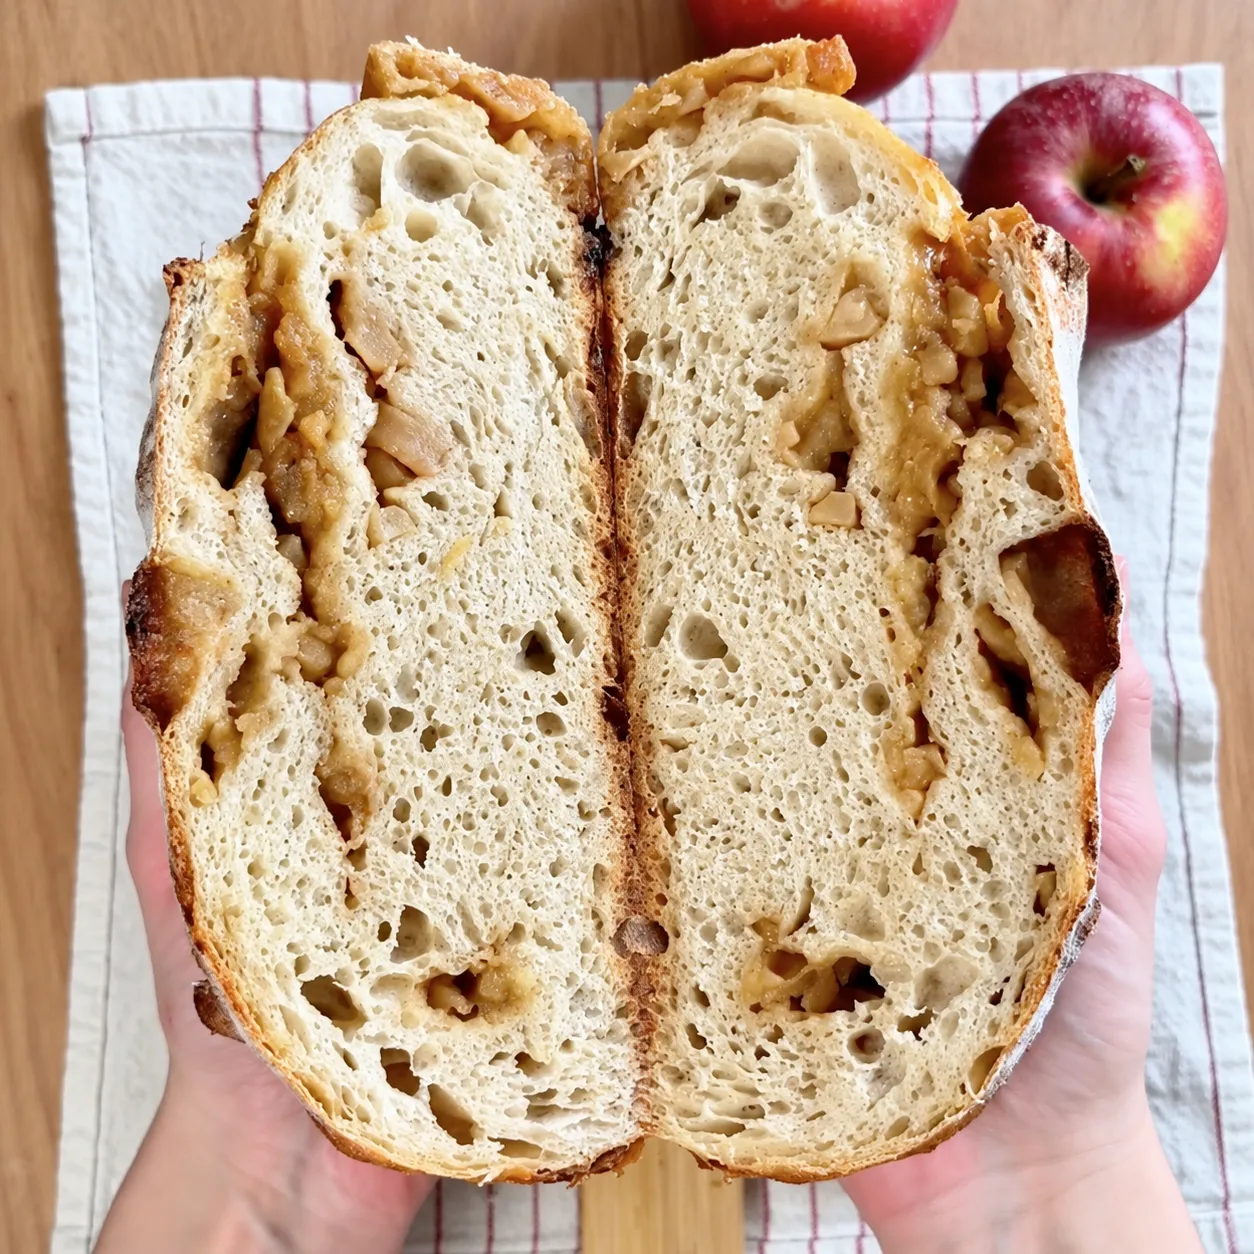
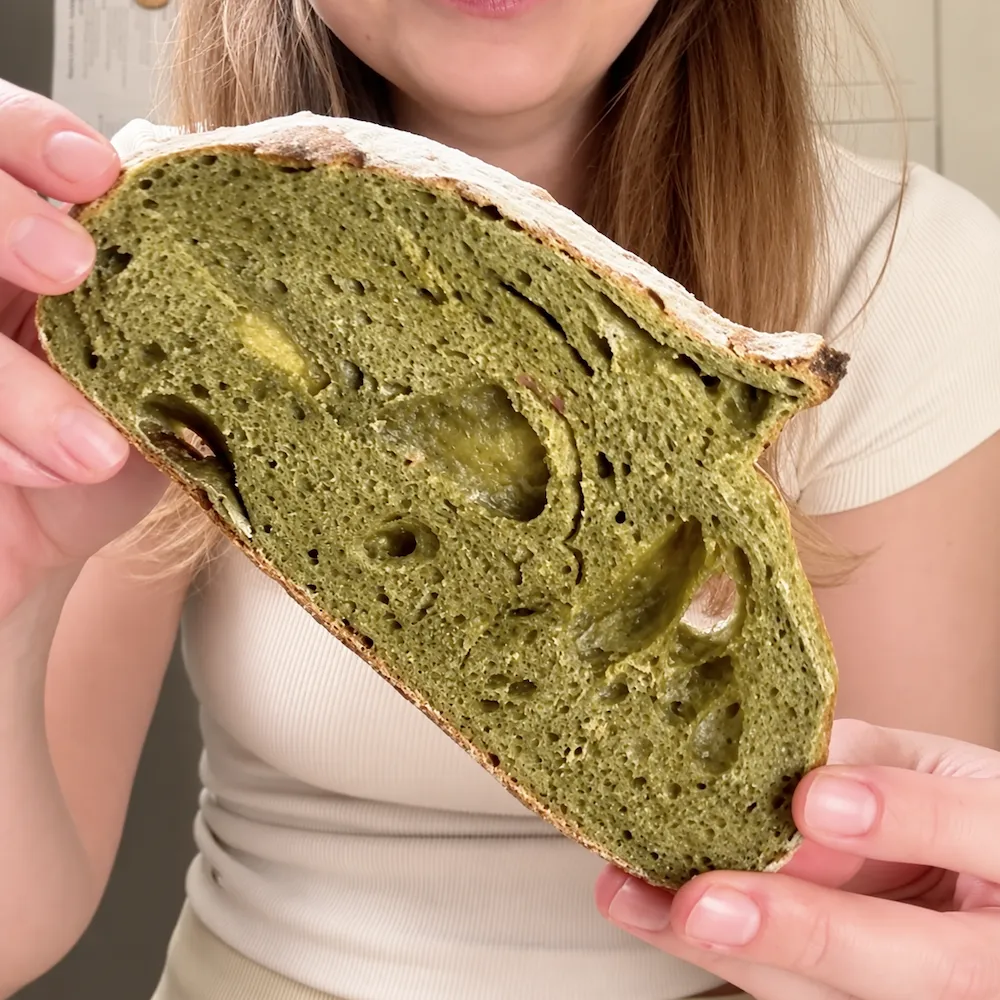
Colorful and Flavored Loaves
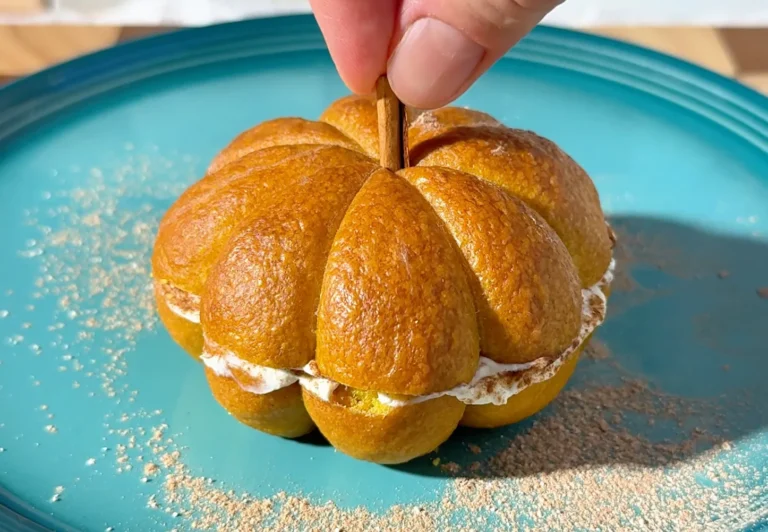
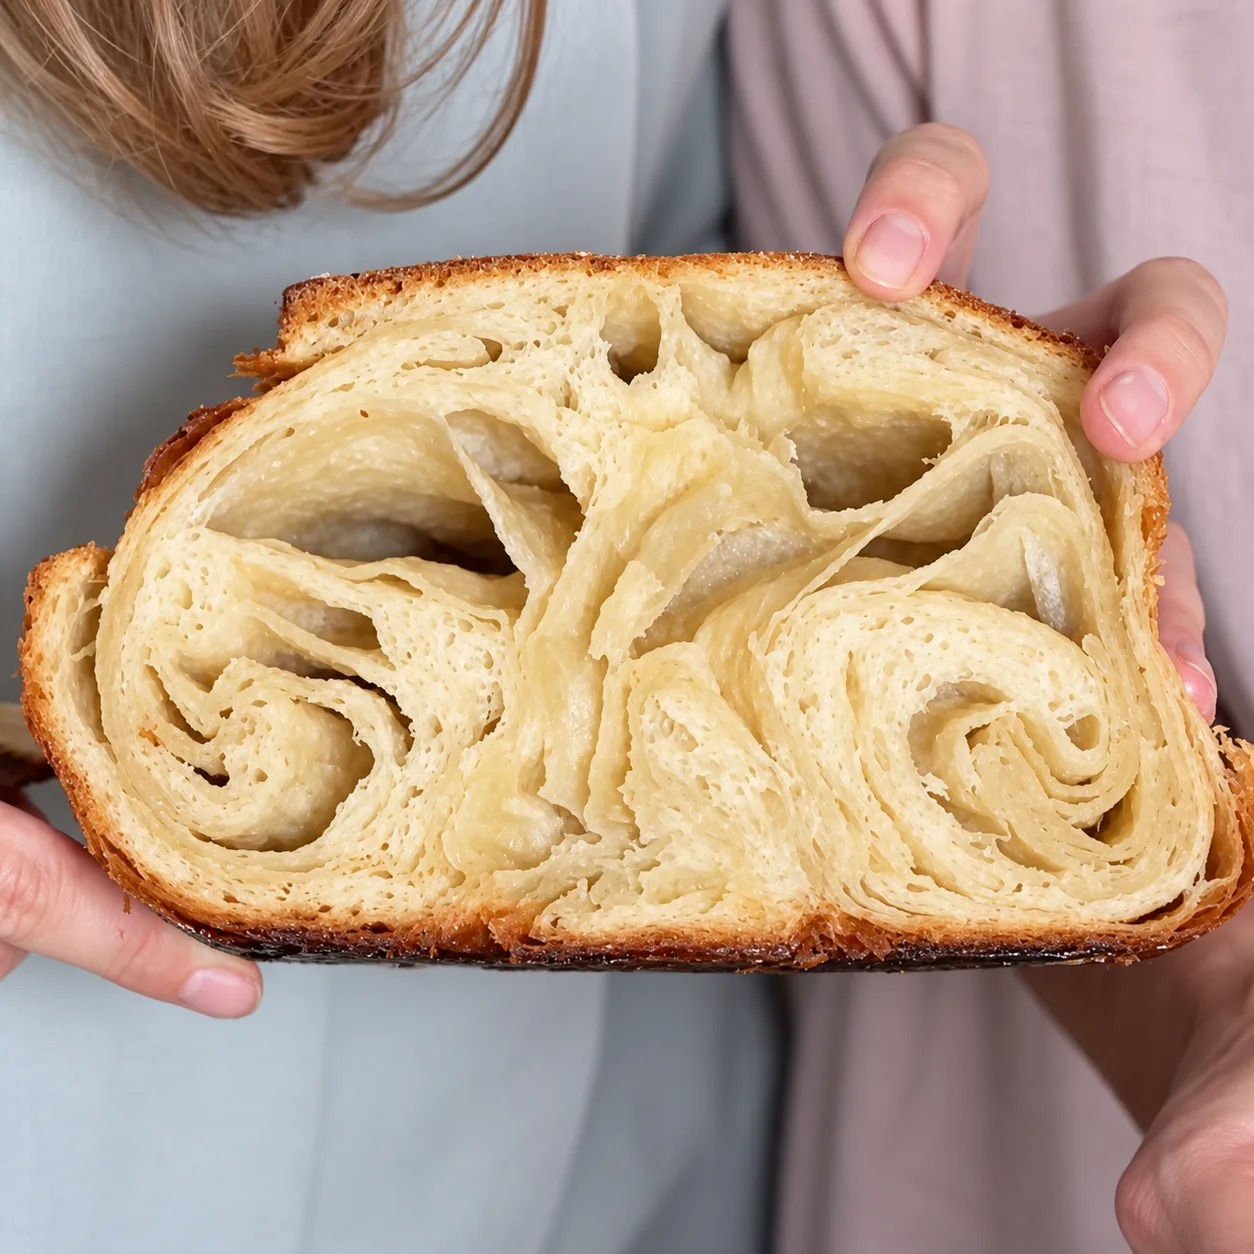
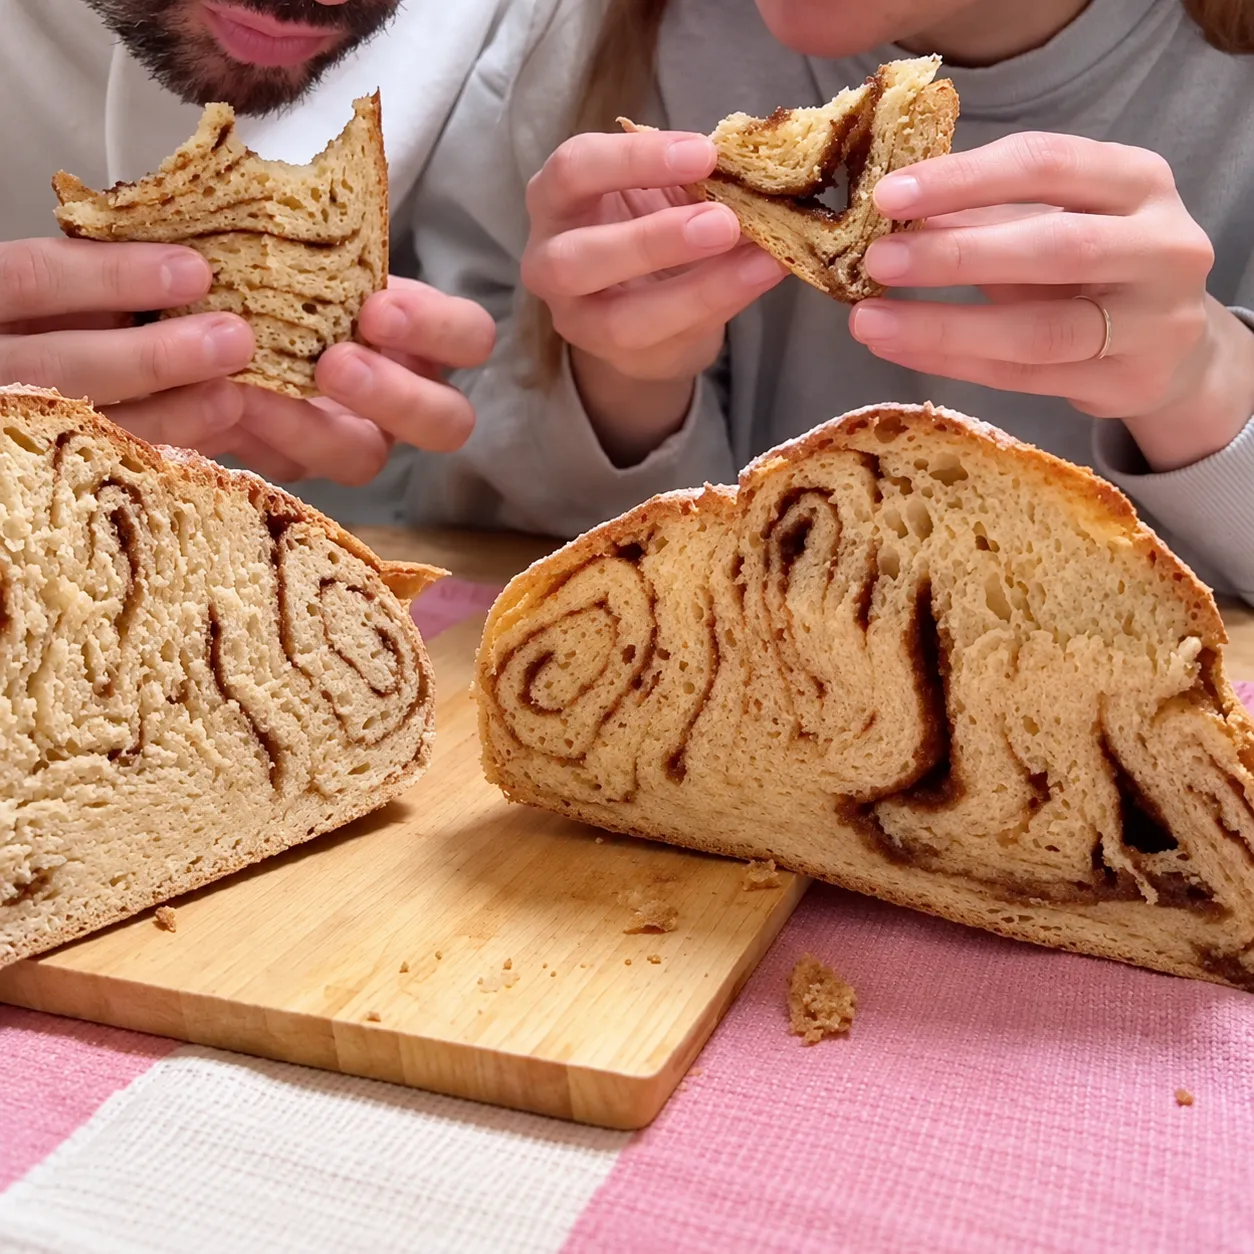
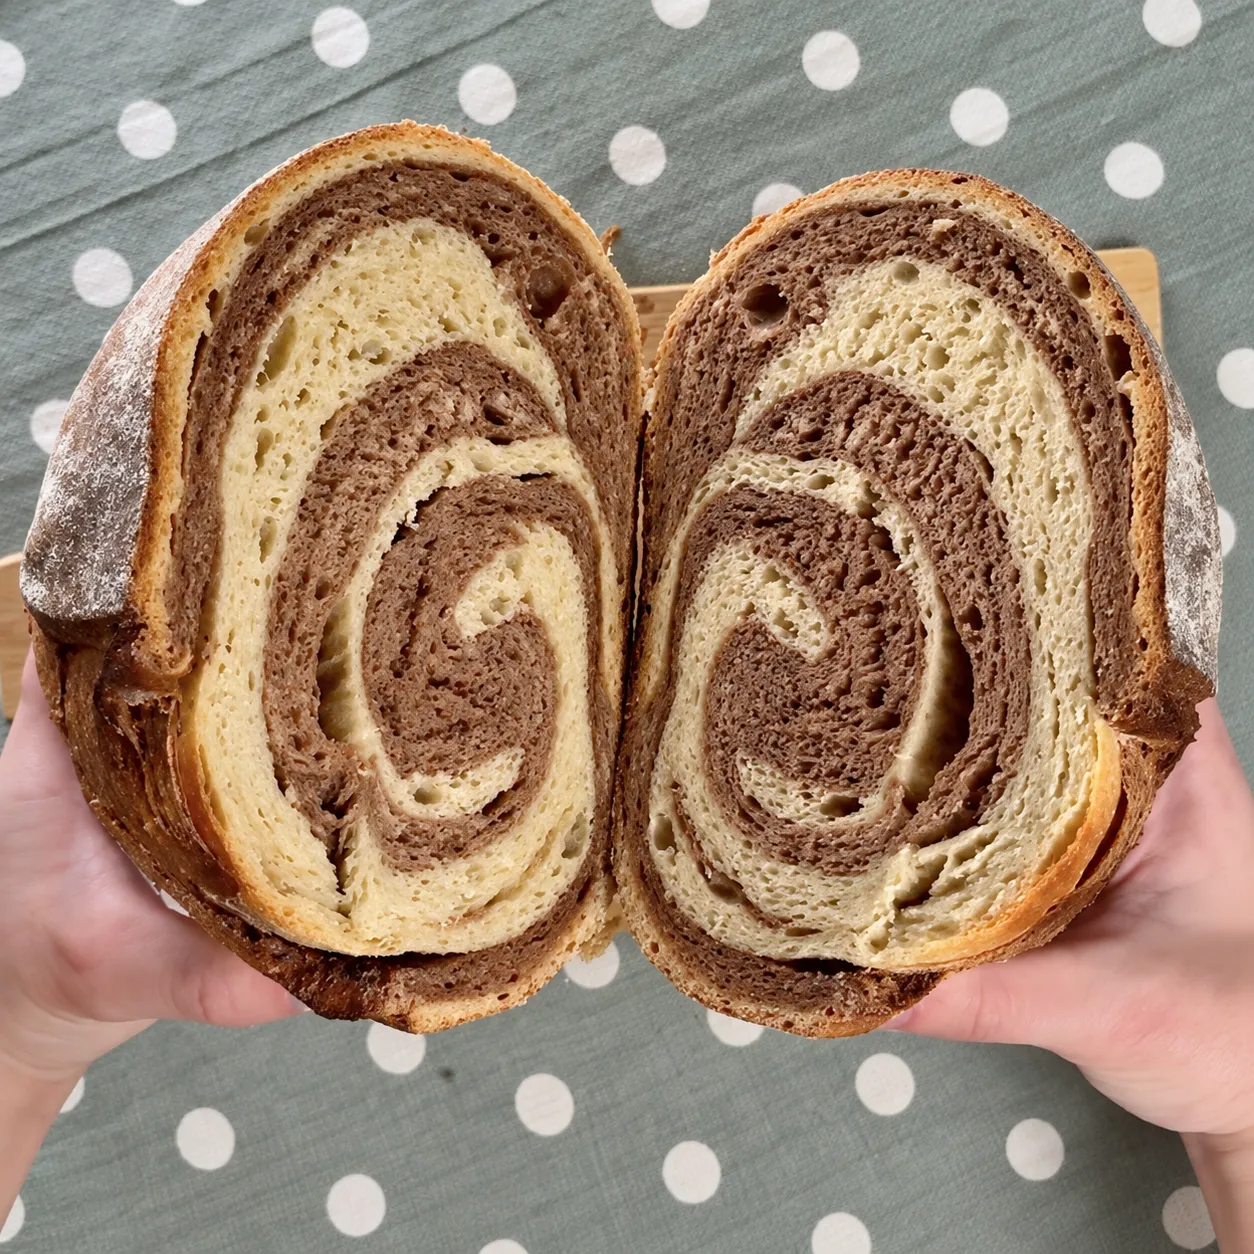
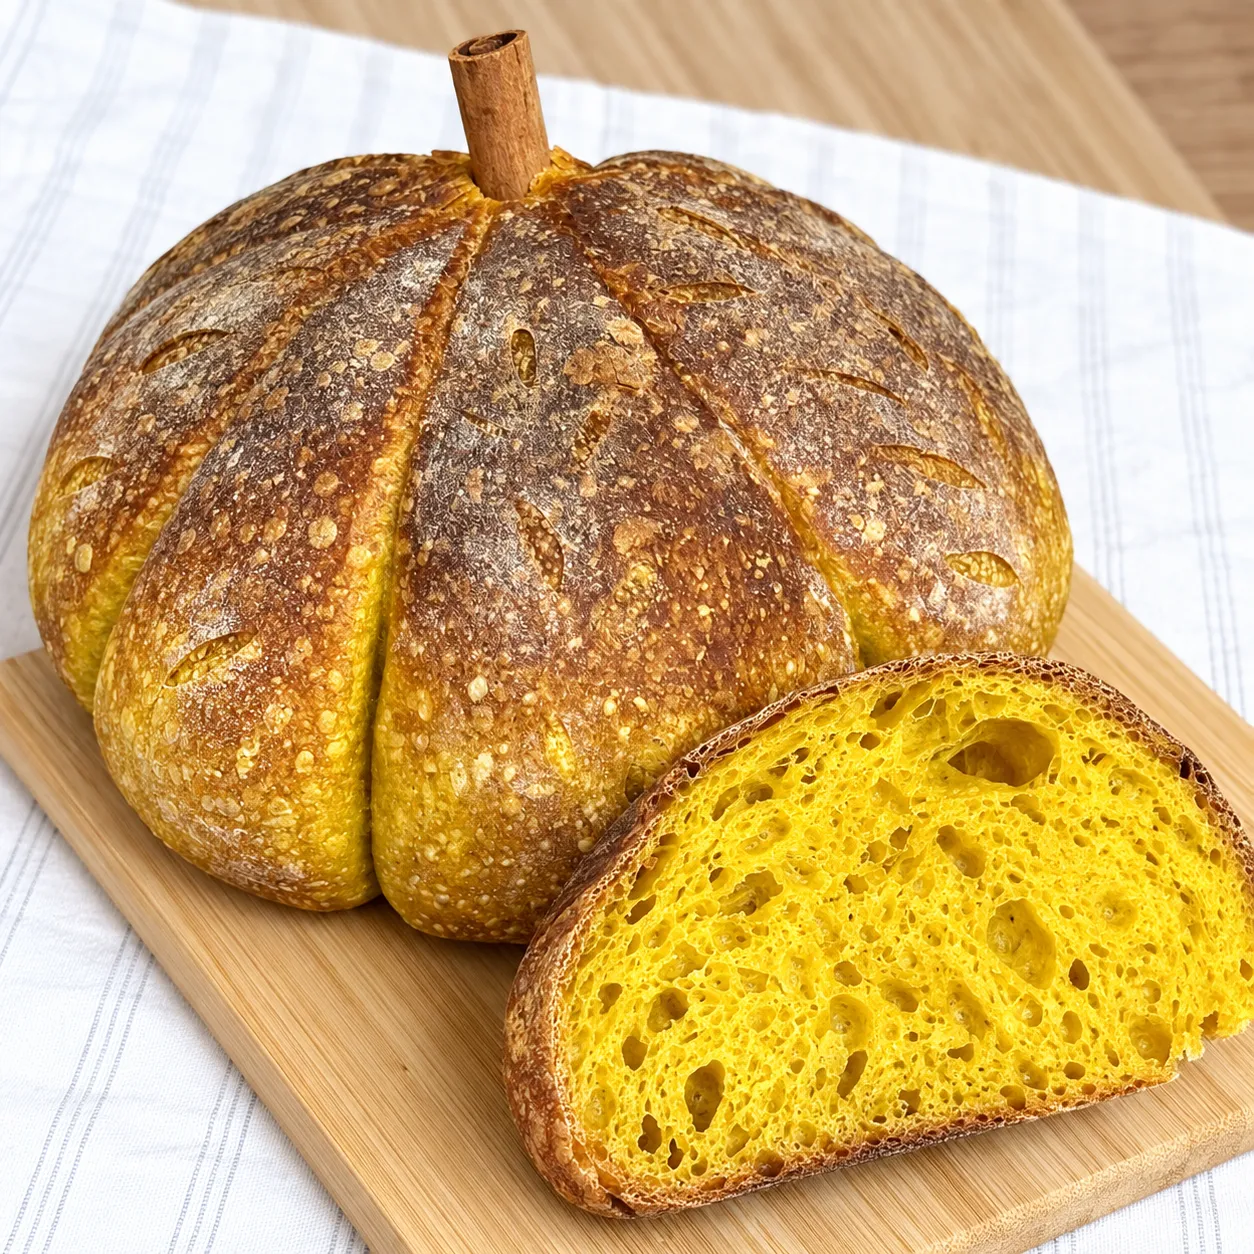
These are the versions we’ve been making. They all start from the same recipe on this page, with small tweaks:

Easy Sourdough Bread FAQ
Can I make this bread without a Dutch oven?
Yes. Bake it on a very hot cast iron skillet or pizza stone, with a tray of water underneath to create steam. We explain the whole method, with times and temperatures, in how to bake sourdough without a Dutch oven.
How long do you bake sourdough bread?
This loaf bakes for 45 minutes in total: 25 minutes covered at 250 °C (480 °F) and 20 minutes uncovered at 210 °C (410 °F), after preheating the Dutch oven for 30 minutes. Without a Dutch oven it’s the same 45 minutes, lowering the temperature at minute 20. Then give it at least 1 hour on a wire rack before slicing.
Can I skip the autolyse and mix everything at once?
Yes, you can mix everything from the start with no problem. With good kneading, the result is the same or nearly the same. The autolyse simply saves you work, because the dough is easier to handle.
Why is the autolyse done with just flour and water?
Because that rest hydrates the flour well and gluten starts forming on its own, without kneading. When you then add the starter and the salt, the dough is already smoother and more elastic. If you added the starter from the start, fermentation would begin during that rest and you’d lose part of the effect.
How do I know if my flour is bread flour?
In the US and Canada, the bag says “bread flour”; in the UK, “strong white bread flour”. Otherwise, check the protein: 12 to 14 g per 100 g. In Europe you may also see a W value, usually 260 to 320 for bread flour. We have a table of names by country above.
Can I use less than 180 g of starter?
Yes, but fermentation will be slower. With 180 g, the dough ferments in about 2 to 3 hours from the last set of folds. With less, it can take twice as long or more, and you’ll need to go by the dough’s signs even more than by the clock.
How do I know my starter is ready to use?
It has to be active: fed a few hours earlier, bubbly and risen. It can be at its peak or even a little past it, as long as it’s lively and smells good. If it doesn’t rise, smells bad or looks lifeless, it needs a few feedings before it can raise bread. We explain it step by step in getting your starter ready.
What does it mean when the dough jiggles?
It’s the most reliable sign that bulk fermentation is done. When you move the bowl, the dough wobbles slightly instead of staying still or spreading out. That means the gluten is taut and full of gas. If it doesn’t move, it needs more time; if it spreads out, it has gone too far.
My dough barely rose in the fridge overnight. What went wrong?
Ours grows noticeably during the 10 to 14 hours in the fridge, so if yours hardly moved, the cause is usually earlier on: the bulk fermentation was too short or the starter wasn’t active enough. Next time, let the bulk go until the dough has grown by about 50% and jiggles when you move the bowl. We explain what happens in the fridge in the overnight cold proof.
Why didn’t my sourdough bread rise?
The three most common causes are a starter that wasn’t active enough, a bulk fermentation that was too short and shaping without enough tension. It can also be the oven, if it doesn’t really reach 250 °C (480 °F) even though the dial says it does. Check these four things before changing the recipe.
Why is my sourdough bread dense?
Almost always, it’s under-fermentation: the dough didn’t produce enough gas and the crumb ends up tight. Another common cause is slicing it before it has cooled completely: it’s still finishing baking inside and the crumb turns gummy.
Why is my sourdough bread too sour?
Usually it’s over-fermentation, a starter that was well past its peak or too many hours in the fridge. Try using the starter at its peak rather than past it, shortening the bulk fermentation and cutting the fridge time to 10 hours instead of 14.
Is sourdough bread gluten free?
No. This bread is made with wheat flour, so it contains gluten, and the fermentation doesn’t make it gluten free. It isn’t suitable for anyone who can’t eat gluten.
How long does it keep, how do I store it and can I freeze it?
It keeps for 3 or 4 days at room temperature, in a cloth bag or a bread box, cut side down once you’ve started it. Not in the fridge, where it goes stale much faster. And yes, it freezes very well: the best way is to slice it the same day and toast the slices straight from frozen. We explain it in detail in how to store and freeze sourdough bread.
Can I make it with whole wheat flour?
Yes. We regularly make a version with 400 g of bread flour, 50 g of whole wheat and 50 g of rye. No time or step changes; the dough just gets stickier and a bit harder to shape. We cover it in the variations.
Made This Recipe or Have a Question?
Any questions before you start? Ask us down below and we’ll get back to you. And if you’ve already made it, tell us how it turned out or leave us a rating: it really helps more people find the recipe 😊
Rate this recipe ⭐️