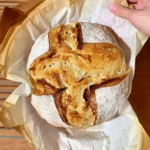
Beginner Sourdough Loaf, Step by Step
A sourdough loaf with 4 ingredients, an overnight cold proof and baked in a Dutch oven. We also show you how to bake it if you don't have one.
12 slices
Equipment
- Large bowl
- Kitchen scale
- Dutch oven Or the method without a Dutch oven we explain below
- Banneton Or a bowl lined with a well-floured kitchen towel
- Stand mixer or Danish dough whisk Or just your hands
- Bread lame Or a very sharp knife
- Wire rack For cooling
- Large wooden board or a roomy work surface
- Bench scraper
- Parchment paper Rated to 250 °C (480 °F), if you bake in a classic Dutch oven
- Oven thermometer Optional
Ingredients
- 500 g bread flour 17.6 oz
- 330 g water 11.6 oz; at 20-30 °C (68-86 °F)
- 180 g active sourdough starter 6.3 oz; at its peak or just past it
- 10 g fine salt 1¾ tsp; fine sea salt or table salt
- 30 g rice flour 1.1 oz; optional: for the counter, the banneton and dusting before scoring; regular flour works too
Instructions
The dough
- Autolyse: Mix the 500 g of flour with the 330 g of water until there's no dry flour left. With a stand mixer, 1 minute on low speed. By hand, about 5 minutes, with a Danish dough whisk or just your hands. No need to knead; the flour just needs to hydrate. Cover the bowl and let it rest for 30 minutes.
- Add the starter and salt: Add the 180 g of active starter and the 10 g of salt. With a stand mixer, about 5 minutes on low speed. By hand, about 10 minutes. It's ready when the dough is even and you can't feel any salt crystals between your fingers. Cover and let it rest for another 30 minutes.
- Stretch and folds: Do 3 or 4 rounds of folds, 30 minutes apart. Wet your hands a little, grab the dough from underneath, lift it without tearing it and fold it over itself. Turn the bowl 90 degrees and repeat until you've gone all the way around. With each round, the dough will feel smoother, more elastic and stronger.
- Bulk fermentation: From the last set of folds, let the dough ferment until it has grown by about 50%. About 2 hours at 26 °C (79 °F) and about 3 hours at 21 °C (70 °F), but the dough decides, not the clock. It's ready when it's bubbly, looks airy and jiggles slightly when you move the bowl.
Shaping and cold proof
- Preshape: Dust a large board or the counter with a little rice flour and turn the dough out gently, without tearing it. Rice flour works better than regular flour here because it has no gluten, so the dough sticks less. Stretch it gently into a rectangle, fold the sides into the middle and roll it up into a spiral. Leave it seam side down, cover it with an upturned bowl and let it rest for 15 minutes, so it relaxes and is easier to handle.
- Final shape: Shape it with a push and pull motion: push the ball away from you, then drag it back toward you so it grips the counter and the surface tightens. Turn the ball slightly and repeat several times. If it sticks, wet your hands or use a drop of neutral oil. It's ready when the surface is smooth and taut and the ball holds its shape. A bench scraper makes this much easier: it lets you lift the dough off the counter and drag it without touching it with your hands, which is when it sticks most.
- Overnight cold proof: Dust a banneton well with rice flour and place the dough in it smooth side down, because when you turn it out later that side will be on top. Dust a little more flour over it, lay a sheet of parchment paper on top and put the banneton inside a bag. The paper keeps moisture from the bag off the dough and stops it sticking to the plastic. Into the fridge for 10 to 14 hours. The cold ferments slowly, improves the flavor and makes the dough easier to score.
Baking
- Preheat: Preheat the oven to 250 °C (480 °F) with the Dutch oven inside, for 30 minutes.
- Turn out and dust: Take the dough out of the fridge and turn it out onto a sheet of parchment paper. Check that yours is rated to 250 °C (480 °F), because many are only rated to 220 °C (428 °F): the paper is what lets you lower the bread into the pot without burning yourself, and what helps you lift it out afterwards. If you have a bread-specific pot, with a shallow base and a dome lid, you don't need paper: turn the bread straight out onto the base. Dust the top with rice flour: that's what gives the scores that pretty white contrast once baked.
- Score: Make a decorative cut 1 to 2 mm (1/16 in) deep if you like, and above all one long cut along the side, about 1.5 cm (⅝ in) deep, at a slight angle rather than straight down. That's the bread's escape route: if you skip it, it will burst open wherever it wants.
- Bake: Lower the bread into the pot on its paper, cover and bake for 25 minutes at 250 °C (480 °F) on the lower-middle rack. Remove the lid, lower the oven to 210 °C (410 °F) and bake for 20 more minutes.
- Cool: Take the bread out of the pot and let it cool on a wire rack for at least 1 hour. It's hard to wait, but it's still finishing baking inside: if you cut it sooner, the crumb can turn out damp or gummy.
Video
Notes
- Your starter needs to be active, fed a few hours before. We explain how to get it ready right below the recipe.
- Don't have a sourdough starter yet? Here's how to make one from scratch.
- The 30 minutes of preheating the Dutch oven aren't included in the bake time.
- Check that your oven really reaches 250 °C (480 °F). Many home ovens fall short even when the dial says they're there, and it's one of the most common reasons a loaf rises less than expected. An oven thermometer settles it.
- The 2 to 3 hours of bulk fermentation are counted from the last set of folds and depend a lot on how warm your kitchen is. Trust the dough's signs over the clock.
- If you use kosher salt, weigh it: a teaspoon of kosher salt weighs very different amounts depending on the brand.
- Once you get the hang of the recipe, try our house version: 400 g of bread flour, 50 g of whole wheat and 50 g of rye. We explain it below, in the variations.
- No Dutch oven? You can still make it, and below we show you how we do it with a tray of water.