Homemade Pumpkin Puree From a Fresh Pumpkin (Thick and Silky)
Homemade pumpkin puree has one problem: it almost always comes out watery.
It is not your fault. Pumpkin is mostly water, and if you roast it and blend it and stop there, you get something closer to a thin soup than to what comes out of a can. In a pie it sinks, in a cheesecake it stops things from setting, and in a latte it turns into murky water.
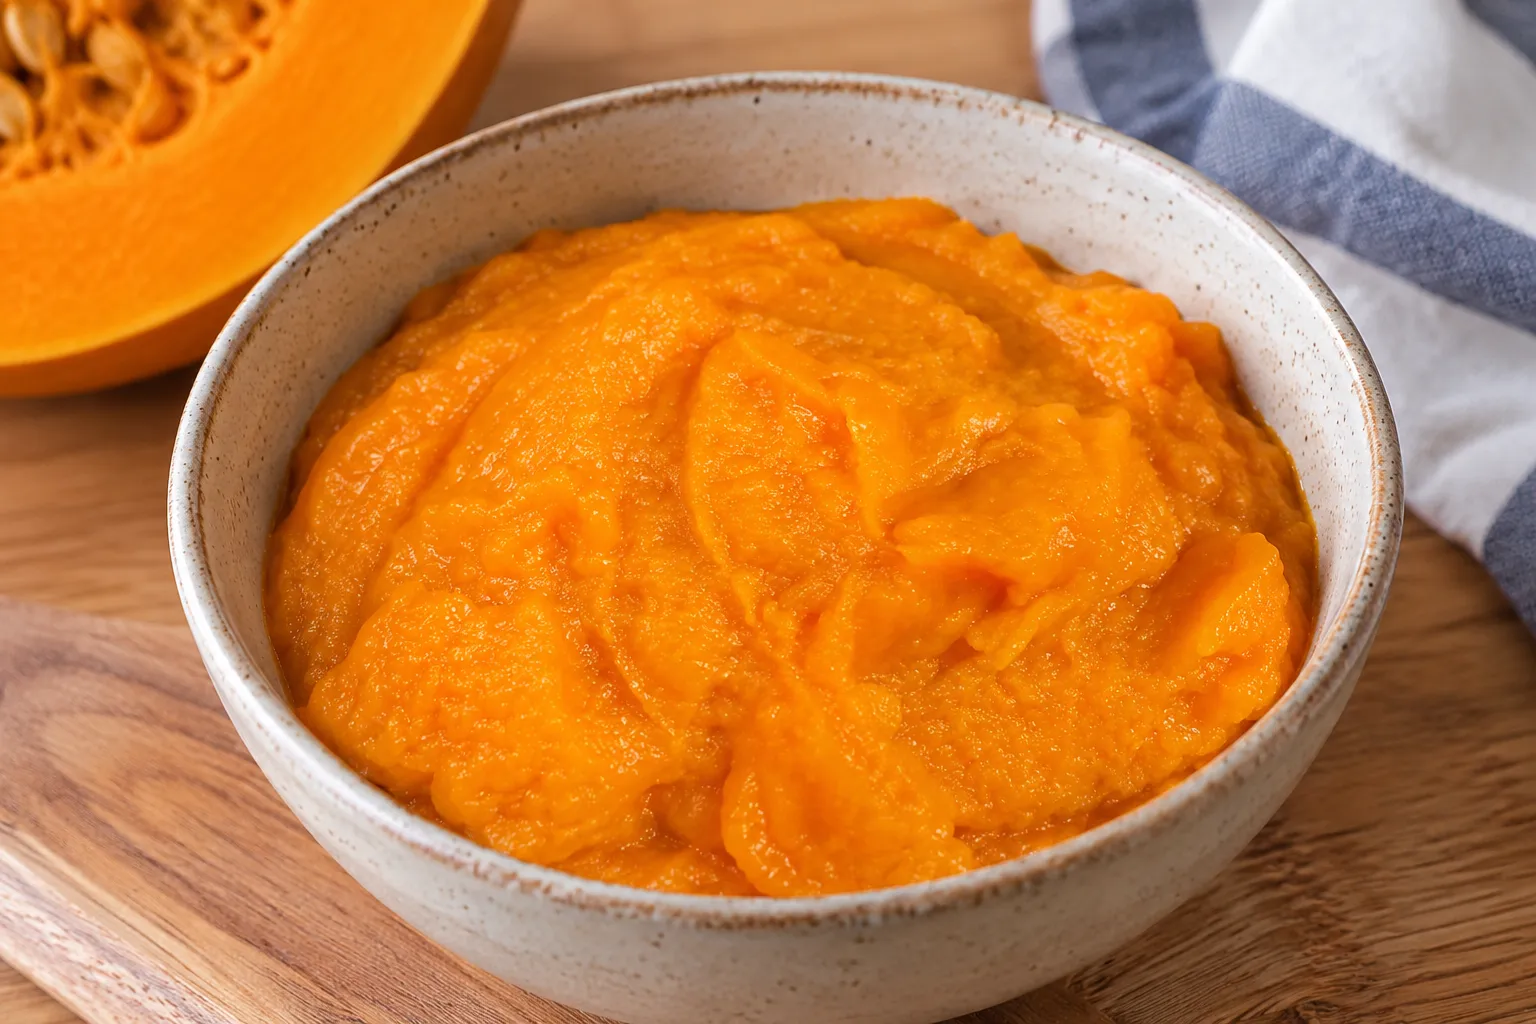
So why bother, when there is a can of pumpkin in the pantry? Because done right, homemade is thicker and tastes like actual roasted pumpkin. And it swaps 1:1 for canned in any recipe you already make.
Here is how we do it, with two extra steps almost nobody takes: we strain it to get rid of the fibers, and we cook it down in a skillet until it is truly thick. It adds about twenty minutes and changes everything.
And one thing that will save you the worst part: you never have to peel the pumpkin. Not once.
It takes a single ingredient. We also put together a chart of how much pumpkin to buy for the amount of puree you need, in grams, cups, and cans.
How We Make It at Home, Step by Step

Homemade Pumpkin Puree
Ingredients
- 1.5 kg pumpkin 3.3 lb. Whole and unpeeled, or 1.2 kg (2.6 lb) if you buy it pre-cut. Sugar pumpkin, butternut squash, or kabocha
Instructions
- Prep the pumpkin, depending on what you have. If it is whole, cut it in half from top to bottom and scoop out the seeds with a spoon: no need to peel it. If you bought it pre-cut, there is nothing to do.
- Onto the baking sheet, on parchment paper. The halves go cut side down. Loose pieces go in a single layer, not touching: crowded together they steam in their own moisture and the puree comes out wetter.
- Roast at 200 °C (400 °F). Halves take 45 to 60 minutes. Pieces take 40 to 50 minutes. It is ready when a knife slides in with no resistance at all.
- Scoop out the flesh. If you roasted halves, flip them, let them cool for a few minutes, and scrape the flesh out with a spoon all the way to the skin. Pieces go straight into the blender.
- Blend until completely smooth.
- Push it through a fine-mesh strainer with a spatula to remove the fibers. It takes about five minutes and it is what gives the puree its silky texture.
- Into the skillet. Use the widest one you have, over medium low heat, stirring often. 15 to 25 minutes depending on how watery the pumpkin was, and a few more if you roasted halves. It spatters like lava, so keep a lid half on between stirs or turn the heat down.
- Check it with the spatula test. Drag the spatula across the bottom: if the trail takes a second to close, it is done. If it closes right away, keep going.
- Weigh it. 1.2 kg (2.6 lb) of pre-cut pumpkin gives you about 650 g (2⅔ cups) of thick puree, which is about 1½ cans. If your recipe calls for a specific amount, weigh out what you need and save the rest.
- Let it cool completely before storing it, and before using it in any cold recipe like a no-bake cheesecake. Spread out on a sheet pan or a plate, it cools in about 30 minutes; in a deep container it can take a couple of hours. For soups or quick breads you can use it warm.
Notes
- A standard 15 oz can of pumpkin puree is 425 g, about 1¾ cups. One batch of this recipe is about 1½ cans.
- The wider the skillet, the faster it cooks down. If yours is small, work in two batches.
- For baking, the puree needs to be very thick. For soups you can cut the skillet time down to about 10 minutes.
- If it is going into a cold recipe like a no-bake cheesecake, it needs to be fridge cold.
- Keeps 4 to 5 days in the fridge and 3 months in the freezer. Freeze it in 425 g (1¾ cup) portions, one can each.
If you make this recipe, leave a star rating ⭐️ it truly helps us ⭐
Homemade vs. Canned Pumpkin Puree
Canned pumpkin is a perfectly good shortcut, and we are not here to tell you otherwise. But there are three real differences.
Texture. Canned pumpkin is thick and consistent, which is why so many recipes are built around it. Homemade puree that is properly cooked down is just as thick, and a little silkier, because you strain out the fibers yourself.
Flavor. This is where homemade wins clearly. Roasting caramelizes the natural sugars, and you end up with something that tastes like roasted pumpkin instead of just “orange”. In a pie, a quick bread, or a no-bake cheesecake, you notice it.
Control. You decide exactly how thick it is. For a cheesecake you want it very thick; for a soup, much looser. With a can, you get what the can gives you.
The one thing canned has going for it is time. So our honest take: use canned when you are in a hurry, and make it from scratch when you have an afternoon and the dessert matters.
One important detail if you do buy it: check that the label says 100% pure pumpkin, not pumpkin pie filling. Pie filling already contains sugar and spices, and it will throw off any recipe that calls for puree.
How to Roast It: It Depends on How You Buy It
Peeling a raw pumpkin is the most annoying part of this whole recipe, and you can skip it entirely. The only thing that changes is how the pumpkin goes into the oven, and you do not get to choose that: it depends on how you bought it.
If You Have a Whole Pumpkin
Cut it in half from top to bottom and scoop out the seeds with a spoon. Do not peel it, and do not cut it into pieces.
Place both halves on parchment paper cut side down and roast them just like that. Once it is tender, flip the halves, let them cool for a few minutes, and the flesh scoops right out with a spoon, coming away from the skin with no effort at all. From there, straight into the blender.
To cut it without a fight: slice a thin piece off the bottom so it sits flat on the cutting board, and use the biggest knife you have. If it is still too hard, 2 to 3 minutes in the microwave softens it enough.
If You Bought It Pre-Cut
Then there is nothing to do. Pre-cut butternut squash cubes from the grocery store work perfectly. Spread them on parchment paper in a single layer, not touching, and into the oven. Crowded together, they steam in their own moisture, which is exactly what we are trying to avoid.
The difference between the two, in case you are wondering: cut side down, the halves are sealed against the paper and cook partly in their own steam, so the puree comes out a bit wetter and needs a few more minutes in the skillet. Loose cubes have every side exposed to dry heat, they brown at the edges, and they taste a little deeper.
Do not overthink it: the skillet evens them out. The only real difference is how long you will be stirring.
Why We Roast It Instead of Boiling It
This is the first thing to understand, because it decides everything else.
In the oven, pumpkin loses water. Dry heat evaporates it, and the sugars concentrate and caramelize a little at the edges. You get a thicker puree with much more flavor.
Boiled, pumpkin gains water. It cooks surrounded by liquid and soaks some of it up. You end up with more puree, sure, but much looser, and you have to cook it down twice as long to get to the same point. More work for a worse result.
We always roast it, and we have never tried steaming. Our guess is it would land somewhere in between: better than boiled, but noticeably wetter than roasted.
The Two Steps Almost Nobody Does
The Strainer: Silky vs. Stringy
No matter how well you blend it, pumpkin leaves fibers behind. You cannot see them in the bowl, but you can feel them, and they are what makes homemade puree taste like a vegetable mash instead of a baking ingredient.
The fix is to push it through a fine-mesh strainer with a spatula. It is a bit of an arm workout and takes about five minutes, but it is the step that gives you that silky texture you will notice in everything you make with it.
If you have a food mill, even better.
The Skillet: The Spatula Test
This is where puree becomes real puree.
Use a wide skillet, the biggest one you have, over medium low heat, stirring often. The more surface area, the faster the water evaporates. It takes 15 to 25 minutes depending on how watery your pumpkin was.
Heads up: it spatters like lava. Keep a lid half on between stirs, or turn the heat down.
To know when to stop, there is a test that never fails: drag the spatula across the bottom of the skillet and watch the trail. If it takes a second to close, it is ready. If the puree floods back over the bottom right away, it needs more time.
Another quick check: put a little on a spoon and turn it upside down. Thick puree clings. Watery puree slides right off.
Which Pumpkin to Buy (and Which to Skip)
What you want is dense flesh, deep orange color, and not much water.
The ones that work best:
- Sugar pumpkin, also called pie pumpkin. Small, round, and sold everywhere in the fall. This is the classic choice.
- Butternut squash. Available all year, sweet, and a great yield. If you have ever wondered whether it “counts” as pumpkin puree: Libby’s, the best-selling canned brand, uses its own Dickinson variety, which is the same species as butternut.
- Kabocha or red kuri. If you can find one, it is the best of all: very little water, a flavor close to chestnut, and it cooks down in half the time.
The one to skip: the big carving pumpkin you buy for Halloween. It is mostly water, has thin flesh, and very little flavor. You would spend an hour cooking it down to end up with a few spoonfuls of something bland.
How Much Pumpkin You Need: Yield Chart
This is the grocery store question, and the short answer is that a whole pumpkin gives you a little over 40% of its weight in thick puree. If you buy it pre-cut, a little over half.
| Puree you need | Canned equivalent | Whole pumpkin | Pre-cut pumpkin |
|---|---|---|---|
| 250 g (1 cup) | about ½ can | 600 g (1.3 lb) | 460 g (1 lb) |
| 425 g (1¾ cups) | 1 can (15 oz) | 1 kg (2.2 lb) | 800 g (1.8 lb) |
| 650 g (2⅔ cups) | about 1½ cans | 1.5 kg (3.3 lb) | 1.2 kg (2.6 lb) |
| 850 g (3½ cups) | 2 cans | 2 kg (4.4 lb) | 1.6 kg (3.5 lb) |
The highlighted row is our standard batch, and the one in the recipe card above.
These numbers are rounded up on purpose, because running short halfway through a recipe is much worse than having a little left over. And they are approximate: a kabocha gives you quite a bit more than a large, watery butternut, and a pumpkin with a big seed cavity gives you less.
Practical tip: make more than you need. The process takes just as long for one can as it does for three, and the extra freezes perfectly.
How to Store and Freeze It
In the fridge, in an airtight container, it keeps well for 4 to 5 days. Let it cool completely before you close the lid, or the condensation puts back some of the water you just worked to remove.
In the freezer is where it really shines, because it is an ingredient and you rarely use it all at once. Two ways:
- In 425 g (1¾ cups) portions, which is exactly one can. Freeze them flat in labeled freezer bags. Flat bags take up no space and thaw quickly, and whenever a recipe calls for a can, you grab one bag.
- In an ice cube tray, if you will use it by the spoonful for smoothies or lattes. Once frozen, move the cubes into a bag.
It keeps for 3 months with no loss in quality. Thaw it in the fridge, and if it releases some liquid, drain it off or give it a couple of minutes in the skillet.
What to Make With It
Anything that calls for canned pumpkin:
- Pumpkin pie, the classic. It swaps 1:1 for the can, and the flavor difference shows here more than anywhere.
- Pumpkin bread and muffins.
- No-bake pumpkin cheesecake. This is what the method was designed for: it needs very thick puree, so all the work pays off here.
- Pumpkin bagels. Shaped like little pumpkins with kitchen twine. For these you don’t even need to cook the puree down: roasted and blended is enough.
- Pumpkin spice latte.
- Soups, risotto, and pasta sauces, thinned with a little broth.
Pumpkin Puree FAQ
Do I have to peel the pumpkin?
No, and that is one of the best things about this method. If it is whole, cut it in half, scoop out the seeds, and roast it with the skin on and the cut side down. Once it comes out of the oven, the flesh separates from the skin with a spoon, no effort needed. Peeling a raw pumpkin is tedious and a little risky, and there is simply no reason to do it.
Is canned pumpkin the same as pumpkin puree?
Yes. A can labeled “100% pure pumpkin” is pumpkin puree, and you can use it straight from the can in any recipe that calls for puree. What is not the same is canned pumpkin pie filling, which already has sugar and spices added. Check the label: if it lists anything besides pumpkin, it is pie filling.
How many cups are in a can of pumpkin puree?
A standard 15 oz can holds about 1¾ cups, or 425 g. One batch of this recipe makes about 650 g, which is roughly 1½ cans. If you freeze it, portioning it into 425 g bags means you always have “one can” ready to go.
What is the best pumpkin for pumpkin puree?
Sugar pumpkins, also called pie pumpkins, are the classic choice and easy to find in the fall. Butternut squash works just as well and is available all year. And if you can find a kabocha or red kuri, those are the best of all: very little water, a lovely flavor, and they cook down in half the time.
Can I use a carving pumpkin?
We would not. The big pumpkins sold for jack-o’-lanterns are mostly water, with thin flesh and very little flavor. You would spend a long time cooking the puree down only to end up with a small amount of something bland. Carve that one, and buy a sugar pumpkin or a butternut to cook with.
Can I boil or steam the pumpkin instead of roasting it?
You can, but it is more work for a worse result. Boiled pumpkin soaks up water instead of losing it, so you would need to cook the puree down much longer to reach the same thickness. Roasting does the opposite: it drives off water and concentrates the sugars, and you can taste the difference. We have not tried steaming, but we would expect it to fall somewhere in between.
Can I make pumpkin puree without an oven?
Yes, though roasting gives the best result. The air fryer works well if you use pre-cut pieces (see below). An Instant Pot or a pot of simmering water will also cook the pumpkin, but both cook it with steam or water, so the puree comes out wetter and needs more time in the skillet. We have not tested either ourselves, which is why we stick with the oven.
Can I roast the pumpkin in an air fryer?
Yes, and it works quite well because the moving hot air dries it out even more. This only works with pre-cut pieces, since pumpkin halves will not fit: about 180 °C (350 °F) for 25 to 30 minutes, in a single layer, shaking the basket halfway through. You will probably need a few batches, which is why we still prefer the oven for larger amounts.
Do I really need to strain it?
You can skip it and the puree will still taste good. What you lose is texture: unstrained puree has fibers you can feel, and in a pie, a cheesecake, or a latte, you notice them. If it is going into a soup, skip it without a second thought. If it is for baking, those five minutes are worth it.
How do I know it is thick enough?
Use the spatula test: drag the spatula across the bottom of the skillet and see how long the trail stays open. If it holds for a second, it is ready. If the puree floods back right away, keep cooking. Another quick check is to put a little on a spoon and turn it upside down: thick puree clings, watery puree slides right off.
How long does homemade pumpkin puree last in the fridge?
In an airtight container, 4 to 5 days. Let it cool completely before you close it, because condensation will put back some of the water you worked to remove.
How do I freeze pumpkin puree?
Portion it into 425 g (1¾ cup) amounts, which is one can each, and freeze them flat in labeled freezer bags. They stack neatly and thaw quickly. For smaller amounts, freeze it in an ice cube tray and move the cubes to a bag. It keeps for 3 months. Thaw it in the fridge, and if it releases a little liquid, drain it off or give it a couple of minutes in the skillet.
Can I can pumpkin puree at home?
No, and this one matters. The USDA advises against home canning pumpkin puree because it is so dense that heat cannot reliably reach the center of the jar, even in a pressure canner. Only cubed pumpkin can be pressure canned safely at home. For puree, the freezer is the safe way to keep it long term.
What can I use as a substitute for pumpkin puree?
Butternut squash puree is the closest match and swaps 1:1. It is made exactly the same way. Sweet potato puree also works 1:1 in most baked goods, with a slightly sweeter, denser result.
Can I use pumpkin puree in savory recipes?
Absolutely. This puree is unseasoned, so it works just as well in soups, risotto, pasta sauces, or mashed with a little butter and salt as a side dish. For savory uses you do not need to cook it down as much, so you can shorten the skillet time.
Did You Make This Homemade Pumpkin Puree?
If you made this, tell us how it went by leaving a star rating down below 👇 It really helps other people find this recipe. Tell us whether it came out nice and thick or something went wrong. We read and reply to every single comment 😊