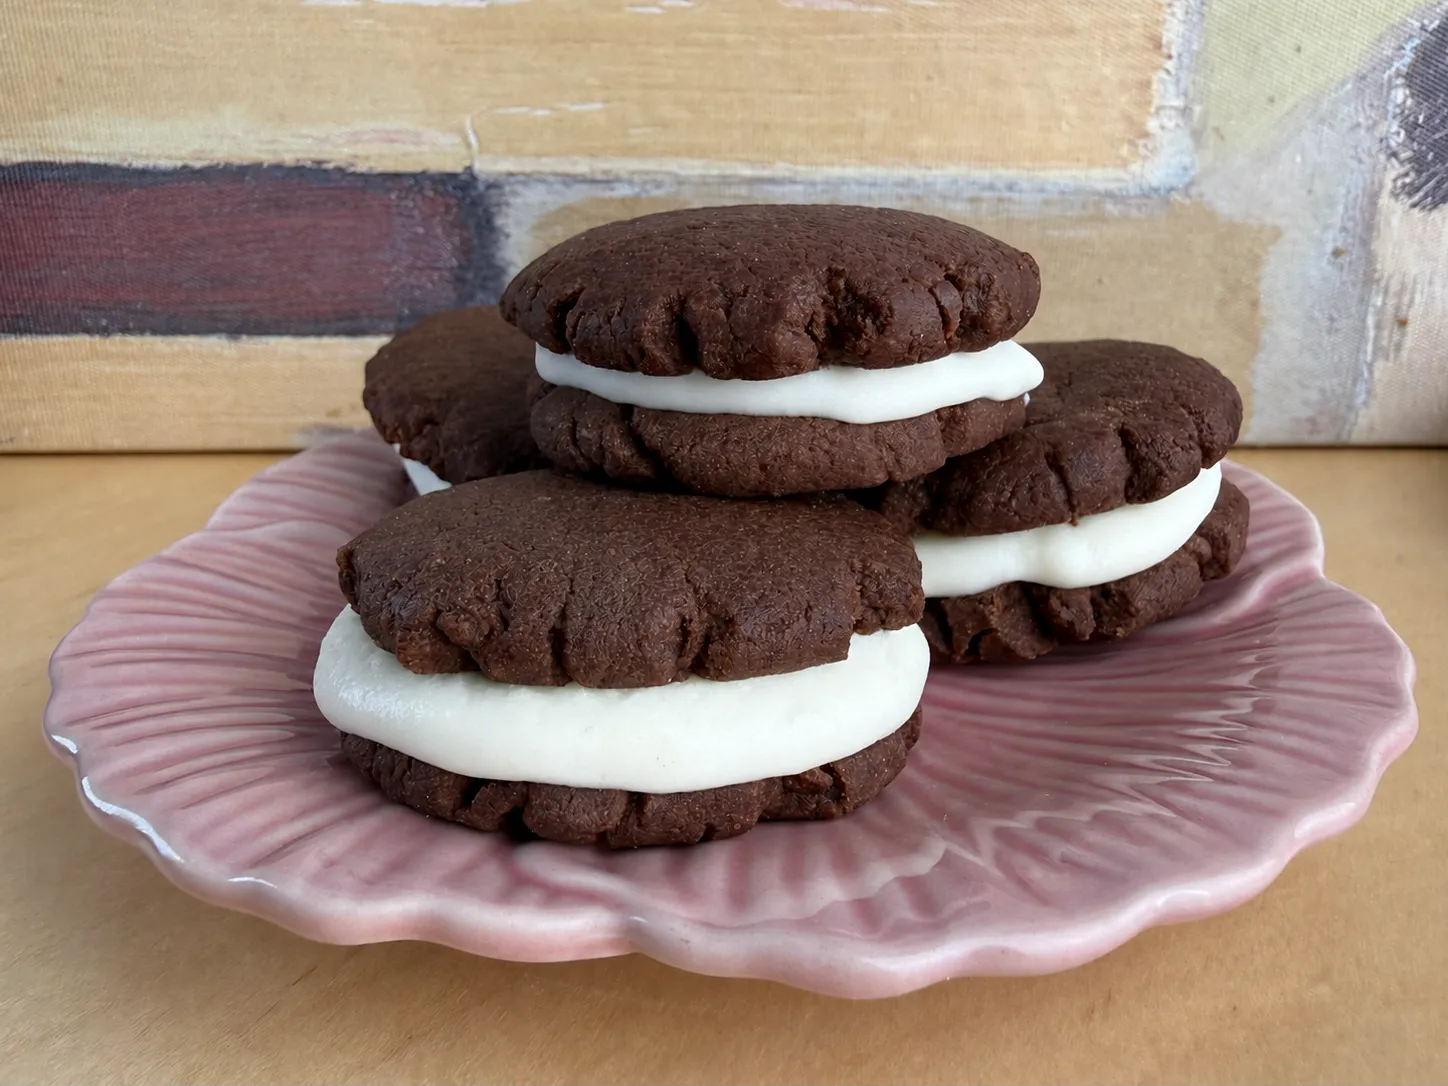
Homemade Oreo Cookies We Like Better Than the Box
These homemade Oreos took us more test batches than anything else on the blog. We wanted three things at once: cookies that snap instead of bending, a filling that doesn’t coat your mouth in sugar, and no special-order ingredients.
The filling was the hard part. Almost every recipe out there uses the same butter-and-powdered-sugar frosting, roughly one part butter to two parts sugar. It pipes beautifully and it looks the part, but between two cookies it gets heavy by the third one. Trading some of that sugar for 70 g of cream cheese fixed it: less sweet, slightly tangy, and it still holds its shape.
The cocoa was the other one. Most recipes call for black cocoa, which you have to order online. These use regular unsweetened cocoa from the grocery store, darkened with a quarter teaspoon of baking soda.
Makes 15 sandwich cookies. If you came here wanting to know what’s actually in an Oreo, the label comparison is right below the recipe.
Homemade Oreos
Ingredients
For the cookies
- 120 g all-purpose flour 1 cup, spooned and leveled
- 40 g natural unsweetened cocoa powder ½ cup, not Dutch-process, see note
- 1.5 g baking soda ¼ tsp, optional, for color only
- 75 g powdered sugar ⅔ cup
- 2 g fine salt ⅓ tsp, table or fine sea salt
- 90 g unsalted butter 6 tbsp + 1 tsp, cold from the fridge at 5-7 °C (40-45 °F), cut into 1 cm (½ inch) cubes
- 15 g whole milk 1 tbsp, cold
- 2 g vanilla extract ½ tsp
For the filling
- 75 g unsalted butter 5 tbsp + 1 tsp, at room temperature, gives to the touch but not shiny
- 110 g powdered sugar 1 cup, sifted
- 2 g fine salt ⅓ tsp
- 2 g vanilla extract ½ tsp
- 70 g cream cheese 5 tbsp (2.5 oz), room temperature
Instructions
The cookies
- Stir the baking soda into a tablespoon of the flour in a small cup, so it disperses evenly.
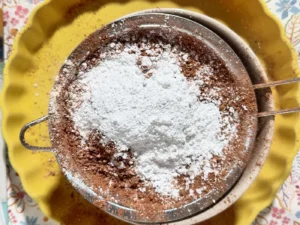
- Combine the flour, cocoa, powdered sugar, salt and the baking soda mixture in a bowl. Sift everything into a second bowl, pressing any lumps through the mesh with the back of a spoon.
- Add the cold butter cubes and toss to coat. Cut the butter in with your fingertips, flattening each cube between your thumb and fingers, for 2 to 3 minutes, until the mixture looks like coarse crumbs. Shake the bowl sideways every 30 seconds to bring any remaining butter pieces to the surface.
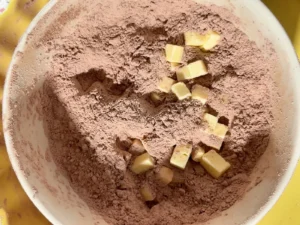
- Scatter the cold milk and vanilla over the top in several spots. Stir, then press the mixture against the bottom of the bowl five or six times until it comes together. If it stays crumbly, add 5 g (1 tsp) of softened butter and press twice more.
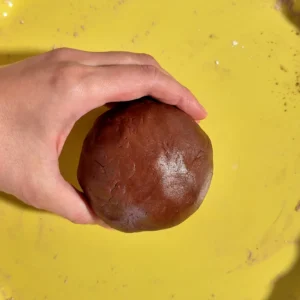
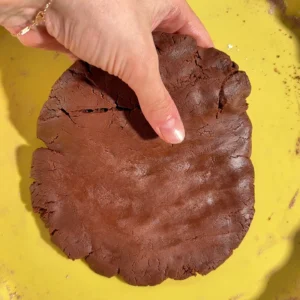
- Flatten the dough into a disc about 15 cm (6 inches) across and 2-3 cm (1 inch) thick, wrap it, and chill for 30 minutes.
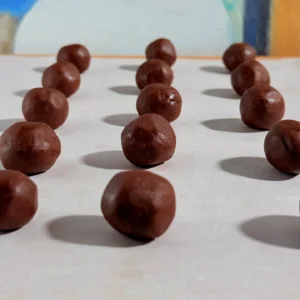
- Roll 12 g balls, about 2 cm (¾ inch) across, and space them 3 cm (1¼ inches) apart on a lined baking sheet.
- Flatten each ball with the flat base of a glass, pressing straight down without twisting, until they are 5-7 mm (¼ inch) thick. Dip the base in cocoa if it sticks.
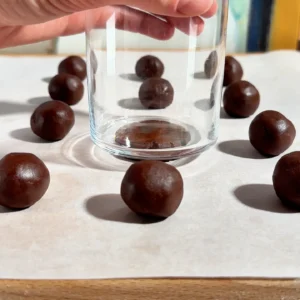
- Freeze the sheet for 20 minutes. Meanwhile, preheat the oven to 170 °C (340 °F), conventional heat.
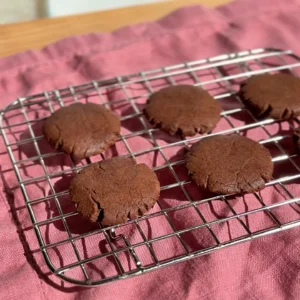
- Bake one sheet at a time on the center rack for 11 to 13 minutes. They're done when the surface turns from shiny to matte and the cookies no longer wobble when you move the pan.
- Let the sheet sit for 5 minutes, then move the wafers to a rack and cool completely, about 30 minutes.
The filling
- Beat the 75 g of butter on medium speed for 2 to 3 minutes, until pale and fluffy. Scrape the bowl halfway through.
- Sift the powdered sugar and add it in two additions, starting on the lowest speed each time and raising it once incorporated. Scrape between additions.
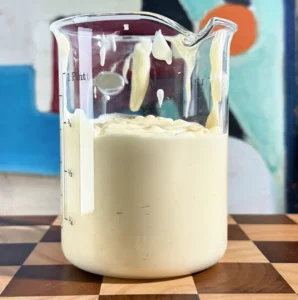
- Add the salt and vanilla and beat for a minute. Add the cream cheese on low speed for 30 to 40 seconds, only until smooth.
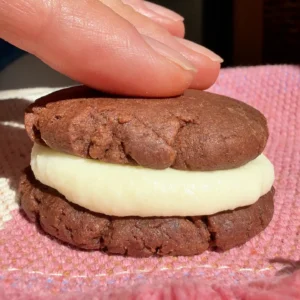
- Pipe or spoon a mound of filling onto half the wafers, leaving a ½ cm (¼ inch) border. Top with the remaining wafers and press straight down until the filling just reaches the edge.
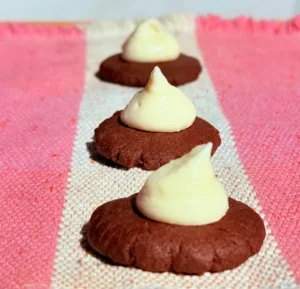
- Chill the assembled cookies for 30 minutes, in a single layer, before serving.
Video
Notes
- Use natural cocoa, not Dutch-process. Check your label: if it says “processed with alkali” or lists potassium carbonate, it has already been alkalized, and you should skip the baking soda. In the US, Hershey’s Natural Unsweetened is natural; Hershey’s Special Dark is not. In Europe, most supermarket cocoa is already alkalized.
- Oven temperatures: we bake these at 170 °C (340 °F). If your oven only works in 25-degree Fahrenheit steps, set it to 325 °F and start checking at 13 minutes.
- Keep the butter cold the whole time you are cutting it in. If the mixture turns shiny or starts sticking to your fingers, chill the bowl for 15 minutes and carry on.
- Use your fingertips only, never your palms. Fingertips are the coolest part of your hand and touch the least dough.
- They come out of the oven soft, every time. The snap sets as they cool, not in the oven.
- The cream cheese has to be at 18-20 °C (65-68 °F). Straight from the fridge it will split the filling into lumps that won’t smooth out.
- One standard US stick of butter is 8 tbsp or 113 g, so 90 g is just over three quarters of a stick.
- UK and Ireland: powdered sugar is icing sugar, all-purpose flour is plain flour, baking soda is bicarbonate of soda, plastic wrap is cling film, and parchment paper is baking parchment.
If you make this recipe, leave us a star rating ⭐️ It really helps us out ⭐️
What’s actually in an Oreo
If you came here wanting the label rather than the recipe, here it is, with ours next to it. Not to point fingers: a cookie that has to sit on a shelf for months has constraints a kitchen doesn’t. But you don’t have that problem at home, and that opens up a few different choices.
| Oreo (US label) | This recipe | |
|---|---|---|
| Flour | Unbleached enriched wheat flour | All-purpose flour |
| Cocoa | Cocoa, processed with alkali. No percentage declared | Natural unsweetened cocoa, 6.6% of the finished cookie |
| Fat | Palm and/or canola oil | Unsalted butter |
| Sugars | Sugar and high fructose corn syrup | Powdered sugar |
| Filling | Not listed separately on the label | Butter, powdered sugar and cream cheese |
| Leavening | Baking soda and/or calcium phosphate | None. The ¼ tsp of baking soda is there for color |
| Emulsifier | Soy lecithin | None |
| Vanilla | Artificial flavor | Vanilla extract |
| Sugar per 100 g | About 41 g | About 31 g |
The cocoa. US labels don’t declare percentages, so there’s no direct comparison to make. For scale: the European label, where declaring it is required, puts it at 4.7%, and ours works out at 6.6% of the assembled cookie. Formulas do differ by region, so treat that as a ballpark rather than a head-to-head. What isn’t a ballpark is the taste: these read as more cocoa and less sweet, and that’s the difference you notice first.
The fat. Palm and canola oil are solid or stable at room temperature and hold up for months. At home you don’t need that, because these get eaten in three days, so you can use butter and get flavor instead. It’s the change that shows up most in the filling.
The alkali. This is the interesting one. The label says the cocoa is processed with alkali, which is the industrial version of what the ¼ teaspoon of baking soda does in this recipe: it neutralizes the acid in the cocoa, deepens the color and rounds off the flavor. Keep that phrase in mind, because you’re about to go look for it on your own cocoa tin.
The flour. Enriched flour just means the B vitamins and iron lost in milling have been added back. It’s standard fortification in the US, not something bolted on to this particular cookie.
What doesn’t change. This is still a butter-and-sugar cookie, same as the other one. It has around 31 g of sugar per 100 g instead of 41, the fat is butter, and there’s no emulsifier or artificial flavor because a home kitchen doesn’t need them. But it isn’t a light dessert and it isn’t trying to be. Each assembled cookie is about 38 g, noticeably bigger than an Oreo.
Homemade Oreo Filling: Why We Use Cream Cheese
The filling took more attempts than the cookie did. Every homemade version we tried uses the same thing: butter and powdered sugar, roughly one part butter to two parts sugar. It whips up white, it pipes cleanly, it looks right. But stacked between two cookies it turns heavy fast, and that was the one thing we didn’t want.
The problem isn’t the butter, it’s the ratio. A classic filling like that runs around 65% sugar. Ours sits at 42%, and what fills the gap is cream cheese.
What’s in the filling of a real Oreo
Here’s the part most people don’t know: there’s no cream in it. The white filling contains no dairy at all, and because the FDA reserves the word cream for products that actually contain it, the package has to say creme. That spelling isn’t a stylistic choice, it’s a legal one.
The label is a single list for the whole cookie, so the exact filling formula isn’t public. What you can tell from the ingredients is that the fats are palm and canola oil and the sweeteners are sugar and high fructose corn syrup, with soy lecithin and artificial flavor doing the rest.
That’s also why it keeps for months on a shelf. A filling made of vegetable fat and sugar barely changes. Ours doesn’t have that quality, and that trade-off matters, which we get to further down.
One more thing worth clearing up, because it confuses a lot of people: the may contain milk warning on the package refers to shared factory equipment, not to an ingredient.
What the cream cheese actually does
Three things.
It cuts the sweetness without losing body. If you simply use less sugar in a buttercream, it goes soft and squeezes out when you press the top cookie on. Cream cheese takes up that volume and holds the structure.
It adds acidity. This is the part you actually taste. The wafer has 40 g of cocoa in it and carries real bitterness, and a filling that’s only sweet fights that instead of balancing it. A little tang settles it, the same way it does in a cheesecake.
It tastes like dairy, which a vegetable-fat filling can’t. That’s what makes these read as a bakery cookie rather than a packaged one.
Temperature is the whole game
This is where the filling goes wrong, and it’s always the same thing.
Butter at 18 °C (65 °F). It should give when you press it, without looking soft or shiny. Take it out 30 to 40 minutes ahead, or 20 if your kitchen runs warm.
Cream cheese at 18-20 °C (65-68 °F), same as the butter. This is the most common mistake by a wide margin: cold cream cheese hitting whipped butter splits the mixture into white lumps that won’t smooth out no matter how long you beat. Take both out at the same time.
And one rule with no exceptions: no milk, no water, ever. If the filling feels stiff, it isn’t short of liquid, the butter is just too cold. Wait ten minutes and beat it again.
How to make it without cream cheese
For the classic version, leave out the 70 g of cream cheese and keep everything else the same. You end up with 75 g of butter to 110 g of powdered sugar, which is still noticeably less sweet than the usual ratio.
It comes out firmer, whiter and quite a bit sweeter. It also has one practical advantage: without cream cheese, the assembled cookies keep at room temperature in an airtight container, so if you’re packing these to take somewhere or giving them away, this is the version you want.
Other ways to use homemade Oreo cream
The recipe makes enough for 15 cookies and you’ll usually have some left. It keeps 3 days covered in the fridge. Take it out an hour before you use it and beat it for a minute or two on low to bring the texture back.
It works as a filling for a chocolate layer cake, spread on toast or any plain cookie, and as frosting for cupcakes. For covering a cake it’s softer than a standard buttercream because of the cream cheese, so drop 20 g of cream cheese if that’s what you’re making.
The Cocoa: Why Baking Soda Darkens It
The color of an Oreo doesn’t come from chocolate, it comes from how the cocoa was treated. That’s why almost every homemade Oreo recipe tells you to buy black cocoa, which is a special order for most people.
You don’t need it. A quarter teaspoon of baking soda takes ordinary unsweetened cocoa to a deep, dark brown that reads exactly right once the cookie is baked. Here’s why that works, and the one situation where you should skip it.
Why natural cocoa is acidic, and what the baking soda does
Untreated cocoa is acidic, sitting around pH 5. That acidity does two things: it holds the powder at a dull reddish brown, and it leaves a sharp edge in the flavor.
Add baking soda and that acid is neutralized. The pigments in cocoa shift color as the pH rises, the powder goes deep brown, and the flavor rounds out. It’s the same principle behind an American devil’s food cake coming out nearly black.
The reaction also releases a little gas, so the cookie ends up slightly less dense. At ¼ teaspoon the leavening effect is small, but you notice it in the bite.
One practical note on the method: you’re spreading 1.5 g of baking soda through 235 g of dry ingredients, and this dough barely gets mixed. Stirring it into a tablespoon of flour first is what stops it from landing in clumps.
Natural vs Dutch-process: how to read your label
Turn the tin around and read the ingredients.
If it says “processed with alkali”, or lists potassium carbonate among the ingredients, your cocoa has already been treated at the factory. That’s Dutch-process cocoa. You’ll recognize the phrase: it’s the same wording on the Oreo package.
If the label says nothing of the kind, your cocoa is natural, and the baking soda will do its job.
In the US, the everyday supermarket tin is usually natural. Hershey’s Natural Unsweetened is natural; Hershey’s Special Dark is a blend that includes alkalized cocoa. In Europe it tends to go the other way, and most supermarket cocoa is already alkalized, so check before you assume.
If your cocoa is Dutch-process, leave the baking soda out. There’s no acid left to neutralize, so you gain no color and the baking soda stays loose in the dough, which leaves a soapy aftertaste. And don’t worry about how they’ll look: Dutch-process cocoa starts out darker anyway, so your cookies will come out much the same as ours.
Do you need black cocoa?
No, and we’d argue against it even if you have some.
Black cocoa is the extreme end of the same process: cocoa alkalized as far as it goes, until it’s nearly black and very mild. It gives you that packaged-cookie color and flavor, but it tastes considerably less of cocoa than a natural powder does. These cookies are better than the original partly because they taste more of cocoa, and black cocoa gives that back.
It’s also drier and more absorbent, so a dough made entirely with it comes out tough. If you want to use it anyway, swap in about a third and keep the rest regular cocoa. And skip the baking soda, obviously.
What happens if you skip the baking soda
Nothing dramatic. The cookies bake the same, snap the same, and taste good. They come out lighter in color, with a sharper edge to the flavor and a slightly denser crumb. Not the same cookie, but a perfectly good one.
If you do use it, check that yours is still alive. Drop a teaspoon into a cup with a splash of vinegar: it should fizz hard and immediately. Give it a sniff too, because baking soda picks up whatever the cupboard smells of, and that ends up in the cookie.
Three Places This Recipe Goes Wrong
It’s a short ingredient list with no leavening to hide behind, so the result comes down almost entirely to how you handle the dough. There are three specific points where it’s decided whether these snap or turn chewy, and if you’re clear on them the recipe works first time.
Cutting in the butter without melting it
This is the most important step and the one most people get wrong.
What you’re doing is coating every particle of flour in fat. Flour forms gluten the moment it meets water, and gluten makes dough elastic and chewy. If each particle is wrapped in butter, the water can’t reach it properly and very little gluten forms. That’s what gives you a short, brittle cookie that snaps instead of bending.
Which means the butter has to stay as solid pieces the whole way through. Once it melts it stops coating and starts soaking in: the dough turns greasy, spreads in the oven, and loses the snap.
The detail almost nobody mentions: use your fingertips only, never your palms. Your hands run at 37 °C (98 °F) and butter starts softening around 20 °C (68 °F). Fingertips are the coolest part of your hand and touch far less dough. Palms are warm and broad.
How you know it’s right. You’re looking for coarse breadcrumbs, like wet sand or the crumble topping on an apple crisp. Everything looks brown because of the cocoa, so go by feel rather than sight. Grab a handful and squeeze: if it roughly holds its shape when you open your hand, it’s ready. If it falls apart like loose flour, keep going. Uneven sizes are a good sign, and the slightly larger pieces are what give you the flaky texture.
A trick so you’re not working blind: shake the bowl side to side every 30 seconds. Any butter pieces still intact float to the surface because they’re lighter than the dry mix. It shows you what’s left to do without digging around.
If you’ve gone too far. The sign is that the mixture clumps on its own, looks shiny, and starts sticking to your fingers as a paste. Don’t throw it out: put the whole bowl in the fridge for 15 minutes and carry on. The butter re-solidifies. If your kitchen is warm, chill the bowl and your hands under cold water first and dry them well, and work away from the oven if it’s already preheating.
This takes 2 to 3 minutes, not ten. You don’t need to rush, you just shouldn’t wander off halfway through.
With a stand mixer: paddle attachment, never the whisk. Dry ingredients and cold butter cubes in the bowl, low speed, 1 to 2 minutes until it looks like crumbs. It works just as well and skips the heat from your hands.
Why they go in the freezer before the oven
Rolling and flattening the dough means handling it, and the butter you kept cold softens again. Put them in the oven like that and the fat melts before the cookie sets, so the disc spreads out thin and soft.
Twenty minutes in the freezer brings the butter back to solid. It takes longer to melt in the oven, and by the time it does the structure has already set. The cookie keeps its thickness and a clean edge.
Freezer to hot oven, directly. Don’t let them sit on the counter while the oven comes up to temperature, or you give back exactly what you gained.
If you’re baking two sheets, roll and flatten the second batch on parchment too and leave it in the freezer while the first one bakes. Thirty minutes in there does no harm.
How to tell when they’re done when everything is brown
The usual test doesn’t work here. With a normal cookie you watch the edges turn golden, but these are dark brown from the first minute and color tells you nothing.
First sign: the surface goes from shiny to matte and dry. Turn the oven light on and look across them at an angle, not straight down.
Second sign: the cookies no longer wobble when you move the pan.
The test that settles it: take one out, leave it on the counter for 3 minutes, and break it. If it snaps, they’re done. If it bends, give them 2 more minutes.
And the thing that matters most: they come out of the oven soft, every single time. The snap sets as they cool, not in the oven. If you wait until they feel firm on the pan, you’ve overbaked them and they’ll be dry.
A note on your oven. Bake these on conventional heat, not convection. If your oven only runs on convection, drop it to 150 °C (300 °F) and start checking at 10 minutes, because the fan speeds up how fast the butter melts, which is the one thing this whole recipe is trying to slow down.
A note on your pans. Light aluminum half sheet pans are ideal. If yours are dark nonstick they run hotter underneath, so check at 10 minutes and expect the bottoms to color faster.
One sheet at a time, center rack, even if your oven has two. With two sheets in, the air doesn’t move properly and the lower one comes out pale and soft.
If any of that saved you a batch, tell us below. And if yours went wrong in a way that isn’t here, even better.
Variations
The dough and the filling take a fair amount of changing without touching the technique. These are the ones worth doing, and we’ve flagged which we’ve tested and which we haven’t.
Double Stuf
These already carry more filling than a packaged Oreo, about 17 g per cookie. If you want them properly stuffed anyway, take the filling up to 110 g butter, 165 g powdered sugar and 105 g cream cheese, keeping the same ratios.
Two warnings. You’ll need a piping bag, because at that volume a spoon won’t place it neatly. And press the top on more slowly, watching the edge, or it squeezes out the sides.
Mint
Add 1 g of peppermint extract to the filling along with the vanilla, and drop the vanilla from 2 g to 1 g. Mint buries vanilla if you use the same amount of both.
Start at 1 g and taste before adding more. Peppermint extracts vary a lot between brands and it’s easy to overshoot. Skip the green food coloring: white against a dark cookie already looks the part.
A hint of coffee
Add 2 g of instant espresso powder to the dry ingredients before sifting. It doesn’t taste of coffee, it makes the cocoa taste more like cocoa. Same trick as in a chocolate layer cake.
Flaky salt
Scatter a little flaky salt over the flattened discs right before they go in the freezer, pressing very lightly so it sticks. Added after baking it just falls off.
It changes the cookie more than you’d expect: the contrast against the sweet filling works well, and it reads clearly in a close-up.
Mini Oreos
Roll 5 g balls instead of 12 g, flatten to 3-4 mm (⅛ inch), and bake 8 to 9 minutes. You get about 35 sandwich cookies instead of 15.
Good for a cookie tray, and for topping ice cream or cakes. Watch the oven closely, because the window between done and overdone is much narrower.
Using them in something else
Crushed, they make a cheesecake base, a mix-in for no-churn ice cream, or a coating for truffles. If you’re crushing them, bake the wafers only and skip the filling: with cream inside they go soft and the base won’t set crisp.
How to Store Homemade Oreos
First thing, because it’s the mistake people make: these live in the fridge. The filling has cream cheese in it, so they can’t sit out in a jar on the counter like a regular cookie.
Assembled cookies
In the fridge, airtight, up to 3 days.
Over time the moisture in the filling softens the wafer from the inside. They’re still good, but the maximum snap is on day one. If the crunch is what you’re after, assemble them the day you plan to eat them.
Take them out 2 or 3 minutes before serving. Straight from the fridge the filling is too firm to taste properly.
Wafers, unfilled
At room temperature, airtight, 5 days, and still crisp.
This is the best way to get ahead: bake one day, assemble the next. It’s also the version you want if you’re taking them somewhere, because assembled cookies don’t travel well without refrigeration.
The filling on its own
In the fridge, covered, up to 3 days.
It comes out stiff, so take it out an hour ahead and beat it for a minute or two on low to bring the texture back. Don’t add liquid to soften it, just time.
The raw dough
The wrapped disc keeps up to 24 hours in the fridge. If you leave it longer than the initial 2 hours, take it out 15 minutes before rolling, because it gets very hard and cracks when you flatten it.
Freezing
Assembled, up to a month. Layer them with parchment so they don’t stick together and keep them airtight.
And this is the best thing about the recipe: eat them straight from the freezer, no thawing. The filling sets firm like ice cream and the wafer snaps harder than it does fresh. We like them better this way than on day one.
Can you mail these?
Not assembled. Cream cheese filling and a few days in transit don’t go together.
The wafers on their own ship fine, packed snugly in a tin so they don’t rattle, with the filling made at the other end. If the whole cookie has to travel, use the no-cream-cheese version from the filling section, which keeps at room temperature.
Frequently Asked Questions about homemade Oreos
Why did mine come out soft?
Almost always one of three things. The butter melted while you were cutting it in, you skipped the freezer, or you took them out of the oven too late rather than too early.
The last one catches most people, because they come out soft every time and the snap arrives as they cool. If they spread flat on the pan instead, that was the butter. All three are covered in the section on where this goes wrong.
Are Oreos dairy free? Are these?
The original has no dairy in it. The filling is made with vegetable fat rather than cream, which is why the package says creme rather than cream, and the may contain milk warning refers to shared factory equipment, not an ingredient.
These are not dairy free. They’re made with butter and cream cheese, and that’s precisely what makes them taste different.
Can I freeze them?
Yes, assembled, up to a month. Layer them with parchment so they don’t stick and keep them airtight.
Eat them straight from the freezer without thawing. The filling sets firm and the wafer snaps harder than it does fresh. It’s how we like them best.
Can I make these ahead?
Yes, and it’s the best way to do it. Unfilled wafers keep 5 days at room temperature in an airtight container, so you can bake one day and assemble the next.
The dough also holds up to 24 hours in the fridge, though take it out 15 minutes before rolling or it cracks. The filling keeps 3 days covered: take it out an hour ahead and beat it briefly on low.
Can I use margarine instead of butter?
You can, but we’d steer you away from it here. Margarine holds more water than butter, and that water forms gluten, which is exactly what this recipe is built to avoid.
You end up with a chewier cookie and a lot less flavor. In a cookie this short on ingredients, the fat is most of the taste.
Can I make these gluten free?
We haven’t tested it, so we can’t give you amounts. On paper this recipe should adapt better than most, because it’s designed to form as little gluten as possible and the structure comes from the butter rather than from a gluten network.
A 1-to-1 gluten free baking blend ought to work. If you try it, tell us in the comments and we’ll add it here.
Is this an Oreo biscuit recipe or a cookie recipe?
Same thing, different side of the Atlantic. If you’re in the UK or Ireland, this is an Oreo biscuit recipe, and the ingredient names translate as: powdered sugar is icing sugar, all-purpose flour is plain flour, and baking soda is bicarbonate of soda.
Are these healthier than store-bought Oreos?
They’re a butter and sugar cookie, same as the other one. What changes is around 31 g of sugar per 100 g instead of roughly 41, butter instead of palm and canola oil, and no emulsifier or artificial flavor because a home kitchen doesn’t need them.
That said, this isn’t a light dessert and isn’t trying to be. Each assembled cookie runs about 38 g, noticeably bigger than an Oreo. They taste good and you know exactly what’s in them, which is what we were after.
How do you make Oreo cookies from scratch?
Two thin chocolate wafers and a filling, and the whole thing takes about 40 minutes of actual work plus chilling time. The wafer is flour, cocoa, powdered sugar, cold butter, a splash of milk and vanilla, cut together like a shortcrust rather than creamed like a normal cookie dough.
That difference is the point: creaming makes a soft cookie, cutting in cold butter makes one that snaps. The full method is in the recipe card above.
Can you make homemade Oreos without black cocoa?
Yes, and that’s what this recipe does. Black cocoa is cocoa alkalized to the far end of the scale, and for most people it’s a special order.
Regular unsweetened cocoa gets you to a deep dark brown that reads right once baked. If yours is natural, ¼ teaspoon of baking soda takes it darker still. If it’s already Dutch-process, skip the baking soda, since it starts out darker anyway.
Did You Make These Homemade Oreos?
If you made these, tell us how they went by leaving a star rating down below 👇 It really helps other people find this recipe. Tell us whether they came out great or something went wrong. We read and reply to every single comment 😊