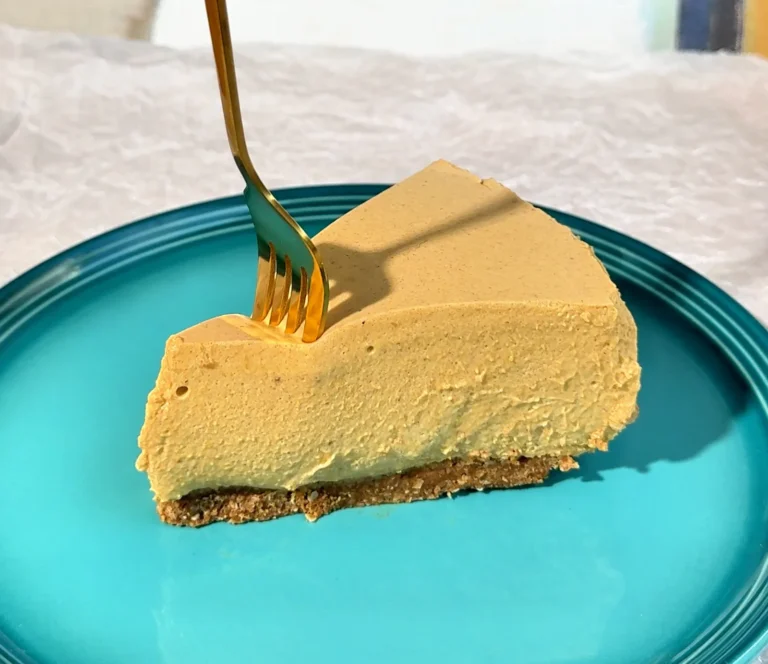
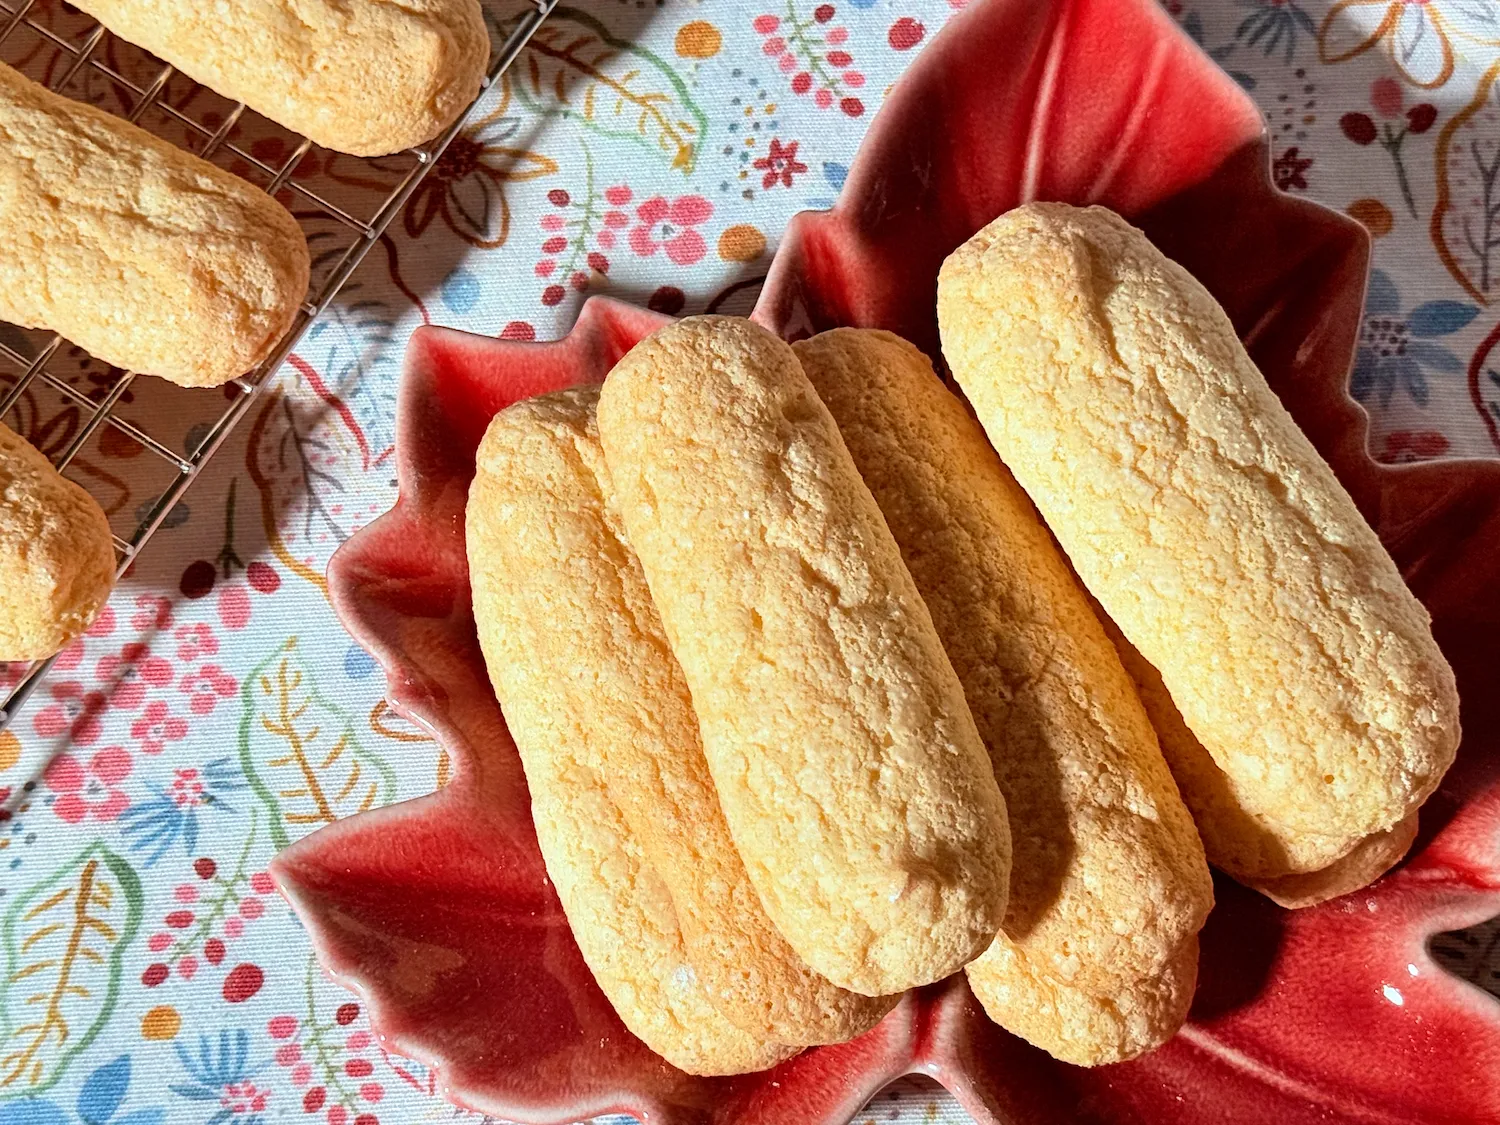
Homemade Ladyfingers for Tiramisu
This ladyfingers recipe started with a tiramisu. We were making our tiramisu without raw eggs and wondered whether we could make the ladyfingers at home too. It turns out we could, and they’re much easier than they look: about 20 minutes of hands-on work and just three ingredients, eggs, sugar and flour 🤗
They’re those long, light sponge biscuits you layer in tiramisu, charlottes and so many cream desserts. In Italy they’re savoiardi, in the UK they’re usually sponge fingers, and in Spain, soletillas. Further down we list what they’re called around the world.
There’s no baking powder and no butter. All the air comes from whipping the egg whites and the yolks separately, so the secret isn’t in the ingredients but in the technique. That’s why we take our time explaining it: how to tell when the meringue is ready, how to add the flour without deflating the batter, and how to bake and dry them so they come out crisp, like store-bought, and hold up to the coffee in a tiramisu.
Ours have just those three ingredients. If you have a package at home, flip it over and compare 😉
The full recipe is right below, and under it you’ll find every step explained in detail, in case it’s your first time whipping egg whites.
Homemade Ladyfingers Video
How We Make Them at Home, Step by Step

Homemade Ladyfingers (Savoiardi) for Tiramisu
Equipment
- Large stainless steel or glass bowl 2 to 3 liters (2 to 3 quarts), for the whites. Never plastic
- Small bowl For the yolks
- Electric mixer Balloon whisk beaters work best
- Wide silicone spatula For folding
- Fine-mesh sieve For the flour and the powdered sugar
- Piping bag with a plain round tip 1.2 to 1.5 cm (½ in). Or a zip-top bag
- Baking sheet
- Parchment paper or a silicone baking mat Not greased
- Wire rack For cooling
Ingredients
- 3 eggs US large or EU medium; 150-160 g without shells, at room temperature
- 60 g granulated sugar ¼ cup + 1 tbsp; for the egg whites
- 30 g granulated sugar 2½ tbsp; for the yolks
- 90 g cake flour ¾ cup; or all-purpose (plain) flour, weighing is best
- 0.5 g fine salt a pinch; optional
- 3 g vanilla extract ½ tsp; optional
- 5 g powdered sugar 2 tsp; optional, one light layer on top
Instructions
Before you start
- Preheat the oven. To 150 °C (300 °F), conventional setting with top and bottom heat, fan off. That way it has time to settle while you make the batter.
- Prepare the tray and the piping bag. Line the baking sheet with parchment paper or a silicone baking mat, without greasing it. Fit the tip into the bag and stand it in a tall glass with the top folded down over the rim.
- Clean the bowl for the whites. The bowl and the beaters must be perfectly clean and dry. If in doubt, wipe them with a paper towel and a few drops of lemon juice or vinegar, then dry them.
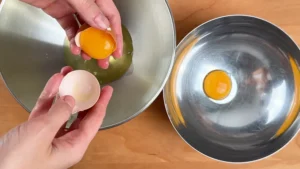
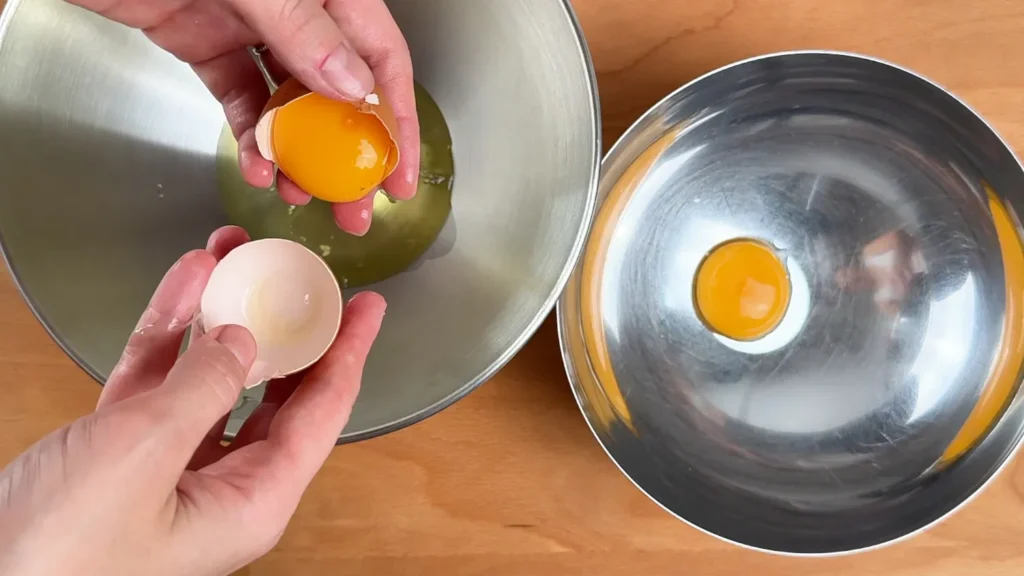
- Separate the eggs. The whites (about 95 g) into the large bowl and the yolks (55-60 g) into the small one. Separate each egg over a small bowl first: a single drop of yolk is enough to stop the whites from whipping properly.

- Weigh the flour. The 90 g, in a bowl, with the fine sieve next to it: you’ll sift it straight over the batter when it’s time to add it.
The meringue
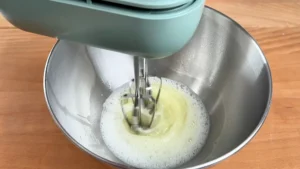
- Beat the whites. With the pinch of salt, if using, on medium speed, for 1 or 2 minutes, until they're white and foamy, like soap suds.
- Add the sugar in batches. The 60 g, in 4 or 5 additions, without stopping the mixer.
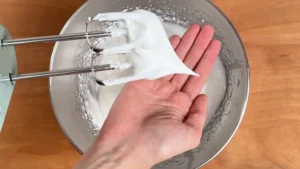
- Beat to stiff peaks. On medium-high, for 3 to 5 minutes, until the meringue is smooth and glossy and doesn't move when you tilt the bowl. Optional: beat the last 30 seconds on medium-low to make the bubbles finer.
The yolks
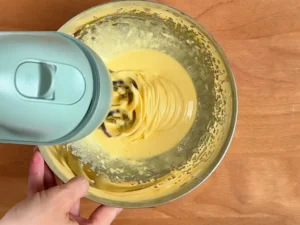
- Beat the yolks with the sugar. With the same beaters, unwashed, add the 30 g of sugar and the vanilla, if using, and start beating right away. For 3 to 4 minutes, until they're pale, have doubled in volume and fall in a ribbon that sits on the surface.

The batter
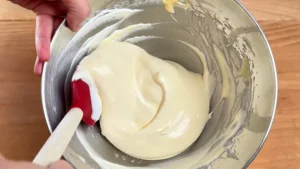
- Combine the yolks and the meringue. Pour half the yolks over the meringue and fold with the spatula, from the bottom up. When it's almost blended, add the other half. A few streaks are better than overmixing.
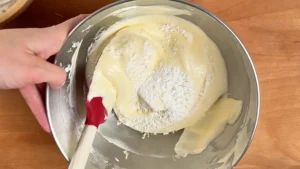
- Fold in the flour in batches. Sift a little over the top, cover it with 1 or 2 folding strokes and repeat until it's all in. Don't mix more than you need to: stop as soon as you can't see dry flour, checking the bottom of the bowl. The batter should be thick and fall from the spatula in clumps.
Pipe and bake
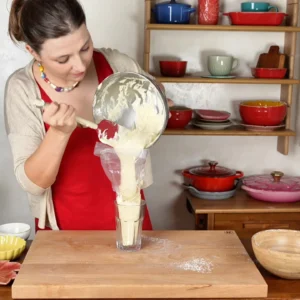
- Fill the piping bag. Gently, without pressing the batter. If you're using a zip-top bag, cut about 2 cm (¾ in) off one corner now.

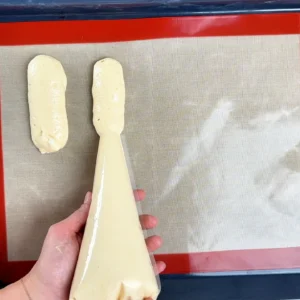
- Pipe the strips. With the bag at 45° and 1 cm (⅜ in) above the paper, strips 2 x 10 cm (¾ x 4 in), 2 to 3 cm (1 in) apart. Don't linger: the batter is losing air.
- Dust with powdered sugar. Optional. A single light layer, sifted from 20 to 30 cm (8 to 12 in) high, and straight into the oven: with no baking powder, the only air is in the egg whites, and it escapes while the batter sits.
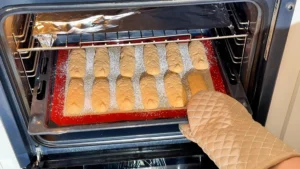
- Bake for 15 minutes. Tray on the middle rack or one lower, and don't open the oven for the first 10 minutes. They're done when they're pale golden and the surface is dry and firm.
- Dry them for 15 more minutes. At the same temperature, with a sheet of aluminum foil on the top rack or with bottom heat only, so they don't brown too much.
- Peel them off. With a silicone mat: slide it off the hot tray onto the counter and leave it for 5 minutes. Then lift one end of the mat and slowly bend it downward: the ladyfingers release on their own. With parchment paper: let them cool on the tray for 15 to 20 minutes. Then bring the paper to the edge of the table and, instead of lifting the ladyfingers, pull the paper downward so it's the paper that comes away from them.
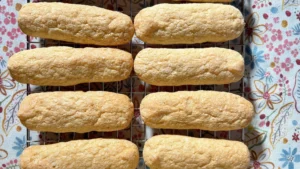
- Move them to a wire rack. Leave them until they're completely cool. Air circulates underneath, so the steam they still release doesn't soften the bottoms.
- Store them airtight. In an airtight container or a zip-top bag, at room temperature.
Notes
- Our recipe uses 3 ingredients. For a texture closer to store-bought ladyfingers, swap 15 g of the flour for 15 g of cornstarch: 75 g of flour and 15 g of cornstarch, mixed together before sifting.
- Are your eggs bigger? Adjust the flour and sugar with the egg size table.
- Use a stainless steel or glass bowl for the whites. Plastic holds on to fat and the whites won’t whip as well.
- If your home is humid, drying them in the oven is a must. Left out in the air, they soften instead of drying.
- With 10 cm (4 in) strips you get about 20. If you make them bigger, you get fewer: we made 12.
- They keep for a couple of weeks in an airtight container and can be frozen for up to 3 months.
- No vanilla extract? Here’s our homemade vanilla extract with 2 ingredients.
Any questions about the recipe? Ask us in the comments and we’ll get back to you. And if you make it, tell us how it turned out, we love hearing from you! 🤗
Before You Start: The Bowl and the Eggs
With this recipe, what happens before you switch on the mixer decides half the result. Three details, and they take two minutes.
Which Bowl to Use for the Egg Whites
You need two bowls: a large one, 2 to 3 liters (2 to 3 quarts), for the whites, and a smaller one for the yolks. The bowl for the whites matters more than it seems:
- No plastic. Plastic is porous and holds on to traces of fat even after washing, and fat stops egg whites from whipping.
- Stainless steel is the best option. It doesn’t hold fat, it’s light and it won’t break. With an electric mixer it’s very easy to knock the beaters against the side of the bowl.
- Glass and glazed ceramic work too, because they don’t hold fat. Just be more careful with the beaters.
- Avoid uncoated aluminum, which can turn the whites grayish.
Clean the Bowl and the Beaters
They need to be perfectly clean and dry. A single drop of fat is enough to stop the whites from whipping properly: the fat gets between the proteins in the white and keeps them from forming the walls that hold the air bubbles. You end up with a foam that won’t rise, or that rises and collapses right away.
If in doubt, wipe the bowl and the beaters with a paper towel and a few drops of lemon juice or vinegar, then dry them well. Ten seconds that save you from starting over.
Separate the Eggs One at a Time
Not a single drop of yolk can get into the whites. Even a tiny amount makes the meringue whip worse and come out softer.
That’s why it’s worth separating each egg over a separate small bowl and only adding the white to the large bowl once you see it’s clean. That way, if the third yolk breaks, you don’t lose the first two whites.
How to Tell When the Meringue Is Ready
Start by beating the whites with the pinch of salt on medium speed for 1 or 2 minutes, until they’re white and foamy, with small bubbles, like soap suds. The salt is only for flavor: in this amount it doesn’t help or hurt the whipping.
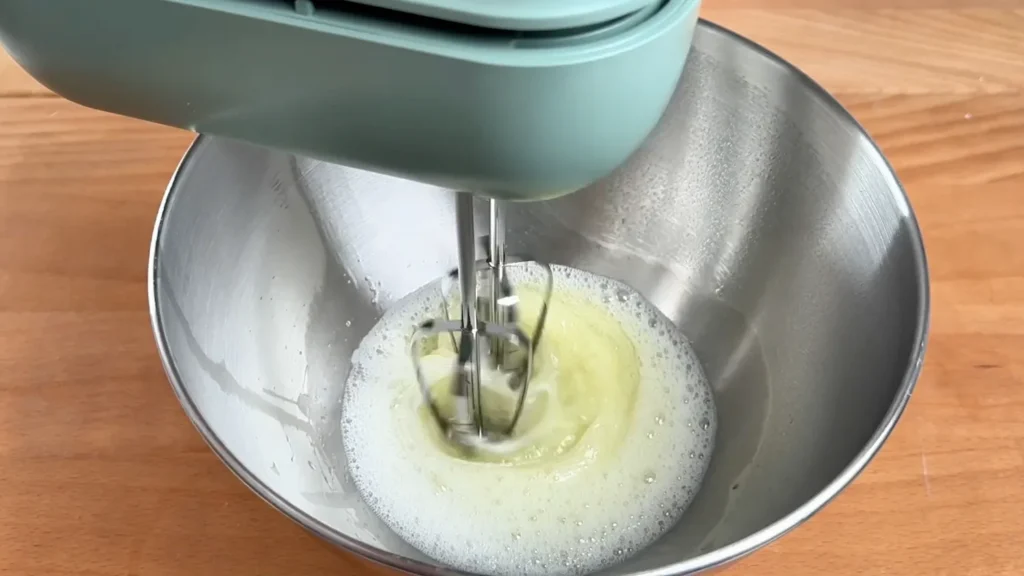
Then add the 60 g (¼ cup + 1 tbsp) of sugar a little at a time, in 4 or 5 additions, without stopping the mixer, and keep beating on medium-high for another 3 to 5 minutes. If it takes longer with your mixer, that’s fine: keep going until you reach the right point. With this much sugar, it’s very hard to overdo it.
An optional trick: for the last 30 seconds, drop to medium-low speed. Almost no new air goes in, but the beaters break the big bubbles into smaller ones, and the meringue holds up better when you fold it with the yolks and the flour.
Signs It’s Ready
It still needs more time if the tip droops and curls over when you lift the beaters, or if the whites slide when you tilt the bowl.
It’s ready when:
- the beaters leave clear marks on the surface that don’t fade on their own;
- when you tilt the bowl, the meringue stays put;
- when you lift the beaters, the peak stands up without falling;
- it looks smooth and glossy, like thick shaving foam.
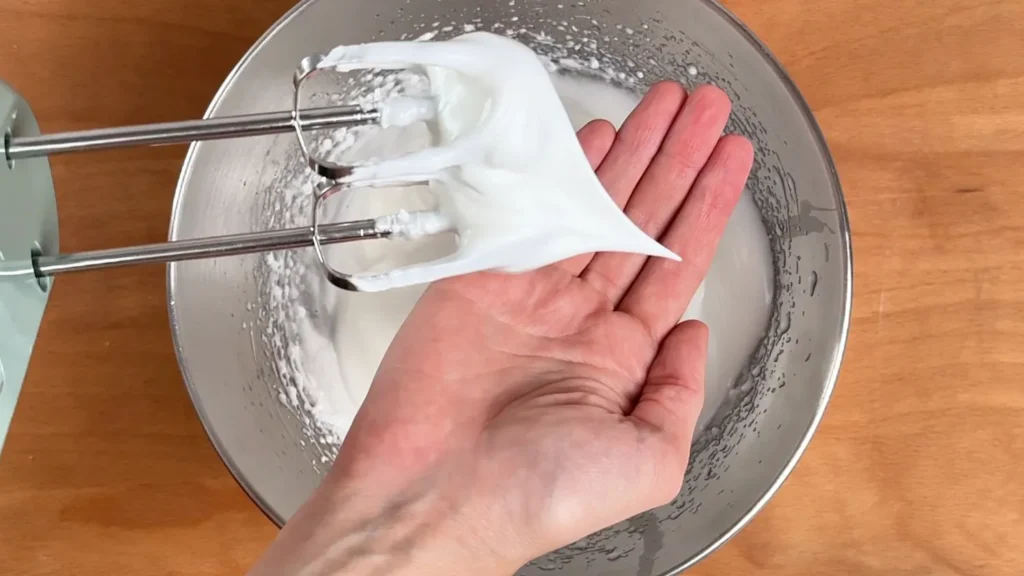
The tilted bowl is the most reliable test. And if you’re feeling brave, the extreme version: hold the bowl upside down over your head 😄
If You Overbeat It
The meringue loses its shine, looks matte and lumpy, like cotton, and sometimes leaks liquid at the bottom of the bowl. Then it’s hard to fold in and leaves little white lumps in the batter. As long as it’s smooth and glossy, you can keep beating without worry.
Whipping the Yolks to the Ribbon Stage
Don’t leave the meringue waiting long: go straight to the yolks. You can use the same beaters without washing them. Traces of meringue don’t bother the yolks, while the other way around would be a problem, because the fat in the yolk would stop the whites from whipping. That’s why the meringue goes first.
Add the 30 g (2½ tbsp) of sugar to the yolks and start beating right away. If you leave the sugar sitting on the yolks for a few minutes, it pulls water out of them and forms hard little lumps where they touch. Those lumps never fully dissolve.
If you’re using vanilla, add it now, with the sugar. Yolks contain fat and hold on to aromas well. Vanilla never goes into the whites, because the alcohol in the extract destabilizes the meringue. If you’d like to make your own, here’s our homemade vanilla extract with 2 ingredients.
Beat for 3 or 4 minutes. They’re ready when:
- they’ve turned pale yellow, much lighter than at the start;
- they’ve roughly doubled in volume and look thick and creamy;
- when you lift the beaters, they fall in a thick ribbon that sits on the surface for a couple of seconds before sinking. That’s the ribbon stage.
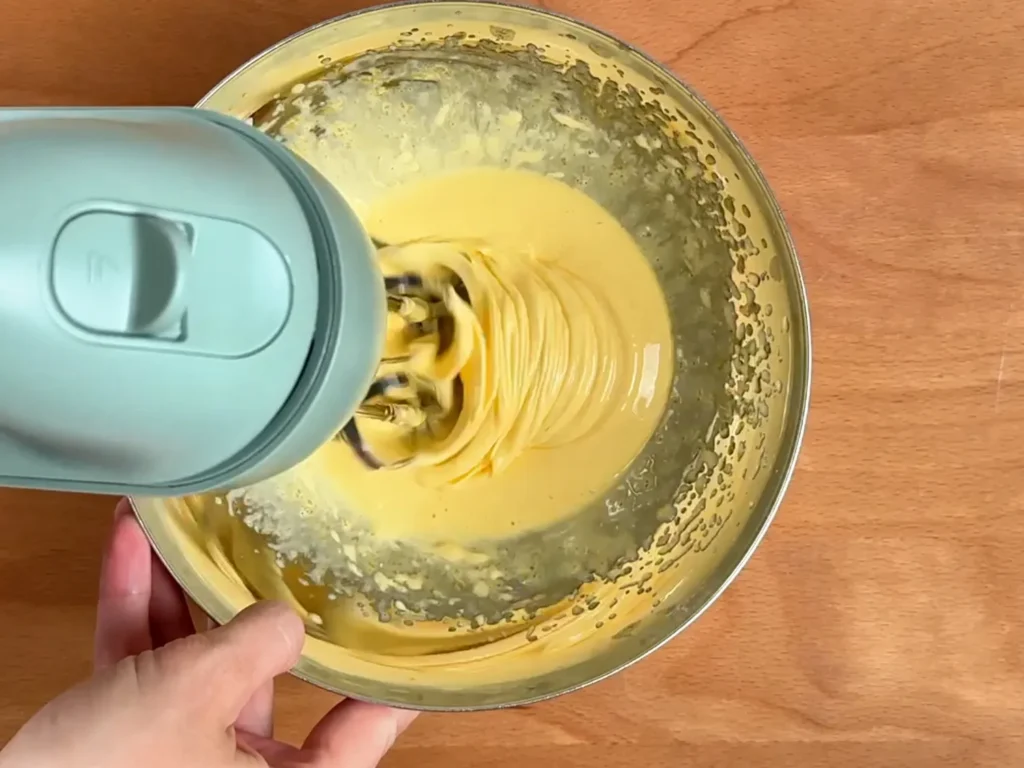
The yolks are whipped so they become light and close to the meringue in texture. That way they blend in with far fewer strokes and the batter deflates less. Runny yolks sink to the bottom of the bowl and force you to overmix.
You can also whip them by hand with a whisk, in about 6 to 8 minutes. They’ll be a little less airy, but it works, because most of the volume comes from the meringue.
How to Fold Without Deflating the Batter
This is where the result is won or lost. All the air you’ve beaten in can disappear here in half a minute.
First, add half the whipped yolks to the meringue and fold. When it’s almost blended, add the other half and keep going. The yolks go onto the meringue and not the other way around, because the meringue has much more volume and is already in the large bowl: moving it into the yolk bowl would knock air out just in the transfer. Stop when it’s almost even. A few white streaks are better than overmixing.
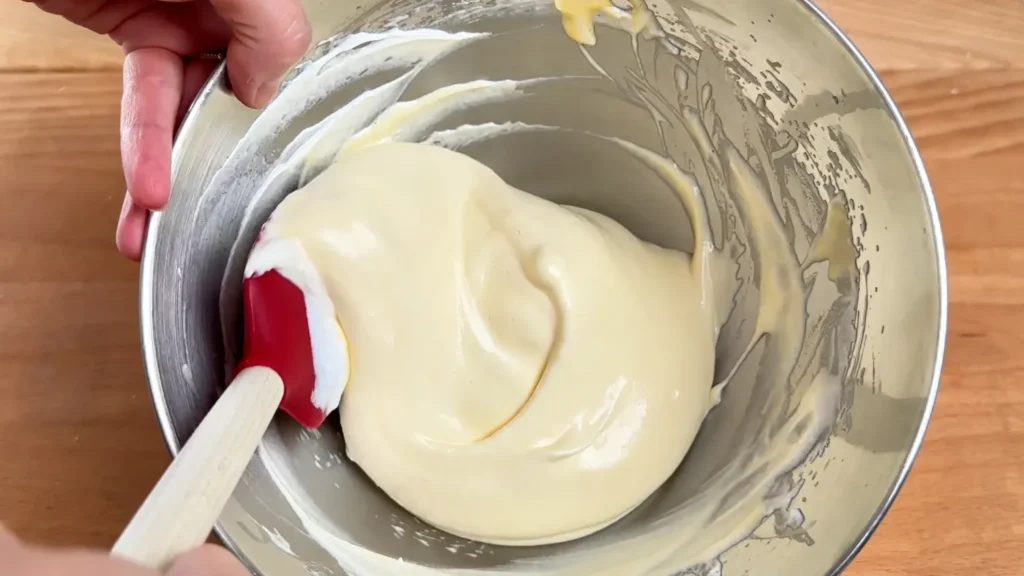
What Folding Actually Means
You don’t stir in circles, like you would a coffee. You fold, and the motion goes like this:
- Slide the spatula down the side of the bowl, vertically, until you touch the bottom.
- Drag it across the bottom to the opposite side.
- Come up the side of the bowl, scooping batter, and let it fall over the top as you turn the spatula over.
Every stroke should bring batter from the bottom to the top. Go slowly: slow, wide strokes deflate the batter much less than quick, short ones. And use a wide spatula, because the more batter you move with each pass, the fewer passes you need.
Adding the Flour in Batches
The flour doesn’t go in all at once. The technique is to sift a little over the top, cover it with batter and repeat:
- Hold the sieve right over the bowl and add a little flour to it.
- Fold just 1 or 2 strokes, only enough to cover that layer of flour with batter. Don’t try to blend it in completely.
- Sift a little more on top and cover it again. Keep going until it’s all in.
- At the end, give it a few more strokes, until you can’t see any dry flour. Check the bottom of the bowl with the spatula, because that’s where it hides.
It takes a couple of minutes.
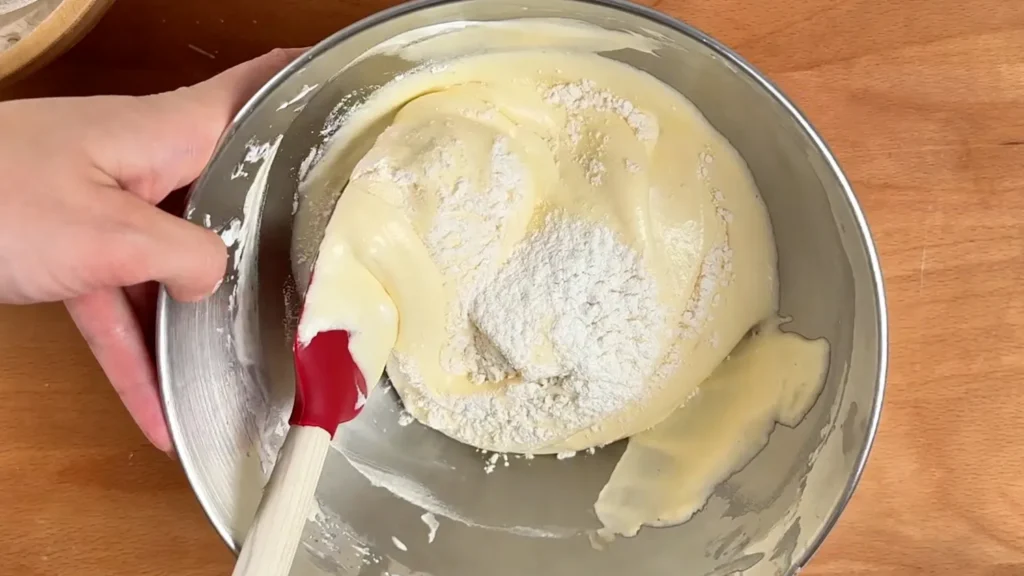
What the Batter Should Look Like
Voluminous and thick: it falls from the spatula slowly and in clumps, not in a stream. If it has turned runny and flattens out on its own in the bowl, it has deflated. Either the meringue wasn’t stiff enough or it was overmixed.
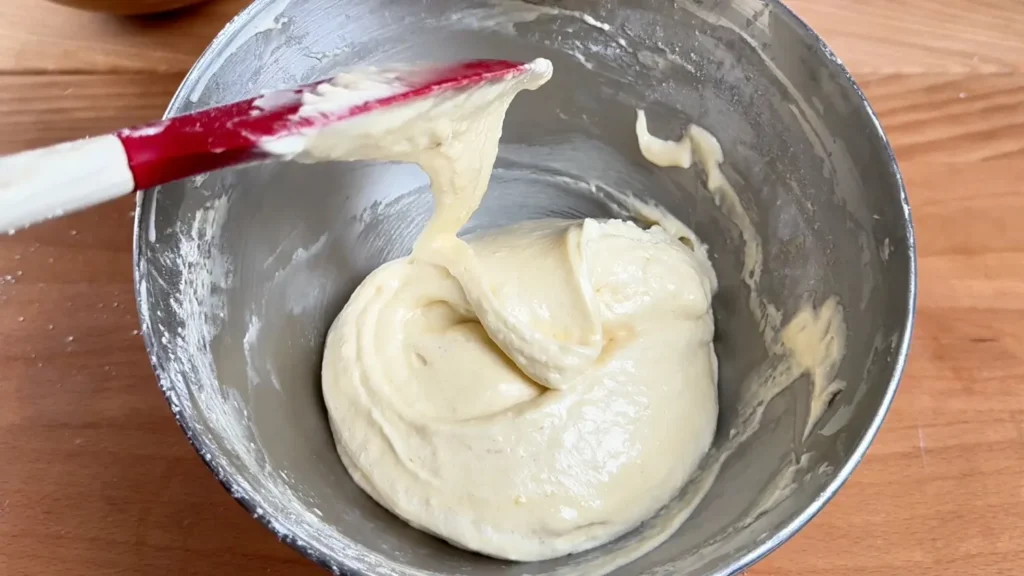
From here on, don’t leave it waiting. Go straight to piping.
Piping the Ladyfingers
You can use a piping bag with a plain round tip, 1.2 to 1.5 cm (½ in) wide, or a zip-top freezer bag. To fill it without making a mess, stand the bag in a tall glass with the top folded down over the rim.
Transfer the batter gently, without pressing it. Twist the top to close it and push the batter toward the tip to get the air out. If you’re using a zip-top bag, cut it now that it’s full: a straight cut across one corner, about 2 cm (¾ in) measured on the flat bag, gives you an opening of 1.2 to 1.5 cm.
To pipe them:
- hold the bag at about 45°, 1 cm (⅜ in) above the paper;
- squeeze with steady pressure and move along to make strips about 2 cm wide and 10 cm long (¾ x 4 in);
- leave 2 to 3 cm (1 in) between them, because they spread a little in the oven.
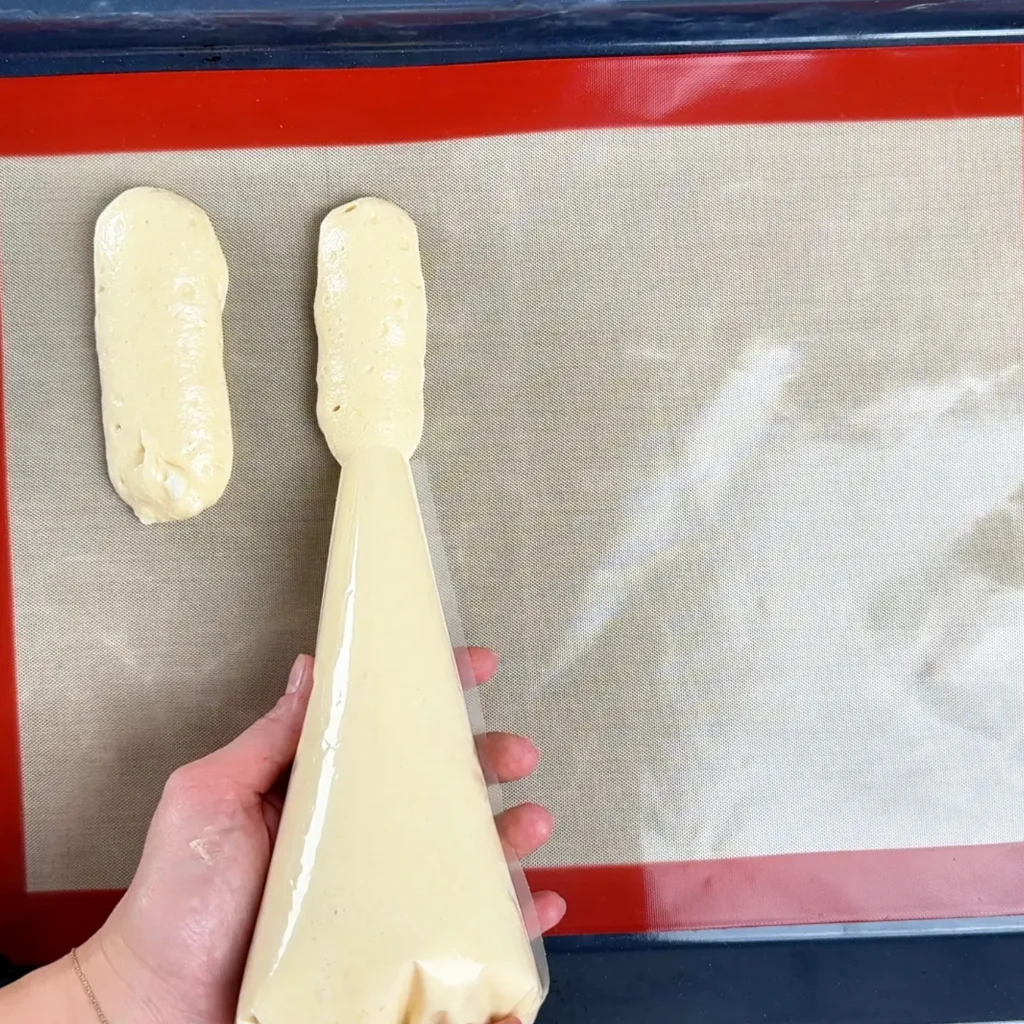
The faster, the better, because the batter keeps losing air. But if you find it tricky, don’t stress: at worst they’ll come out a little flatter.
With 10 cm strips you get about 20 ladyfingers. The ones in our photos are bigger and we got 12, so make them whatever size suits your tiramisu dish: only the baking time changes a little.
To make them all the same length, draw parallel pencil lines 10 cm (4 in) apart on the parchment paper and flip it over, so the pencil is underneath. And don’t grease the paper or the mat: oil makes the batter slide and the strips spread.
The powdered sugar is optional, and we use very little. A single 5 g (2 tsp) layer, sifted through a fine sieve from about 20 to 30 cm (8 to 12 in) high so it falls evenly, and straight into the oven.
You’ll see many recipes that use two layers of powdered sugar, with a few minutes’ wait in between. They usually contain baking powder, and with baking powder the batter keeps rising in the oven, so there’s time to wait. Ours doesn’t: all the air comes from the whipped egg whites, and it slowly escapes while the batter sits. That’s why speed matters here, and one light layer is enough to give the tops a little crunch. Without powdered sugar they come out just as well, with a smooth, matte top and exactly the same crumb. In a tiramisu you’ll hardly notice, since they’re dipped in coffee and covered in cream.
Baking and Drying Them for Tiramisu
Bake at 150 °C (300 °F), conventional setting with top and bottom heat and the fan off, with the tray on the middle rack or one lower, for 15 minutes. One tray at a time works best.
Turn the oven on when you start the recipe, not at the end. Even if it says it’s at temperature within a few minutes, what heats up that fast is the air. The walls and floor of the oven take longer, and until then the temperature goes up and down. Switching it on at the start gives you those 20 minutes of margin.
Don’t open the oven for the first 10 minutes. Until the structure has set, the change in temperature can make them collapse.
After 15 minutes they’re baked: pale golden, with no white patches, and the surface is dry and firm, without the shine of raw batter. If in doubt, give them a couple more minutes. For tiramisu, overbaking a little is better than underbaking.
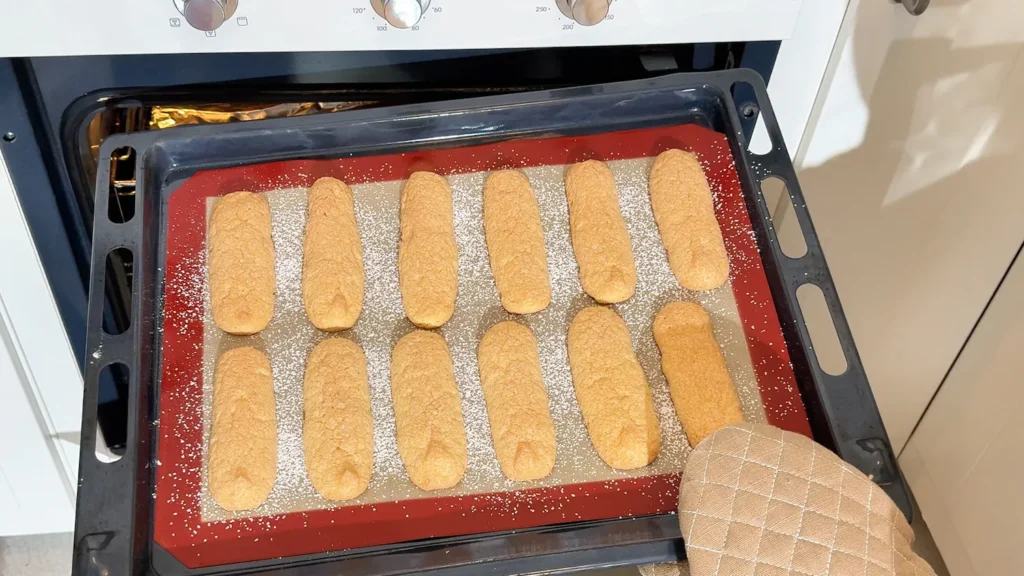
But for tiramisu you want them much drier, because fresh out of the oven they still hold moisture inside. The traditional way is to let them air-dry on a wire rack until the next day. If you want to use them the same day, or your home is humid, dry them in the oven instead: 15 more minutes at the same temperature.
To keep them from browning too much during those extra 15 minutes, you have two options:
- place a sheet of aluminum foil on the top rack of the oven, leaving a few centimeters free on each side so air can circulate;
- or, if your oven has it, switch to bottom heat only.
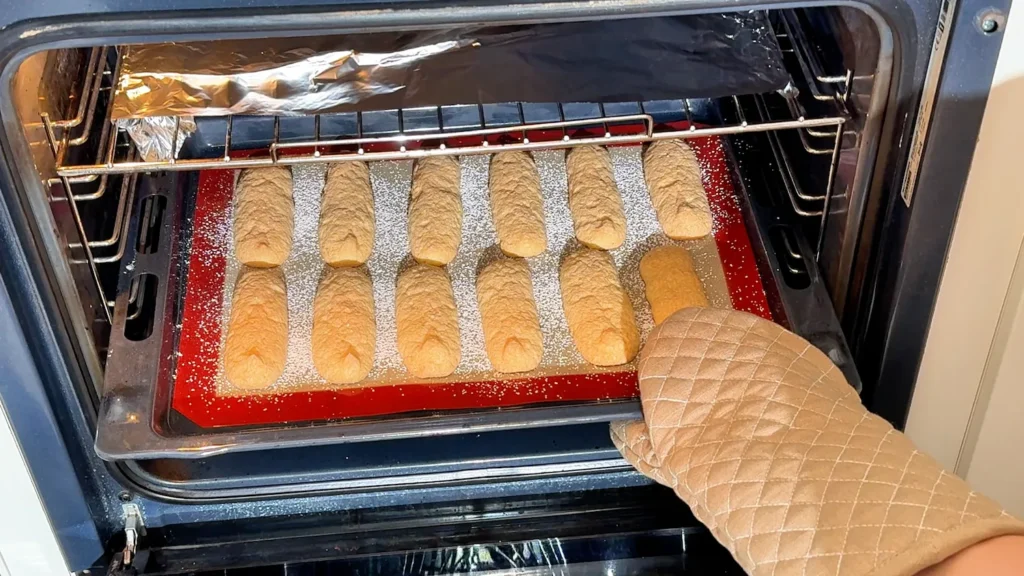
With these 30 minutes in total they come out ready to use, crisp and dry inside. The edges and tips end up a little crunchier than the middle, because they’re thinner. That’s normal.
If your oven keeps giving you trouble, it’s worth checking its real temperature with an oven thermometer. Many home ovens run 20 or 30 degrees hotter or cooler than the dial says.
How to Get Them Off the Paper
With a silicone baking mat: slide the mat off the hot tray onto the counter, so the heat of the tray doesn’t keep baking them from below. After 5 minutes, when they’re just warm, lift one end of the mat and slowly bend it downward. As the mat curves, it comes away from the bottom of each ladyfinger and they release on their own.
With parchment paper: let them cool completely on the tray, about 15 to 20 minutes. While warm, the bottoms are still soft and they stick. Then, instead of lifting each ladyfinger, which is how they break, do it the other way around: bring the paper to the edge of the table and pull it downward, a little at a time. The ladyfingers stay on top and it’s the paper that peels away from them.
If they still stick and a thin layer stays on the paper, lift the paper with the ladyfingers on it and run a damp brush or cloth underneath, without soaking it. Wait 1 or 2 minutes: the moisture loosens the paper and they come right off. If they stick a lot, they needed more time in the oven. Next time, give them 1 or 2 more minutes.
Once they’re off, move them to a wire rack until they’re completely cool. On a flat surface, the steam they still release gets trapped underneath and the bottoms soften. If you haven’t dried them in the oven and your home isn’t humid, the rack is also where they air-dry until the next day.
How to Store Homemade Ladyfingers
In an airtight container at room temperature, they keep for a couple of weeks. What ruins them isn’t time but humidity: sealed well they stay perfect, and sealed badly they go soft in two days.
- A zip-top freezer bag works just as well as a container and takes up less space. Press the air out before sealing.
- Separate them with parchment paper if you stack them.
- A small silica gel packet, the kind that comes in shoe boxes, helps a lot.
- Don’t store them in the kitchen right after using the oven: at that moment it’s the most humid room in the house.
They also freeze well, sealed, for up to 3 months. Thaw them at room temperature, then dry them for 10 minutes in the oven at 100 °C (210 °F).
Why Humidity Matters
Ladyfingers contain a lot of sugar, and sugar draws moisture from the air. That completely changes how you should dry and store them:
- In low humidity, below 60%, you can let them air-dry on a rack until the next day and they come out perfect.
- In high humidity, above 65 or 70%, on rainy days or near the coast, air-drying doesn’t work: instead of drying out, they soften. Dry them in the oven with the extra 15 minutes, or at 90 to 100 °C (195 to 210 °F) for 15 to 20 minutes if you’ve already taken them out.
If your home is humid, don’t wait for them to cool completely before storing them: as soon as they’re just warm, into the container. If they’re still a bit warm, leave it open for a few minutes before closing it, so no steam condenses inside.
If They’ve Gone Soft
You can fix them. Put them in the oven at 100 °C (210 °F) for 20 to 30 minutes and let them cool completely, because they harden as they cool, not while hot. If they’re still bendy once cool, repeat for another 10 to 15 minutes.
Cornstarch: For Ladyfingers Like Store-Bought
Our recipe uses three ingredients, but if you want a texture even closer to store-bought ladyfingers, swap 15 g of the flour for 15 g (2 tbsp) of cornstarch (cornflour in the UK): 75 g of flour and 15 g of cornstarch. Mix them well in the bowl before sifting them over the batter, so the cornstarch is evenly spread and you don’t have to overmix later.
Cornstarch is pure corn starch, without the proteins that form gluten. With less gluten, the ladyfingers come out more tender and lighter, with a drier, more crumbly texture. The trade-off is that they’re a bit more fragile when you peel them off the paper and dip them in coffee. That’s why 15 g is a good middle ground: more makes them too crumbly.
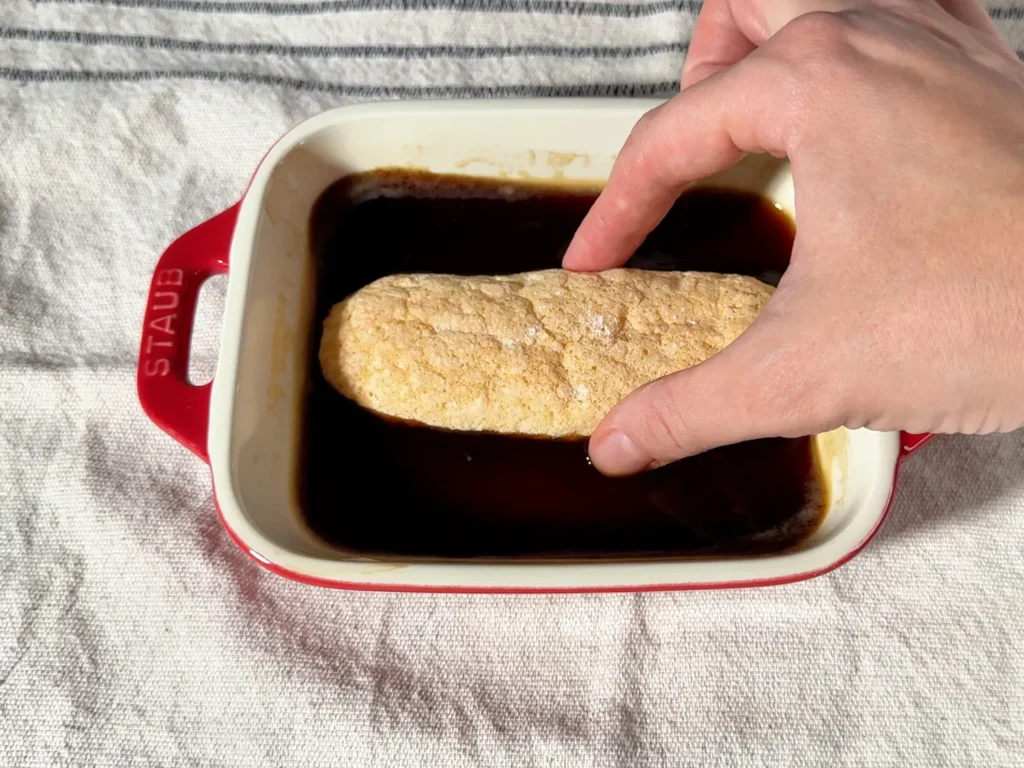
Potato starch works too, and it’s widely used for savoiardi in Italy. It gives a slightly more tender crumb and keeps them a little paler. Use the same amount.
If Your Eggs Are Bigger
The ratio in this recipe is roughly 1 part sugar, 1 part flour and 1.7 parts egg. With more egg you need more flour, or the batter turns runny and the strips spread on the paper. The best thing is to weigh your eggs without the shells and pick the matching row:
| Eggs | Weight without shells | Flour | Or with cornstarch | Sugar for the whites | Sugar for the yolks |
|---|---|---|---|---|---|
| 3 US large / EU medium | 150-160 g | 90 g | 75 g + 15 g | 60 g | 30 g |
| 3 US extra-large / EU large | 170-180 g | 100 g | 85 g + 15 g | 65 g | 30 g |
| 3 US jumbo / EU extra-large | 190-200 g | 115 g | 95 g + 20 g | 70 g | 35 g |
If you can, weigh everything. In this recipe a few grams of flour make a real difference, and cups can easily be off by that much.
Troubleshooting
| What happens | Why | What to do |
|---|---|---|
| They spread and come out flat | The meringue wasn’t stiff, the batter was overmixed or the eggs were too big for that amount of flour | Check the meringue with the tilted bowl test and adjust the flour to your egg size |
| They puff up and then wrinkle | They’re underbaked: the outside set before the inside, and the center gives way as they cool | Lower the temperature and bake longer. Break one open when it comes out: the center should look dry |
| They collapse in the oven | The oven is too hot and they rise before setting, or the meringue had large bubbles | 150 °C (300 °F), tray on the middle rack or lower. And beat the last 30 seconds on medium-low |
| They’re soft the next day | They didn’t dry inside, or they’ve picked up moisture from the air | Dry them in the oven at 100 °C (210 °F) for 20 to 30 minutes and store them airtight |
| They stick to the paper or the mat | The bottoms didn’t dry, or you peeled them off while warm | 1 or 2 more minutes in the oven, and wait until they’re cool to peel them off |
| They have little white lumps | The meringue was overbeaten or not fully folded in | Stop beating as soon as the meringue is smooth and glossy, before it loses its shine |
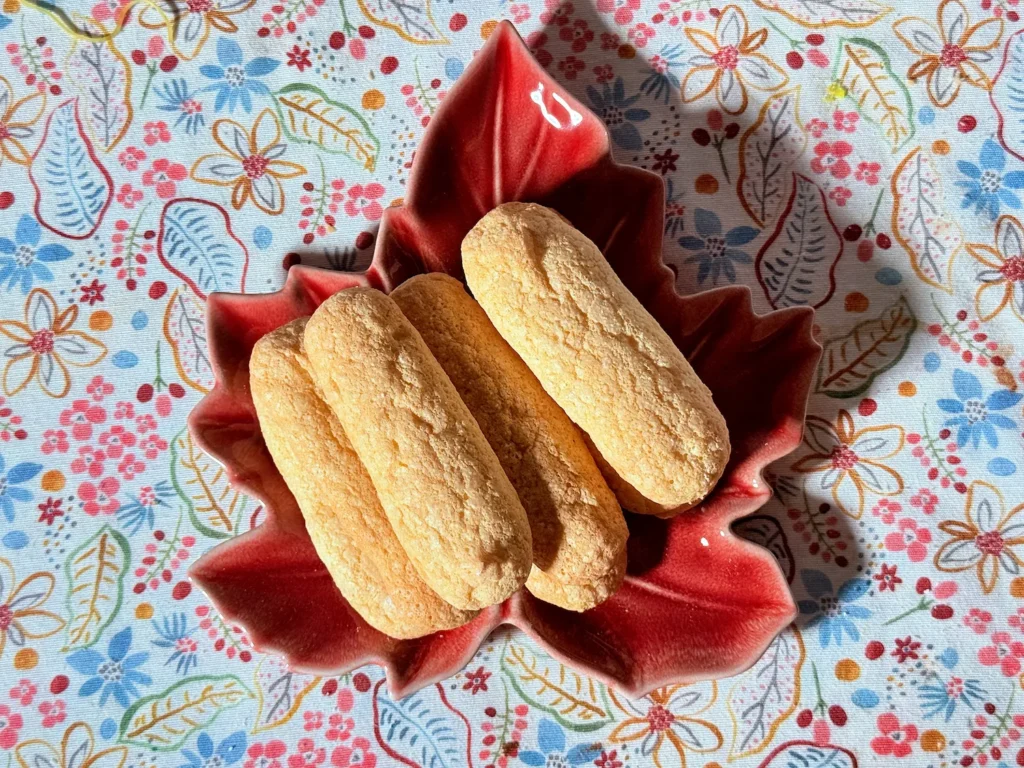
Ladyfingers, Savoiardi, Sponge Fingers: Names Around the World
If you’ve ever followed a recipe from another country, you’ve probably come across a few of these:
- United States and Canada: ladyfingers or lady fingers
- United Kingdom and Ireland: sponge fingers or boudoir biscuits
- Australia: savoiardi or sponge fingers
- Italy: savoiardi
- France: biscuits à la cuillère
- Germany: Löffelbiskuits
- Spain: soletillas or bizcochos de soletilla
- Mexico: soletas
- Argentina: vainillas
- Chile: galletas de champaña
- Uruguay and Venezuela: plantillas
- Colombia: lenguas
And in Catalonia there are close cousins called melindros, usually dipped in thick hot chocolate.
Homemade Ladyfingers FAQ
Are ladyfingers and savoiardi the same thing?
Yes, they’re the same sponge biscuit: savoiardi is the Italian name and ladyfingers the American one; in the UK they’re usually called sponge fingers. Store-bought ones tend to have a thicker sugar crust; we use a single light layer of powdered sugar, which already gives them a little crunch. If a tiramisu recipe calls for savoiardi, you can use these without changing anything.
Are ladyfingers cookies or cake?
They’re a sponge cake, even though they’re often called ladyfinger cookies. The batter is a whipped-egg sponge; drying them in the oven is what makes them crisp and dry like a cookie. That’s why they keep for weeks and soak up coffee without falling apart.
Do ladyfingers have raw egg in them?
No. They’re made with eggs, but the eggs are baked at 150 °C (300 °F) for 30 minutes between baking and drying, so in the finished ladyfinger the egg is fully cooked.
Do the eggs need to be at room temperature?
Both work, but room temperature is a little better: the whites whip faster and gain more volume, and the yolks reach the ribbon stage sooner. Cold eggs whip too, they just take longer and usually end up with slightly less volume, though with finer bubbles. With a sugared meringue like this one, the difference is small. For separating, the yolk is a little firmer when cold.
Can I use all-purpose flour?
Yes. It has a bit more protein than cake flour, so the ladyfingers come out slightly less tender but with more structure: they hold up better when you peel them off and dip them. Just be careful not to overmix, because gluten develops faster. If you want to get closer to cake flour, swap 20 g of the flour for cornstarch.
What does cornstarch do in ladyfingers?
It makes them more tender and crumbly, closer to store-bought ones. Cornstarch is pure starch with no gluten, so swapping 15 g of flour for 15 g of cornstarch gives the batter less structure. The trade-off is that they’re a little more fragile. We explain it in the cornstarch variation.
Do ladyfingers need baking powder?
No, the traditional recipe doesn’t use any. All the air comes from the meringue and the whipped yolks. Many recipes add baking powder because it gives you more margin: the batter keeps rising in the oven even if it deflated a bit while folding or piping. The trade-off is a more cake-like crumb, more open and uneven, and less dry and crisp, which is exactly what you don’t want for tiramisu. Without baking powder, you just need to work a little faster.
Can I make them without sugar?
We don’t recommend it. Here sugar isn’t only for sweetness: it’s what stabilizes the meringue and what lets the ladyfingers dry crisp in the oven. Without it, the whites deflate when you fold them and the ladyfingers come out flat and soft.
Are ladyfingers gluten-free?
Not these: they’re made with wheat flour, and most store-bought ladyfingers contain wheat too, unless the package says otherwise. We haven’t tested a gluten-free version yet, so we’d rather not give you amounts we haven’t tried ourselves.
Can I bake them without parchment paper or a silicone mat?
Yes, straight on the baking sheet. Grease it with a very thin layer of butter, about 5 g (1 tsp) for the whole sheet, dust it with 5 g (2 tsp) of flour and tap the sheet upside down to remove the excess. Lift them off with a thin spatula while they’re warm. It’s the traditional method and works much better than greasing parchment paper, which you should never do.
How long do homemade ladyfingers keep, and can I freeze them?
In an airtight container they keep for a couple of weeks at room temperature; what ruins them is humidity, not time. You can freeze them, sealed, for up to 3 months: thaw them at room temperature and dry them for 10 minutes in the oven at 100 °C (210 °F).
Made This Recipe or Have a Question?
Any questions before you start? Ask us down below and we’ll get back to you. And if you’ve already made it, tell us how it turned out or leave us a rating: it really helps more people find the recipe 😊
Rate this recipe ⭐️