
Sourdough Milk Bread (Shokupan), Soft as a Cloud
This sourdough milk bread is our take on shokupan, the Japanese milk bread: tall, with a thin golden crust and a crumb so soft it almost melts. It’s the loaf we make for breakfast toast and weekday sandwiches, and the one that disappears fastest in our house.
It has two secrets. The first is tangzhong, a cooked paste of milk and flour that holds on to moisture and keeps the crumb tender for days. The second is that it rises with sourdough starter only, no commercial yeast, and that makes it easy to fit into your day: mix the dough in the afternoon, let the pan rest in the fridge overnight and bake it the next morning. Or do it all in one day.
You may know it as Hokkaido milk bread or Japanese milk bread, which belong to the same family. It’s softer and a touch sweeter than a regular sandwich loaf, and it’s the bread behind Japanese egg sandwiches, the tamago sando.
Everything is in grams, with cups alongside, and above all with the signs that tell you when each step is ready. With sourdough, you follow the dough, not the clock.
The only thing to plan ahead is 120 g (½ cup) of active sourdough starter at its peak. If you’re not sure how to get it there, we explain it right below the recipe.
How We Make It at Home, Step by Step
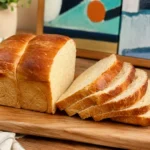
Sourdough Milk Bread (Shokupan)
Equipment
- Small saucepan For the tangzhong
- Stand mixer or large bowl By hand works too
- Kitchen scale The recipe is built on grams
- Loaf pan, about 10 x 25 cm (4 x 10 in) An 8½ x 4½ in or 9 x 5 in pan also works, or a baking dish of similar size
- Rolling Pin For rolling out the strips
- Instant-read thermometer Highly recommended
- Aluminum foil For the foil tent
- Plastic wrap To cover the tangzhong
- Wire rack For cooling
Ingredients
For the tangzhong
- 125 g milk (½ cup)
- 25 g bread flour (3 tbsp)
For the dough
- 165 g milk (⅔ cup), at room temperature
- 1 egg medium in Europe, large in the US
- 60 g sugar (¼ cup + 1 tbsp)
- 435 g bread flour (3⅔ cups), spooned and leveled; a scale is much more accurate
- 120 g sourdough starter (½ cup), active and at its peak, 100% hydration
- 10 g fine salt (1¾ tsp), fine sea salt or table salt
- 60 g unsalted butter (4 tbsp), very soft but not melted
For greasing and brushing
- butter or neutral oil for the bowl and the pan
- melted butter optional, for brushing the baked loaf
Instructions
The tangzhong
- Make the tangzhong. In a small saucepan, whisk the 125 g of milk and 25 g of flour together while cold, until there are no lumps. Cook over low heat, stirring constantly: in 2 or 3 minutes it turns into a thick paste.
- Cover it and let it cool. Transfer it to a bowl and cover with plastic wrap so it doesn't dry out. It must be lukewarm or at room temperature when you use it, because heat can harm the starter. If you're in a hurry, a few minutes in the fridge helps, without letting it get cold.
The dough
- Mix the liquids. In the bowl of a stand mixer or a large bowl, stir the 165 g of milk, the egg and the 60 g of sugar for a few seconds. Add the tangzhong and mix until smooth.
- Add the flour. All 435 g, mixing only until no dry flour remains, with a large whisk or your hands. The dough will look rough and sticky: that's normal.
- Rest for 20 minutes. With the bowl covered. The flour hydrates and the dough becomes much easier to work.
- Add the starter. All 120 g, active and at its peak, and knead for a few minutes. With a stand mixer, 3 or 4 minutes on low speed.
- Add the salt. The 10 g, then knead for 2 more minutes, until the dough looks even.
- Work in the butter in three parts. Very soft but not melted. Don't add the next part until the previous one has disappeared. At first the dough looks like it's falling apart: keep kneading until it's smooth again. By hand, stretch the dough up and fold it over itself; with a mixer, on low speed. If the butter won't go in, rest the dough for 10 minutes, and if it gets warm and sticky, chill it briefly.
Rising and shaping
- Let it ferment in bulk. Move the dough to a lightly greased bowl and cover it. After an hour, do one set of folds on all four sides. In total, 3 to 6 hours depending on the temperature, until it has grown by about 60%, looks airy and jiggles when you shake the bowl.
- Divide and pre-shape. On a lightly floured counter, into 3 equal pieces of about 350 g (12 oz). Shape each into a ball by pushing the dough away and pulling it back toward you, cover and rest for 15 minutes.
- Shape the rolls. Flatten each ball into a rectangle, fold the long sides into the middle, roll it out into a long strip and roll it up tightly, with no air inside. Place the rolls in the greased pan, seam side down.
- Let it rise in the pan. Covered: 3 to 6 hours at room temperature, or in the fridge overnight and then at room temperature until ready. It's ready when a gentle press with a wet or oiled finger springs back slowly and leaves a small dent.
Baking
- Bake covered for 25 minutes. In an oven preheated to 190 °C (375 °F), conventional setting (no fan), under a loose foil tent that doesn't touch the dough.
- Uncover and finish baking. Lower the oven to 175 °C (350 °F) and bake for 30 more minutes, until the center reads 93 to 96 °C (199 to 205 °F). Without a thermometer, until deep golden and firm.
- Unmold and cool. Within the first few minutes, so it doesn't turn damp. Brush with melted butter if you like. Cool on a wire rack for at least 2 hours before slicing.
Notes
- The tangzhong must be lukewarm or at room temperature when you add it. Hot tangzhong can harm the starter.
- Use an active starter at its peak. This dough has sugar, egg and butter, which slow the starter down, so a tired starter makes the rise very long. We explain how to get it ready right below the recipe.
- Rising times depend on your kitchen’s temperature. Follow the signs: in bulk, about 60% growth and a gentle jiggle; in the pan, the poke test.
- To bake it the next day, put the covered pan in the fridge right after shaping.
- The total time is for the same-day version, with average rising times. It doesn’t include feeding the starter or the 2 hours of cooling.
- No loaf pan? A baking dish of similar size works: divide the dough into more pieces and trust the thermometer.
- Want to use commercial yeast instead of sourdough? We explain how to adjust the recipe in the variations below.
- Don’t have a sourdough starter yet? Here’s how to make one from scratch.
Any questions about the recipe? Ask us in the comments and we’ll get back to you. And if you make it, tell us how it turned out, we love hearing from you! 🤗
Getting Your Sourdough Starter Ready
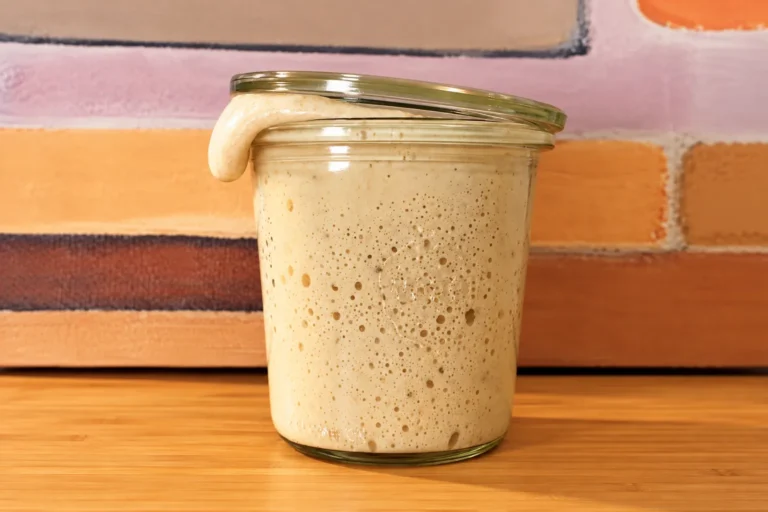
For this bread you need 120 g (½ cup) of active sourdough starter at its peak, at 100% hydration, which means it’s fed with equal weights of flour and water. At its peak means at the highest point of its rise after a feeding: it has doubled, it’s bubbly all the way through, the top is domed and it smells mildly tangy, like yogurt.
Timing matters more here than in a lean loaf. This dough has sugar, egg and butter, and all three slow the starter down. If you use it tired or straight from the fridge, the rise can take a very long time.
Don’t have a starter yet? Here’s how to make sourdough starter from scratch. It takes one to two weeks of daily feedings.
How to Get 120 g of Starter at Its Peak
If you keep your starter in the fridge, feed it a few hours before you start:
| Ingredient | Amount |
|---|---|
| Starter from the fridge | 30 g (2 tbsp) |
| Flour | 75 g (½ cup + 2 tbsp) |
| Room temperature water | 75 g (⅓ cup) |
Any wheat flour works, so use the one you usually feed it with. Mix, cover loosely and leave it at room temperature. How long it takes depends on your kitchen:
- Warm kitchen, 24 to 26 °C (75 to 79 °F): 4 to 5 hours
- Mild kitchen, 20 to 22 °C (68 to 72 °F): 6 to 8 hours
- Cool kitchen, below 19 °C (66 °F): 10 to 12 hours
You’ll have 180 g. Use 120 g for the bread and keep the remaining 60 g in the fridge for next time.
Want it ready when you wake up? Feed it before bed with 15 g of starter, 80 g of flour and 80 g of water. It takes longer and gives you a wider window in the morning. We explain how feeding ratios work in our sourdough starter guide.
If it smells like nail polish remover, it’s hungry: give it another feeding before you use it. And if it has been weeks since you last fed it, one feeding won’t be enough. Give it two or three, 12 to 24 hours apart, until it rises reliably. We cover these and other starter problems in our sourdough starter troubleshooting guide.
What Tangzhong Is and Why It Makes the Crumb So Soft
Tangzhong is a technique used in many Asian milk breads. You cook a small part of the flour with milk until it thickens, then add that paste to the dough.
It sounds like a small detail, but it changes the whole crumb. When flour is cooked, its starch gelatinizes and can hold far more water than raw flour. That water stays inside the bread through baking and afterwards, which is why the crumb comes out so tender and stays that way for days.
We use the classic ratio: 1 part flour to 5 parts liquid. That’s 25 g of flour and 125 g of milk, a little over 5% of all the flour in the bread.
How to Tell It’s Ready
Over low heat, stirring constantly, it goes from liquid milk to a thick paste in 2 or 3 minutes, a bit like a loose béchamel. When you drag the spoon across the bottom of the pan, it leaves a trail that closes slowly. With a thermometer, it’s ready at about 65 °C (149 °F). It doesn’t need to boil.
Two Common Mistakes
Lumps. Whisk the flour into the milk while both are cold, before you turn on the heat. Flour added to hot milk clumps instantly.
Adding it hot. It should be lukewarm or at room temperature, because heat can harm the starter. You can make it ahead and keep it in the fridge, covered with plastic wrap, but take it out in time to come back to room temperature.
What Milk, Butter and Egg Do in Sourdough Bread
A basic sourdough loaf is just flour, water, salt and starter. This one swaps all the water for milk and adds butter, egg and sugar. Each of them changes the bread in a specific way:
Milk makes the crumb softer and a little sweeter, and the crust browns faster and deeper. That’s why we cover the pan with foil for the first part of the bake.
Butter coats the gluten strands and keeps them short, and that’s where the tender, almost cake-like bite comes from. It’s also why it goes in only once the dough has built some strength.
Egg adds richness and color, and gives the crumb a finer, more even texture.
Sugar adds a gentle sweetness and helps the bread stay moist.
The trade-off is time. All of these slow the starter down, so this dough ferments more slowly than a lean loaf. In our kitchen, a basic sourdough loaf finishes its bulk fermentation in 2 to 3 hours. This one takes 3 to 6.
That’s why the hours are only a guide. The dough is ready when it has grown by about 60% and looks airy. In a glass bowl you’ll see small bubbles on the sides. And the most reliable sign: when you shake the bowl gently, the dough jiggles, like set custard.
Keys to a Soft, Tall Loaf
Very Soft Butter, Added in Three Parts
The butter goes in once the dough has come together, not at the start, because fat coats the flour and gets in the way of gluten forming. First the dough builds structure, then we enrich it. It’s the same trick behind our fluffy homemade cinnamon rolls.
It has to be very soft but not melted. Melted butter separates and won’t work its way into the dough. Take it out of the fridge a couple of hours before you start.
Each time you add a portion, the dough will look like it’s falling apart and turn slippery. That’s normal. Keep kneading until it’s smooth and even again, with no visible bits of butter, and only then add the next portion. By hand, it helps to stretch the dough up without tearing it and fold it back over itself, turning the bowl as you go.
If the butter won’t go in, let the dough rest for 10 minutes. If the dough gets warm and very sticky, chill it for a little while before you carry on.
Roll Each Piece Up Tightly
Shaping the dough into three rolls is what gives shokupan its three domes and its fine, even crumb. Roll each piece out into a long strip and roll it up tightly, with no air trapped inside. Loose rolls leave big holes in the crumb.
Weigh the pieces so they’re equal, about 350 g (12 oz) each. That way they rise at the same pace and the loaf comes out even.
The Poke Test
It’s the most reliable way to tell when the second rise is done. Press the dough gently with a wet or oiled finger:
- If the dent springs back slowly and leaves a small mark, it’s ready.
- If it springs back quickly and leaves no trace, it needs more time.
- If it stays sunken and doesn’t spring back at all, it’s close to overproofed: get it in the oven right away.
The Foil Tent
We cover the pan for the first 25 minutes with a loose foil tent that doesn’t touch the dough. This dough has sugar, milk and egg, so it browns very quickly. Covered, the loaf finishes rising and bakes through before the crust takes on color. Then we uncover it, lower the temperature and let it brown.
The tent doesn’t need to be neat or airtight. It shapes the color, not the loaf: with it, the top bakes into rounded domes.
Use a Thermometer
A loaf with butter, sugar and egg can look perfectly golden outside and still be raw in the middle. An instant-read thermometer settles it: the bread is done when the center reads 93 to 96 °C (199 to 205 °F).
Without one, look for a deep golden color and a loaf that feels firm when you tap it. If in doubt, give it a few more minutes. Slightly overbaked beats raw in the middle.
Unmold Right Away, Then Wait Two Hours
Take the loaf out of the pan within the first few minutes out of the oven. Steam builds up inside a hot pan, and the bottom and sides turn damp.
Then let it cool on a wire rack for at least 2 hours before slicing. The crumb is still setting, and if you cut it earlier it squashes under the knife. We know it’s hard to wait.
Same-Day or Overnight: How We Schedule It
Both work, and the bread comes out just as soft. The overnight version is the one we make most, because it splits the work into two relaxed moments. These timings are for a mild kitchen, about 20 to 22 °C (68 to 72 °F). In a warmer kitchen everything moves faster, and in a cooler one, slower.
Overnight: mix in the afternoon, bake in the morning
| When | What you do |
|---|---|
| Day 1, 9 am | Feed your starter (30 g + 75 g + 75 g) |
| Day 1, 3 pm | Make the tangzhong and let it cool |
| Day 1, 3:30 pm | Mix the dough, rest 20 minutes, then add the starter, salt and butter |
| Day 1, 4:30 pm | Bulk fermentation starts. At 5:30 pm, one set of folds |
| Day 1, 8:30 to 9:30 pm | When the dough jiggles: divide, shape and place in the pan |
| Day 1, night | Pan well covered, into the fridge |
| Day 2, morning | Take the pan out and wait for it to pass the poke test. In our kitchen it takes about 2 hours |
| Day 2 | Bake for 55 minutes, unmold and cool for 2 hours |
Same day: bake it in the evening
| When | What you do |
|---|---|
| The night before | Feed your starter with the slower overnight feed (15 g + 80 g + 80 g) |
| 8 am | Make the tangzhong and let it cool |
| 8:30 am | Mix the dough, rest 20 minutes, then add the starter, salt and butter |
| 9:30 am | Bulk fermentation starts. At 10:30 am, one set of folds |
| 1:30 to 2:30 pm | When the dough jiggles: divide, shape and place in the pan |
| 2:30 pm onwards | Second rise at room temperature, 3 to 6 hours, until it passes the poke test |
| Evening | Bake for 55 minutes, unmold and cool for 2 hours. Perfect for tomorrow’s breakfast |
For the overnight version, the pan goes into the fridge right after shaping. The cold puts the second rise on pause.
The Pan: Loaf Pan, Pullman Pan or Baking Dish
We use a loaf pan of about 10 x 25 cm (4 x 10 in), without a lid. This recipe makes just over 1 kg (2.3 lb) of dough, which fills it well.
In the US, an 8½ x 4½ in (22 x 11 cm) loaf pan has almost the same base as ours, so the loaf will rise just as tall. A 9 x 5 in (23 x 13 cm) pan works too. It’s a bit wider, so the loaf will come out slightly lower.
A Pullman pan is a loaf pan with a sliding lid. Baked with the lid on, the bread comes out perfectly square, like the shokupan in a Japanese bakery. We bake ours without a lid, under the foil tent, so the top rises into rounded domes. If you have a Pullman pan, you can use it without the lid, as we do.
Whatever pan you use, grease it well with butter or oil in every corner, or line it with parchment paper. This dough sticks.
No Loaf Pan? Use a Baking Dish
You don’t need to buy anything. We’ve baked this bread in an ordinary baking dish and it came out just as good, only a different shape. Three things make it work:
Pick a dish close in size to a loaf pan. In a much larger one, the dough spreads out and the loaf comes out low and wide. In a smaller one, it will overflow.
Divide the dough into more pieces. Instead of three rolls, make more, smaller pieces and arrange them so they fill the dish evenly and rise together.
Trust the thermometer more than the timer. Glass and ceramic dishes heat up more slowly than a metal pan, and the shape changes the baking time. It’s done when the center reads 93 to 96 °C (199 to 205 °F).
The foil tent for the first 25 minutes works the same way.
Variations: With Commercial Yeast or Without Eggs
With Commercial Yeast Instead of Sourdough
You can, but it’s not just a matter of leaving the starter out. Those 120 g of starter are really 60 g of flour and 60 g of water. Take them out without replacing them and the dough ends up drier and the loaf smaller. These are the changes:
| Change | Amount |
|---|---|
| Leave out the starter | 120 g (½ cup) |
| Add more bread flour, with the rest of the flour | 60 g (½ cup), 495 g in the dough in total |
| Add more milk, with the other liquids | 60 g (¼ cup), 225 g in the dough in total |
| Add instant yeast | 5 g (1½ tsp), or 15 g of fresh yeast |
The tangzhong stays the same. Add the yeast where you would add the starter, after the 20-minute rest. If you only have active dry yeast, use the same amount and dissolve it in the milk in the first step of the dough instead.
Everything else stays the same except the timing, which is much faster with yeast. Bulk fermentation usually takes 1 to 2 hours and the second rise about an hour. Follow the same signs: the jiggle and the poke test.
The bread turns out good, but with a flatter flavor. Besides the flexible schedule, what the starter brings is a deeper, more complex flavor, without tasting sour.
Without Eggs
Replace the egg with 50 g (3½ tbsp) of milk. The bread still works, with a slightly less tender crumb and a paler color.
If you’d rather bake a crusty country loaf with your starter, our easy sourdough bread is the place to start.
How to Store Sourdough Milk Bread
Thanks to the tangzhong, this bread stays soft for 3 or 4 days at room temperature. Store it once it’s completely cool, in a sealed bag or an airtight container. There’s no crackly crust to protect here: what matters is keeping the crumb from drying out.
Keep it out of the fridge. At fridge temperatures, the starch in bread firms up much faster than on the counter, so it goes stale sooner.
For longer, freeze it. Slice it the same day, freeze the slices in a bag and toast them straight from frozen, or let them thaw for about 10 minutes at room temperature.
Sourdough Milk Bread FAQ
Is shokupan the same as Hokkaido milk bread?
Almost. Shokupan is simply the Japanese word for a sandwich loaf, while Hokkaido milk bread is a softer, milkier style that’s usually made with tangzhong. In practice, many people use both names for the same bread. Ours sits right in between: the shape of a shokupan with the soft crumb of a milk bread.
Can you use milk instead of water in sourdough bread?
Yes, and it’s exactly what this recipe does: all the liquid in the dough is milk. Milk makes the crumb softer and slightly sweeter, and the crust browns faster, so keep an eye on the color. It also slows fermentation a little, so expect a longer rise than with a water-based loaf.
Does sourdough milk bread taste sour?
No. It has a gentle depth of flavor from the starter, but the milk, sugar and butter balance it, so it tastes soft and mildly sweet rather than tangy. If yours comes out sour, the starter was probably past its peak or the dough rose for too long.
Can I make this with sourdough discard?
No, this bread needs an active starter at its peak. Discard doesn’t have the strength to raise a dough this rich in butter and sugar, and the loaf wouldn’t rise. Use discard in recipes where baking powder or yeast does the lifting. We explain what sourdough discard is in our starter guide.
Can I use commercial yeast instead of sourdough starter?
Yes, but you need to adjust the recipe: leave out the 120 g of starter and add 60 g of flour, 60 g of milk and 5 g (1½ tsp) of instant yeast. With yeast it rises much faster and the flavor is flatter. We explain it step by step in the yeast variation.
Can I make it without eggs?
Yes. Replace the egg with 50 g (3½ tbsp) of milk. The crumb comes out slightly less tender and the loaf a little paler, but it works well.
Why did my loaf sink or cave in on the sides?
Almost always it’s one of two things: it overproofed, or it was underbaked. If the dough rises too much before baking, the structure can’t hold and it collapses. If the center doesn’t reach 93 °C (199 °F), the sides cave in as it cools. Watch the poke test, trust the thermometer and unmold it right away.
Why isn’t my dough rising?
Most often, the starter wasn’t at its peak or the kitchen is cool. This dough has sugar, egg and butter, so it rises more slowly than a basic sourdough loaf, and in a cool kitchen the 3 to 6 hours can stretch quite a bit. Give it time and follow the signs, not the clock.
Can I make it without a stand mixer?
Yes, by hand it turns out just as good; it just takes more effort, especially when working in the butter. What works best is stretching the dough up without tearing it and folding it back over itself, turning the bowl, until the butter disappears. We show it in the video.
How do I know it’s done without a thermometer?
Look for a deep golden color and a loaf that feels firm when you tap it. If in doubt, leave it in for a few more minutes: slightly overbaked beats raw in the middle. That said, an instant-read thermometer is inexpensive and takes all the guesswork out.
Can I make it in one day?
Yes. Feed your starter the night before, mix the dough in the morning and bake it in the evening. For the overnight version, the pan goes into the fridge right after shaping and you bake it the next morning. Both schedules are laid out in how we schedule it.
What flour should I use?
Bread flour, with 12 to 14 g of protein per 100 g. On US labels, that’s about 4 g of protein per 30 g serving. In the UK it’s sold as strong white bread flour. All-purpose flour works in a pinch, but the dough is weaker, so the loaf rises less.
Can I make it without a loaf pan?
Yes, in a baking dish of similar size. Divide the dough into more pieces so they fill the dish evenly, and go by the internal temperature rather than the timer. We explain it in how to use a baking dish.
How long does it keep, and can I freeze it?
It stays soft for 3 or 4 days at room temperature in a sealed bag. Keep it out of the fridge, where bread goes stale faster. It freezes very well: slice it the same day and toast the slices straight from frozen.
Made This Recipe or Have a Question?
Any questions before you start? Ask us down below and we’ll get back to you. And if you’ve already made it, tell us how it turned out or leave us a rating: it really helps more people find the recipe 😊
Rate this recipe ⭐️